


Updated at: 2022-12-09 03:49:50
► Configure Container Image
1. Click Add Container Image to add the needed container image, as follows:
• Select the existing image to make container deployment
Pull the image from public or private image repository. if without image repository address, the image will be pulled from Docker Hub by default. Enter the name of the container and the corresponding image name, which generally requires a specified label, such as, nginx: 1.16.
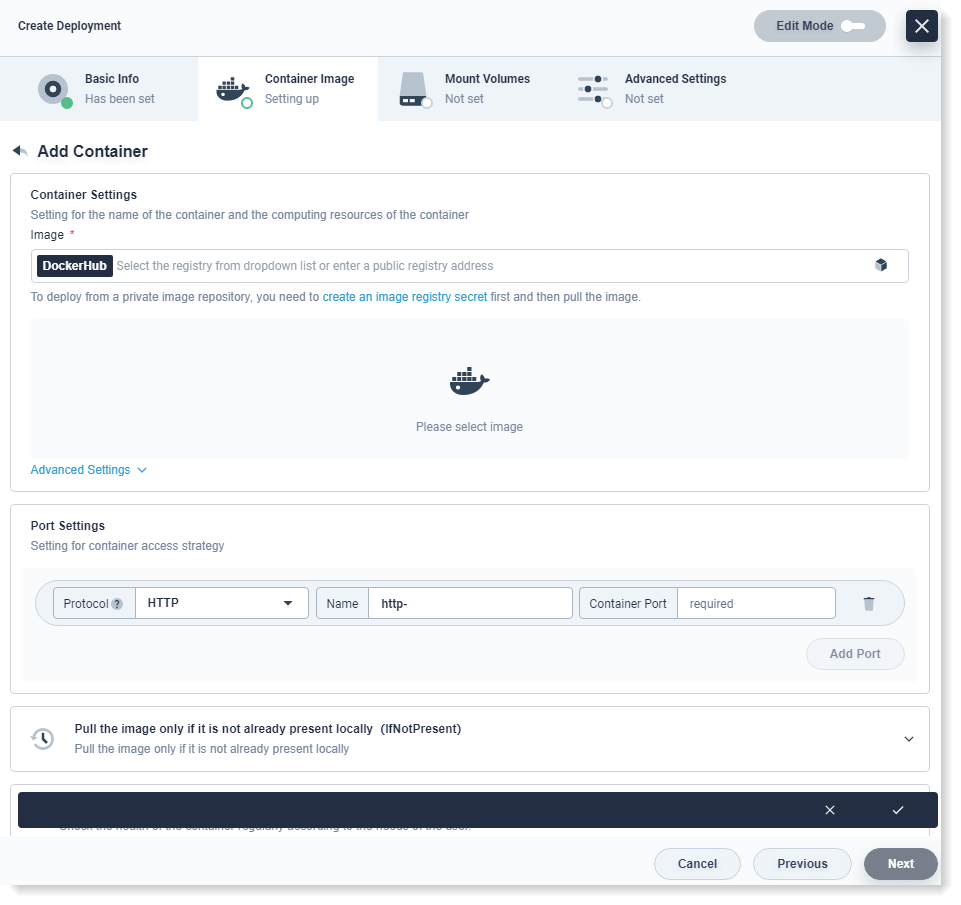
For efficient scheduling and allocation of cluster resources and better resource utilization, the platform has two restriction types (request and limit) to allocate resources.
The request is usually the minimum resource requirement for the container, while the limit is usually the maximum amount of resources available for the container, with the setting of 0 meaning no limit to the available resources. The request ensures that the Pod has enough resources in running, while the limit prevents one Pod from using unrestricted resources to cause other Pods crashing.
Table 1: CPU Quota
Table 2: Memory Quota 2. For other needs, you can scroll down to the Port Settings and other settings, as follows:
 3. Click Save after the setting.
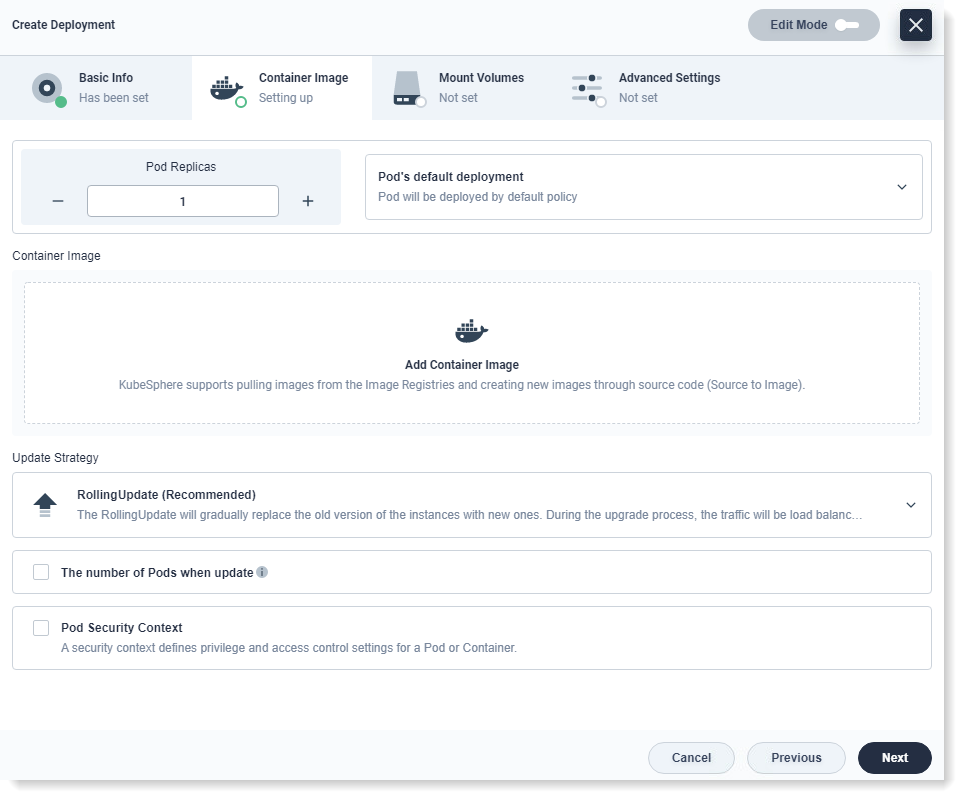
► Update Policy
Update Policy includes RollingUpdate and Recreate, as follows:
• Rolling-update: It is recommended to use Rolling-update to update Deployment. Rolling-update will gradually replace the old version Pods with the new version Pods. During the upgrade process, the service traffic will be load-balanced to the old and new Pods at the same time, free of service interruption. You can specify the minimum available number of Pods and the maximum number of Pods for update to control the process of rolling-update.
• The minimum available number of Pods: Optional configuration item for the minimum number of survival Pods required for each rolling-upgrade, recommended to be configured as a positive integer with a minimum of 1. The value may be an absolute value (e.g. 5).
• The maximum available number of Pods: Optional configuration item for the allowed maximum number of Pods beyond the number of copies in Deployment during the upgrade.
► Recreate: It will kill all existing Pods before creating a new one, which means that the Recreate will first delete the old Pods and then create new Pods, causing service interruption.
After the above configuration, click Next.
1. Click Add Container Image to add the needed container image, as follows:
• Select the existing image to make container deployment
Pull the image from public or private image repository. if without image repository address, the image will be pulled from Docker Hub by default. Enter the name of the container and the corresponding image name, which generally requires a specified label, such as, nginx: 1.16.
For efficient scheduling and allocation of cluster resources and better resource utilization, the platform has two restriction types (request and limit) to allocate resources.
The request is usually the minimum resource requirement for the container, while the limit is usually the maximum amount of resources available for the container, with the setting of 0 meaning no limit to the available resources. The request ensures that the Pod has enough resources in running, while the limit prevents one Pod from using unrestricted resources to cause other Pods crashing.
Table 1: CPU Quota
Table 2: Memory Quota 2. For other needs, you can scroll down to the Port Settings and other settings, as follows:
3. Click Save after the setting.► Update Policy
Update Policy includes RollingUpdate and Recreate, as follows:
• Rolling-update: It is recommended to use Rolling-update to update Deployment. Rolling-update will gradually replace the old version Pods with the new version Pods. During the upgrade process, the service traffic will be load-balanced to the old and new Pods at the same time, free of service interruption. You can specify the minimum available number of Pods and the maximum number of Pods for update to control the process of rolling-update.
• The minimum available number of Pods: Optional configuration item for the minimum number of survival Pods required for each rolling-upgrade, recommended to be configured as a positive integer with a minimum of 1. The value may be an absolute value (e.g. 5).
• The maximum available number of Pods: Optional configuration item for the allowed maximum number of Pods beyond the number of copies in Deployment during the upgrade.
► Recreate: It will kill all existing Pods before creating a new one, which means that the Recreate will first delete the old Pods and then create new Pods, causing service interruption.
After the above configuration, click Next.
< Previous:
Next: >