


Updated at: 2022-12-09 03:49:50
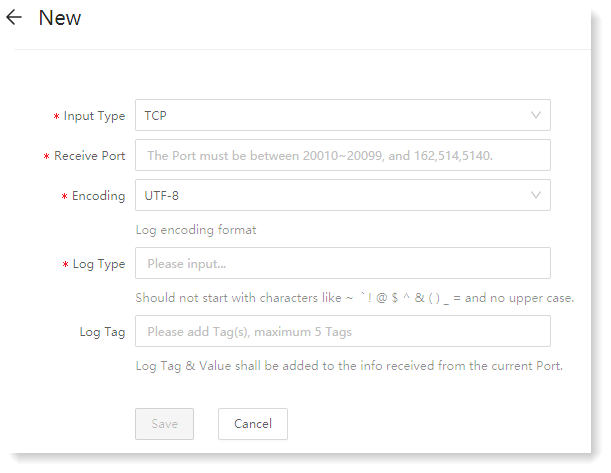
1. Click Data Source > Input Data > New, to make New Data Input, as follows:
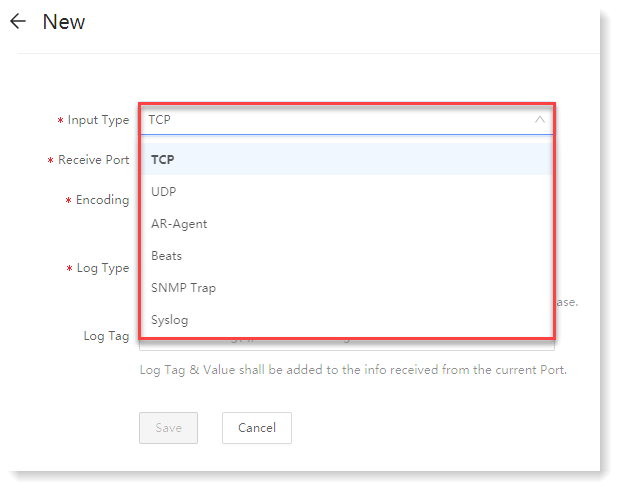
2. In the New Data Input configuration, click the Input Type drop-down box to select the input type: TCP, UDP, AnyRobot Agent, Beats, as follows:
 3. After completing the parameter configuration, click Save to complete the configuration of TCP/UDP and agent data input.
2. In the New Data Input configuration, click the Input Type drop-down box to select the input type: TCP, UDP, AnyRobot Agent, Beats, as follows:
3. After completing the parameter configuration, click Save to complete the configuration of TCP/UDP and agent data input.
< Previous:
Next: >