Updated at: 2022-12-09 03:49:50
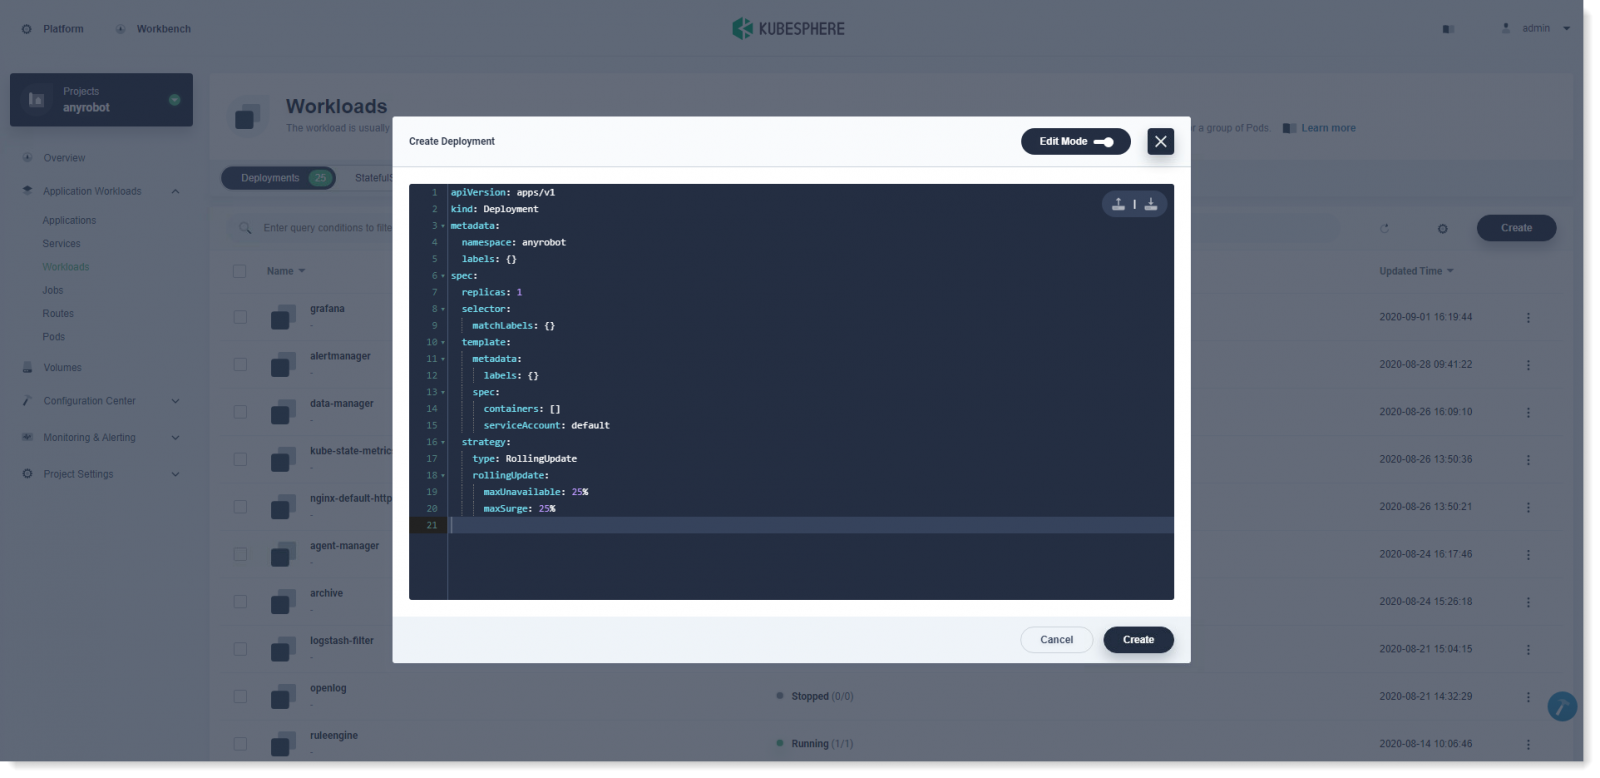
1. Click Create to Create Deployment. There are 2 ways to Create Deployment: Creation on page, or creation by yaml file import:
 The following mainly introduces the way of Edit Mode. Click Edit Mode in the upper right corner to edit the code, supporting yaml and json formats.
In the upper right corner, you can see the import/export icon of configuration file list. The way of yaml file import will automatically fill the yaml file into the page, and you can adjust it on the page as needed.
If you prefer command line, Edit Mode is convenient for you to edit the yaml file and create deployment directly on the page.
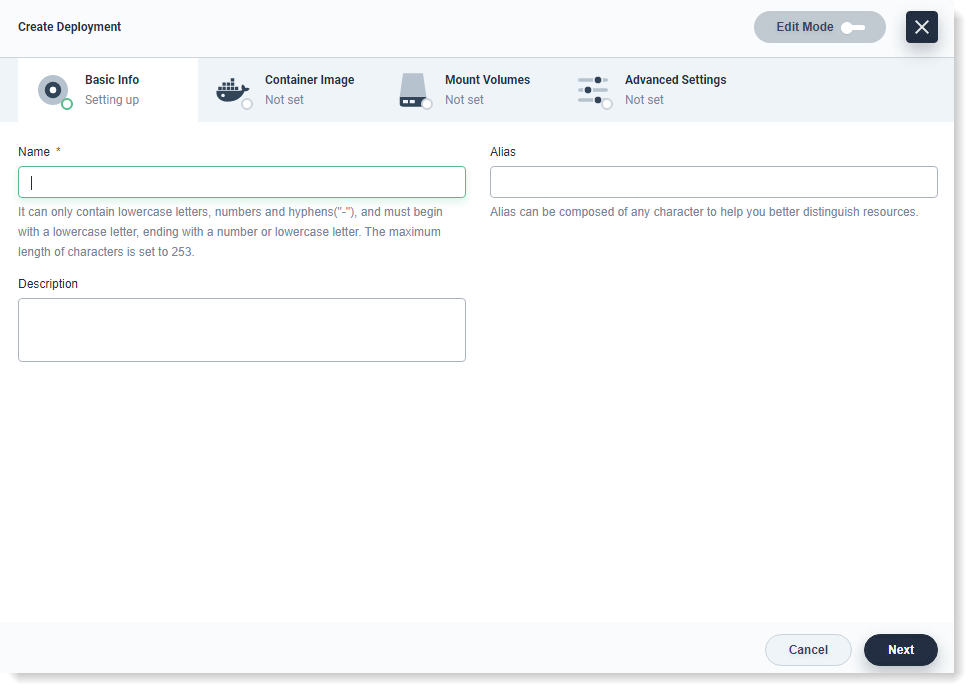
2. In Basic Info, enter the Name of the deployment and you can fill in a description of the deployment as needed, as follows:

• Name: Recommended a clear and concise name easy for you to navigate and search;
• Alias: For you to better distinguish resources. Chinese name is allowed;
• Description: Brief introduction to the deployment to give users a better understanding
3. After filling, click Next.
 The following mainly introduces the way of Edit Mode. Click Edit Mode in the upper right corner to edit the code, supporting yaml and json formats.
In the upper right corner, you can see the import/export icon of configuration file list. The way of yaml file import will automatically fill the yaml file into the page, and you can adjust it on the page as needed.
If you prefer command line, Edit Mode is convenient for you to edit the yaml file and create deployment directly on the page.
2. In Basic Info, enter the Name of the deployment and you can fill in a description of the deployment as needed, as follows:

• Name: Recommended a clear and concise name easy for you to navigate and search;
• Alias: For you to better distinguish resources. Chinese name is allowed;
• Description: Brief introduction to the deployment to give users a better understanding
3. After filling, click Next.
< Previous:
Next: >


