


Updated at: 2022-12-09 03:49:50
1. Click Alert > Alert Policy > Scene > + New to enter the New Scene interface, as follow:

► Basics: ► Trigger: ► Alert Plan:
_15.png) Note:
Note:
1. Use the same signature and short message template ID to send short message to the same phone number, maximum 50 messages/day. So alert suppression≥10 minutes in order to avoid quick consuming SMS;
2. If short message count/day can meet actual needs, please contact Aliyun aftersales.
► Triggered Action:
It is to set the policy of notification and forwarding after an alert is triggered. Supportive for alert notice, HTTP forwarding, Syslog forwarding. Every triggered action type should be added no more than 5 tasks.
• None: Only alert record is generated, and no alert record is sent or forwarded by task;
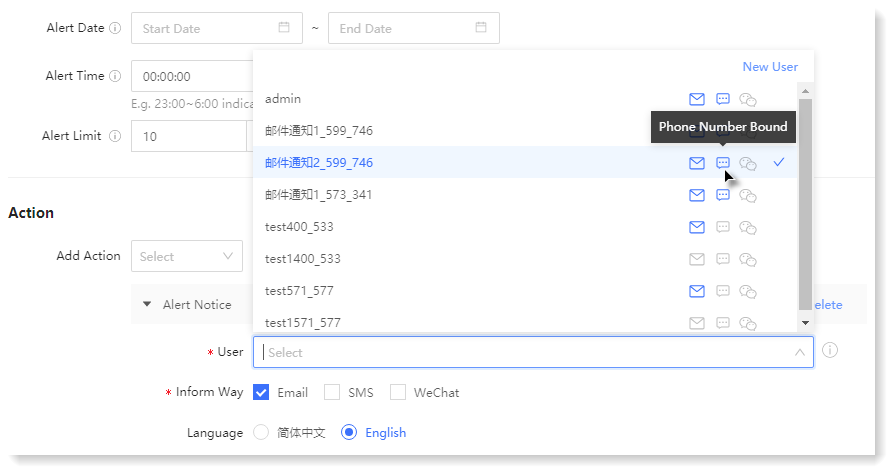
• Alert Notice: Supportive for sending alert notification by email, SMS, WeChat as follows:
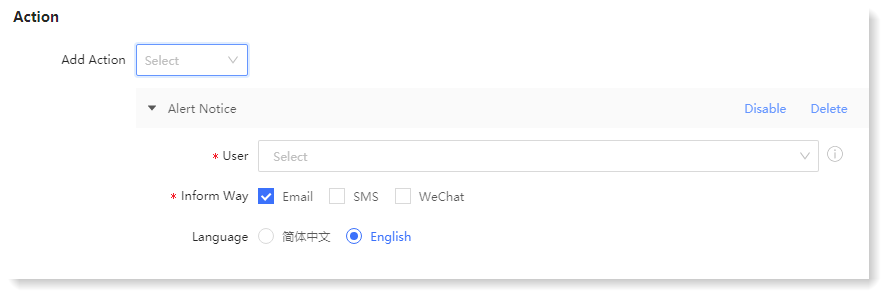
Inform User: You can click User to select the created user(s) in the dropdown list (add 10 users at most) and may check whether the user has been bound with Email, Phone Number and WeChat; Click New User to edit user information. You can set the Languges for Alert Notice: 简体中文/English.
Note:
1. SMTP server configuration must be completed before using the email notice method. For details, please refer to the section SMTP Email Server Configuration.
2. Before enabling WeChat notice, please complete the binding between the enterprise WeChat service account and AnyRobot system to ensure that the alert message can be received normally. For details, please refer to the section Appendix WeChat Service Account System Binding Process.
3. SMTP server configuration must be completed before using SMS Notification. For details, please refer to the section SMS Notification .
4. Before enabling alert notice, please confirm the Email, Phone Number, WeChat parameters configuration for the notified New User.
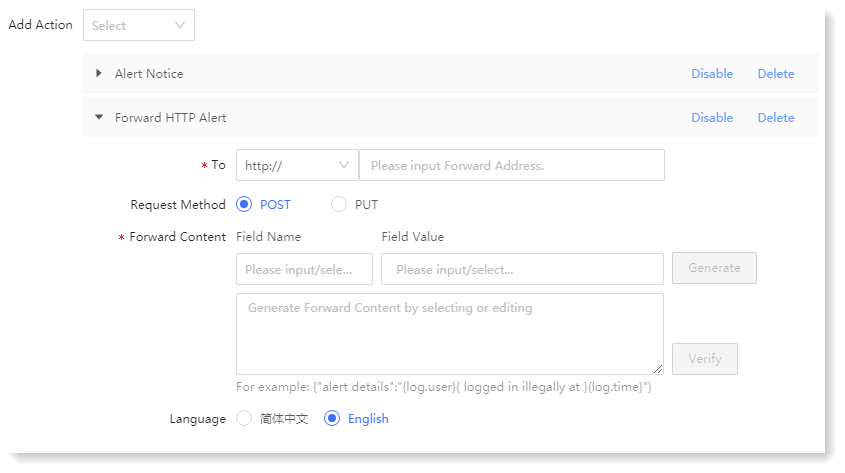
• Forward HTTP Alert: Alert message is forwarded by HTTP to a third-party platform such as an alert monitoring platform, as follows:
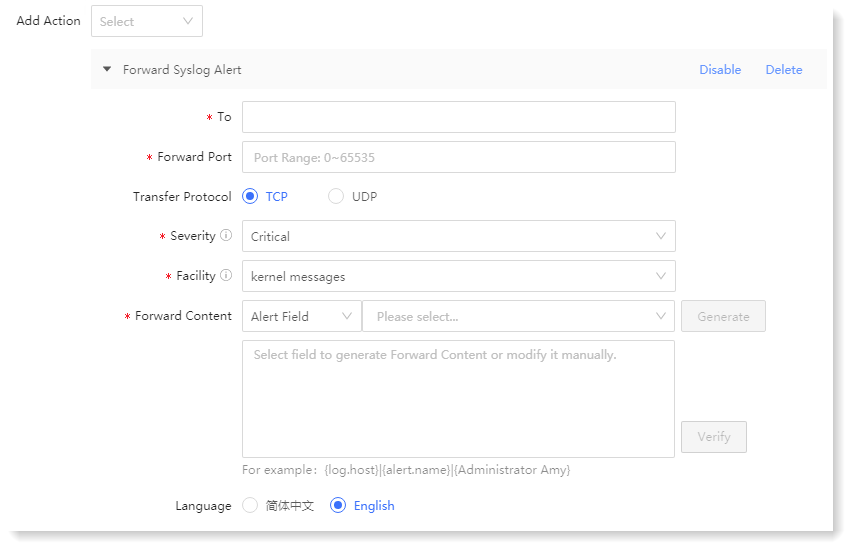
 • Forward Syslog Alert: Alert message is forwarded by Syslog to a third-party platform such as an alert monitoring platform, as follows:
Note:
Click Forward HTTP Alert or Forward Syslog Alert to automatically prompt the help tips on the right side of the page. After closing the help, you can click Help on the top right corner of the page to view again.
2. After configuration, click Save to finish scene policy creation.
► Basics: ► Trigger: ► Alert Plan:
Note:1. Use the same signature and short message template ID to send short message to the same phone number, maximum 50 messages/day. So alert suppression≥10 minutes in order to avoid quick consuming SMS;
2. If short message count/day can meet actual needs, please contact Aliyun aftersales.
► Triggered Action:
It is to set the policy of notification and forwarding after an alert is triggered. Supportive for alert notice, HTTP forwarding, Syslog forwarding. Every triggered action type should be added no more than 5 tasks.
• None: Only alert record is generated, and no alert record is sent or forwarded by task;
• Alert Notice: Supportive for sending alert notification by email, SMS, WeChat as follows:
Inform User: You can click User to select the created user(s) in the dropdown list (add 10 users at most) and may check whether the user has been bound with Email, Phone Number and WeChat; Click New User to edit user information. You can set the Languges for Alert Notice: 简体中文/English.
Note:1. SMTP server configuration must be completed before using the email notice method. For details, please refer to the section SMTP Email Server Configuration.
2. Before enabling WeChat notice, please complete the binding between the enterprise WeChat service account and AnyRobot system to ensure that the alert message can be received normally. For details, please refer to the section Appendix WeChat Service Account System Binding Process.
3. SMTP server configuration must be completed before using SMS Notification. For details, please refer to the section SMS Notification .
4. Before enabling alert notice, please confirm the Email, Phone Number, WeChat parameters configuration for the notified New User.
• Forward HTTP Alert: Alert message is forwarded by HTTP to a third-party platform such as an alert monitoring platform, as follows:
• Forward Syslog Alert: Alert message is forwarded by Syslog to a third-party platform such as an alert monitoring platform, as follows:
Note:Click Forward HTTP Alert or Forward Syslog Alert to automatically prompt the help tips on the right side of the page. After closing the help, you can click Help on the top right corner of the page to view again.
2. After configuration, click Save to finish scene policy creation.
< Previous:
Next: >