Updated at: 2022-12-09 03:49:50
Index Library acts as one of unified data management methods by classifying and categorizing the heterologous and heterogeneous logs to form related indexes. In Index Library, you can view, disable, delete / batch delete, and manually create Index Library.
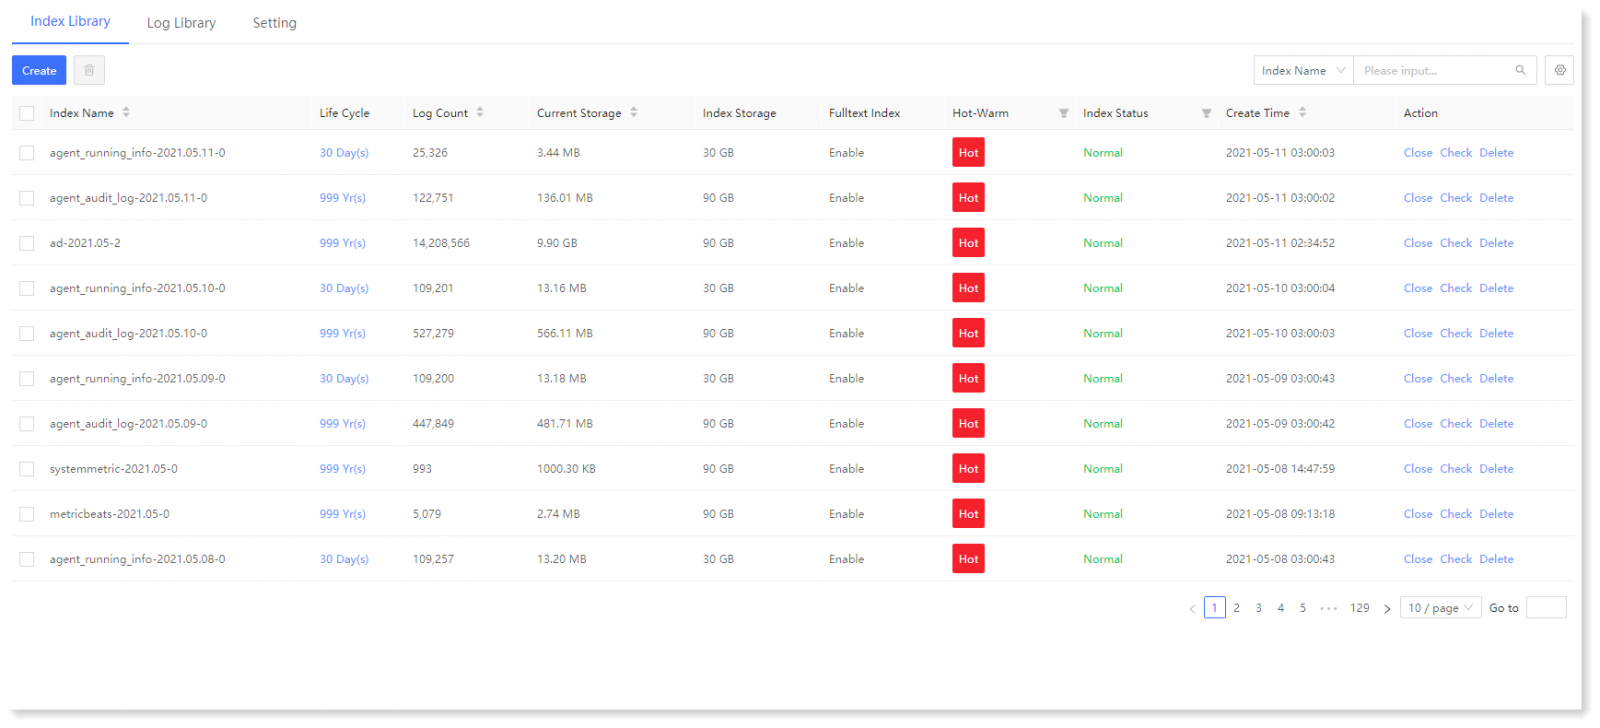
Click Data Source > Log Library > Index Library, as follows:
 ► Manually Create Index Library
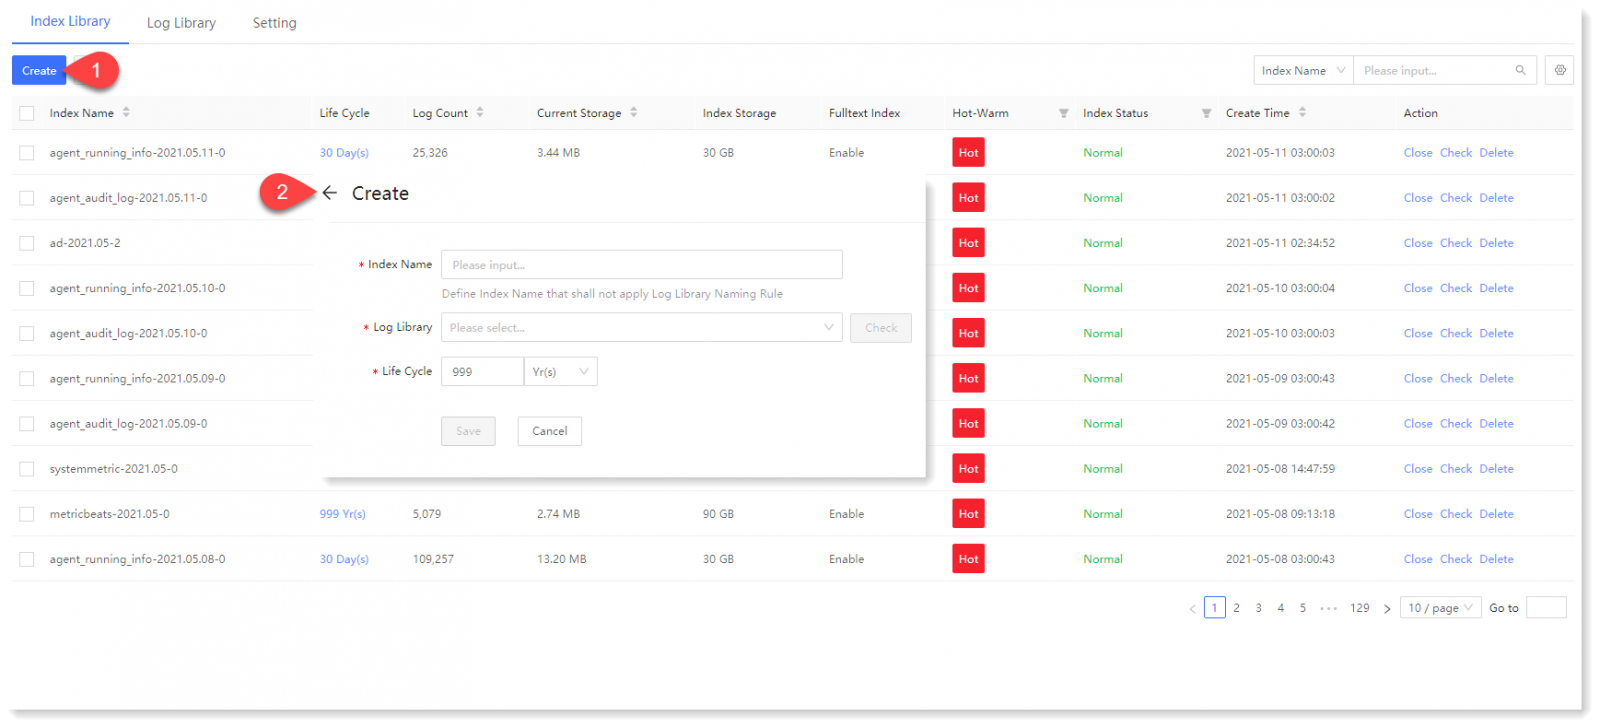
1) Click Data Source > Log Library > Index Library > Create to create index library, as follows:
 2) Configure the index name and log library: click Log Library dropdown box to select the log library to be bound; click Check to view the details of the selected log library, as follows:
 3) Customized the configuration of Life Cycle as needed;
4) Click Save to return to Index Library and view the index created in the list.
_58.png) Note: After index library has been created manually, data will be stored in the bound log library according to the manually created index library.
Note: After index library has been created manually, data will be stored in the bound log library according to the manually created index library.
► Delete/Close Index
Click Data Source > Log Library > Index Library, select the target index and click Edit/Close to edit or close the selected index.
_58.png) Note: If log data is being written into the index library, closing it may result in partial loss of cached data, so please be careful.
Note: If log data is being written into the index library, closing it may result in partial loss of cached data, so please be careful.
► Check Index Library Details
Click Data Source > Log Library > Index Library, and the steps are as follows:
• Click the icon to customize the column setting;
• Use the search box to filter search results on target index by Index Name or Log Library.
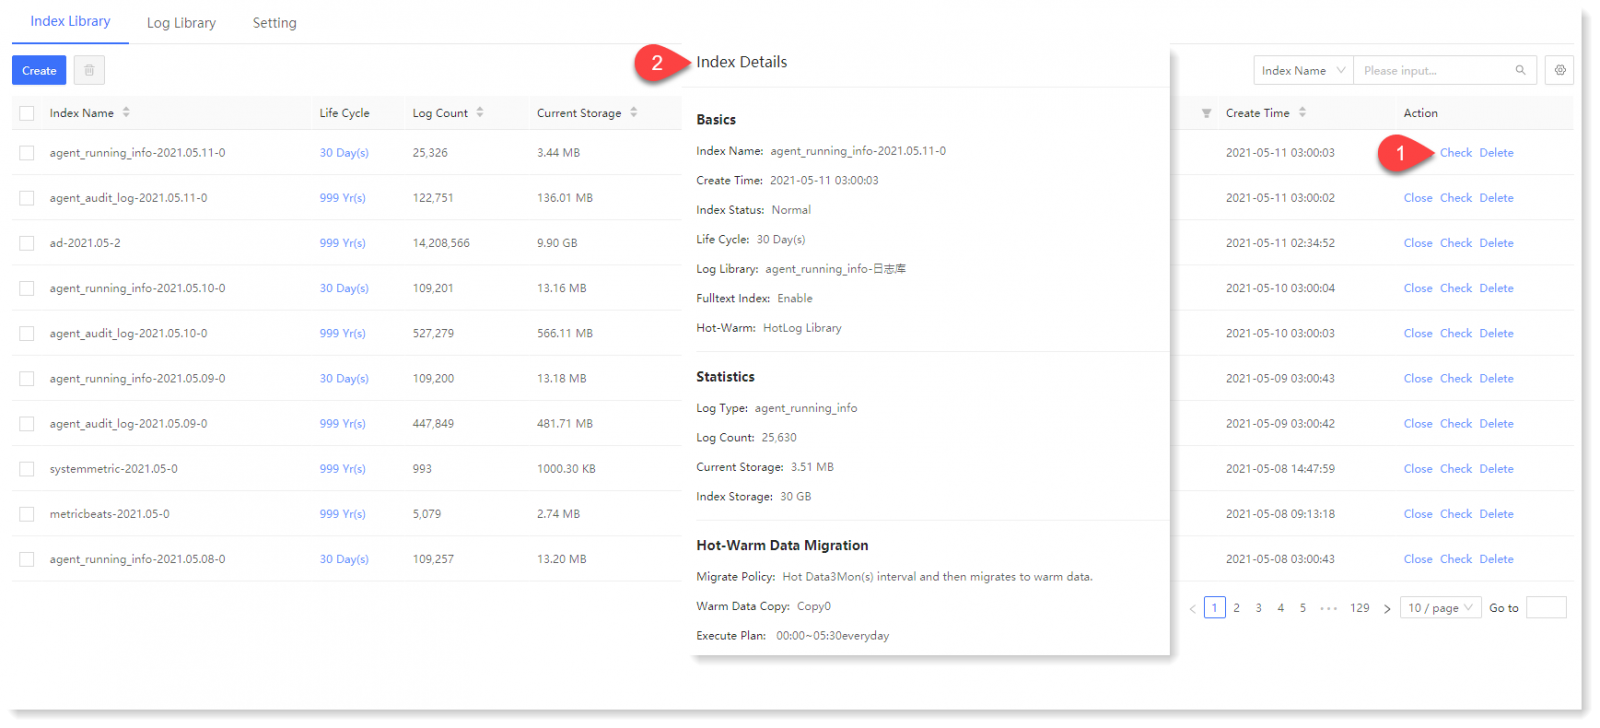
• Select the index to be checked and click the Check in the action column to view Index Library Details, as follows.
 ► Index Library Filtering
• Click Index Name, Log Count, Current Storage, and Create Time for ascending and descending order.
• The display can be filtered by Hot-Warm (Hot Data Index / Warm Data Index), Index Status (Normal / Alert / Abnormal / Close).
Click Data Source > Log Library > Index Library, as follows:
 ► Manually Create Index Library
1) Click Data Source > Log Library > Index Library > Create to create index library, as follows:
 2) Configure the index name and log library: click Log Library dropdown box to select the log library to be bound; click Check to view the details of the selected log library, as follows:
  3) Customized the configuration of Life Cycle as needed;
4) Click Save to return to Index Library and view the index created in the list.
_58.png) Note: After index library has been created manually, data will be stored in the bound log library according to the manually created index library.
Note: After index library has been created manually, data will be stored in the bound log library according to the manually created index library.► Delete/Close Index
Click Data Source > Log Library > Index Library, select the target index and click Edit/Close to edit or close the selected index.
_58.png) Note: If log data is being written into the index library, closing it may result in partial loss of cached data, so please be careful.
Note: If log data is being written into the index library, closing it may result in partial loss of cached data, so please be careful.► Check Index Library Details
Click Data Source > Log Library > Index Library, and the steps are as follows:
• Click the
 icon to customize the column setting;
• Use the search box to filter search results on target index by Index Name or Log Library.
• Select the index to be checked and click the Check in the action column to view Index Library Details, as follows.
 ► Index Library Filtering
• Click Index Name, Log Count, Current Storage, and Create Time for ascending and descending order.
• The display can be filtered by Hot-Warm (Hot Data Index / Warm Data Index), Index Status (Normal / Alert / Abnormal / Close).
< Previous:
Next: >


