


Updated at: 2022-12-09 03:49:50
Check product compatibility first to make sure that the Hyper-V virtualization platform version you are adding is compatible.
The Hyper-V virtualization platform shall be added by a system administrator or tenant.
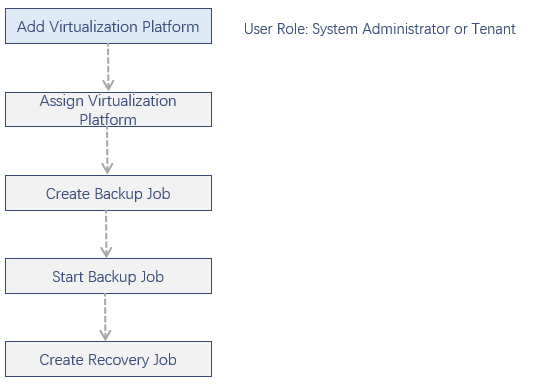
To add a Hyper-V virtualization platform,
Step 1 Log into the console as a system administrator or a tenant.
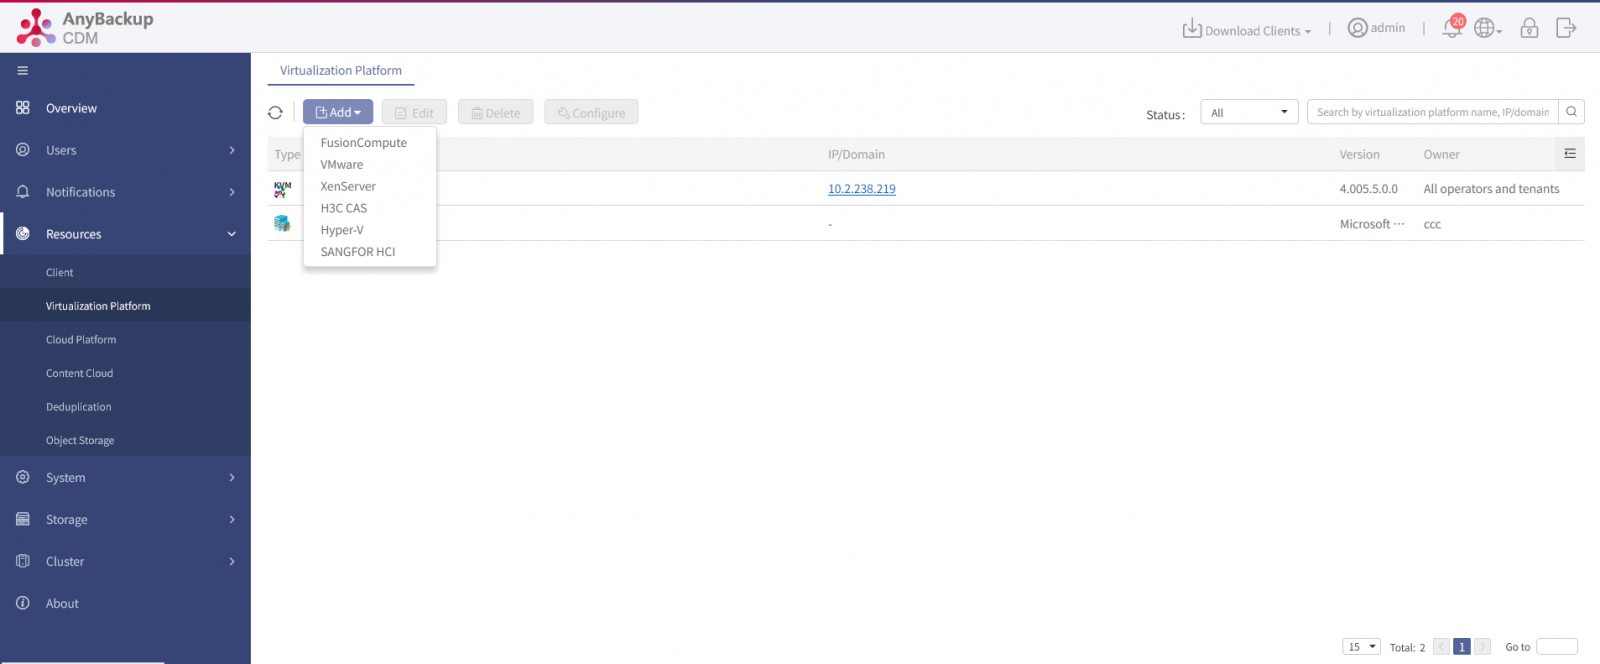
Step 2 Click Resources>Virtualization Platform in the left navigation bar, enter the Virtualization Platform tab.
Step 3 Click Add>Hyper-V, the Add Hyper-V dialog box pops up.
Step 4 Configure the information below.
l Name: Required. You must specify a name for this virtualization platform to distinguish it from others. Requirements: 3~30 characters, can only be Chinese, English letters (case-insensitive), numbers and symbols (“-”,“_”,“.” and “@”).
l OS: Select the version of the platform to be created. Windows Server 2012, Windows Server 2012 R2, Windows Server 2016, and Windows Server 2019 are supported.
l Client: After you select OS version, the corresponding version of the client will be displayed. Select at least one client to create the Hyper-V virtualization platform.
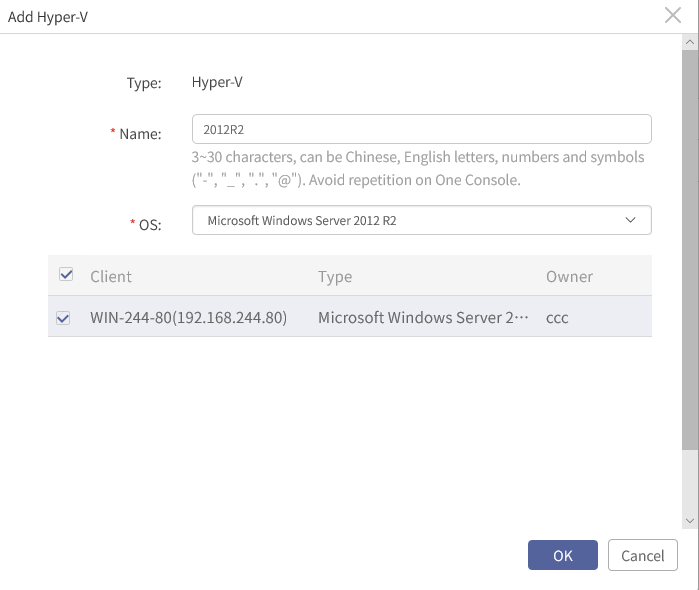
Step 5 Click OK.
The Hyper-V virtualization platform shall be added by a system administrator or tenant.
To add a Hyper-V virtualization platform,
Step 1 Log into the console as a system administrator or a tenant.
Step 2 Click Resources>Virtualization Platform in the left navigation bar, enter the Virtualization Platform tab.
Step 3 Click Add>Hyper-V, the Add Hyper-V dialog box pops up.
Step 4 Configure the information below.
l Name: Required. You must specify a name for this virtualization platform to distinguish it from others. Requirements: 3~30 characters, can only be Chinese, English letters (case-insensitive), numbers and symbols (“-”,“_”,“.” and “@”).
l OS: Select the version of the platform to be created. Windows Server 2012, Windows Server 2012 R2, Windows Server 2016, and Windows Server 2019 are supported.
l Client: After you select OS version, the corresponding version of the client will be displayed. Select at least one client to create the Hyper-V virtualization platform.
Step 5 Click OK.
F Note:
A. For a Hyper-V virtualization platform created by a tenant, only clients under his own name can be selected.
B. To create a Hyper-V virtualization platform, you must select at least one client.
C. Multiple Hyper-V virtualization platforms bound to the same client are not supported.
A. For a Hyper-V virtualization platform created by a tenant, only clients under his own name can be selected.
B. To create a Hyper-V virtualization platform, you must select at least one client.
C. Multiple Hyper-V virtualization platforms bound to the same client are not supported.
< Previous:
Next: >