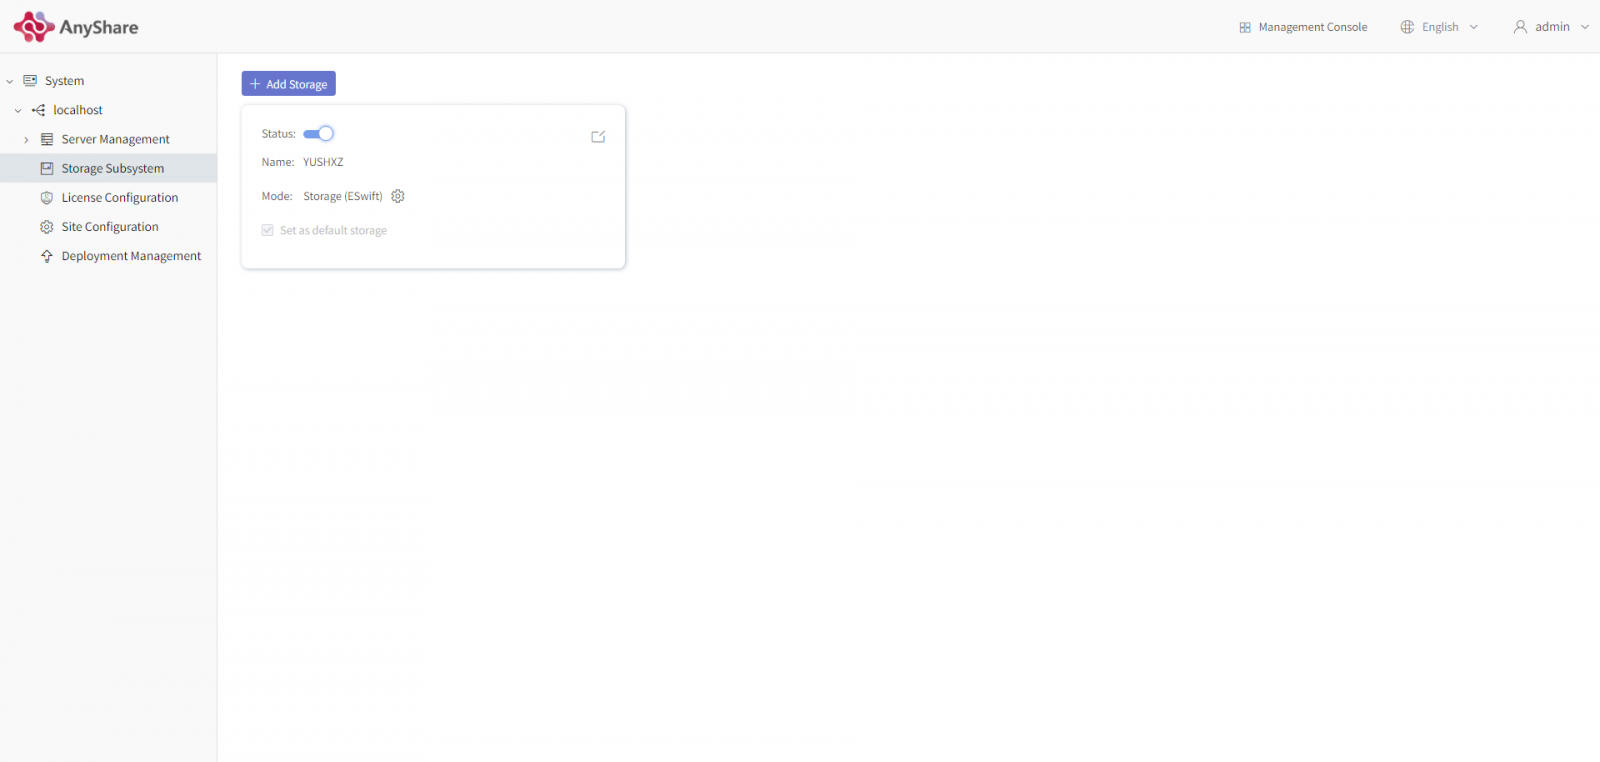
When no object storage is configured, you need to enter the page of [Storage Subsystem] to configure it. Multiple object storage services can be configured and used in the master or common site console. The master site console can add multiple object storage services for its subsites, and only one object storage service can be added in the subsite console. You can apply an object storage service to users, departments, and document libraries.
I Add Storage Services
An administrator clicks on the [New Storage Services] button at the top of the page to fill storage names, select a storage mode, and a home site in the pop-up box. Storage modes include Eceph storage, Eswift storage, and Third-party storage. The home site is set as the current site by default. When null is selected, object storage is only used to store data which will not be processed by the data processing server.
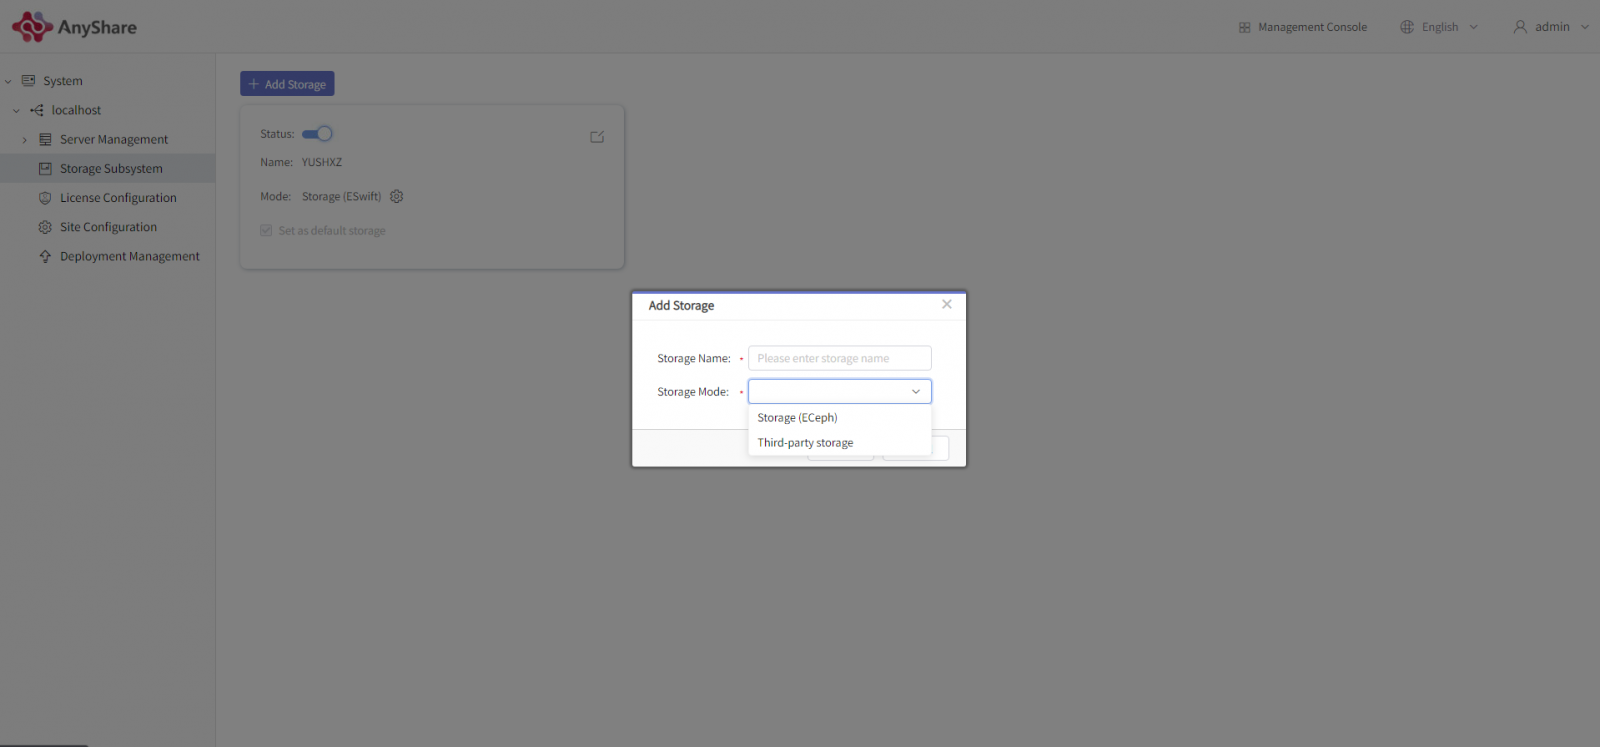
It is worth noting that when the Eswift storage is selected as the storage mode, the home site is the current site and cannot be modified; two third-party storage platforms including Qiniu Cloud’s S3 storage and Microsoft’s Azure Blob storage cannot be mixed with others meanwhile Qiniu Cloud's S3 storage or Microsoft Azure Blob storage can be solely used between master sites and subsites. Other kinds of storage are unlimited. The next part is about the storage mode configuration methods.
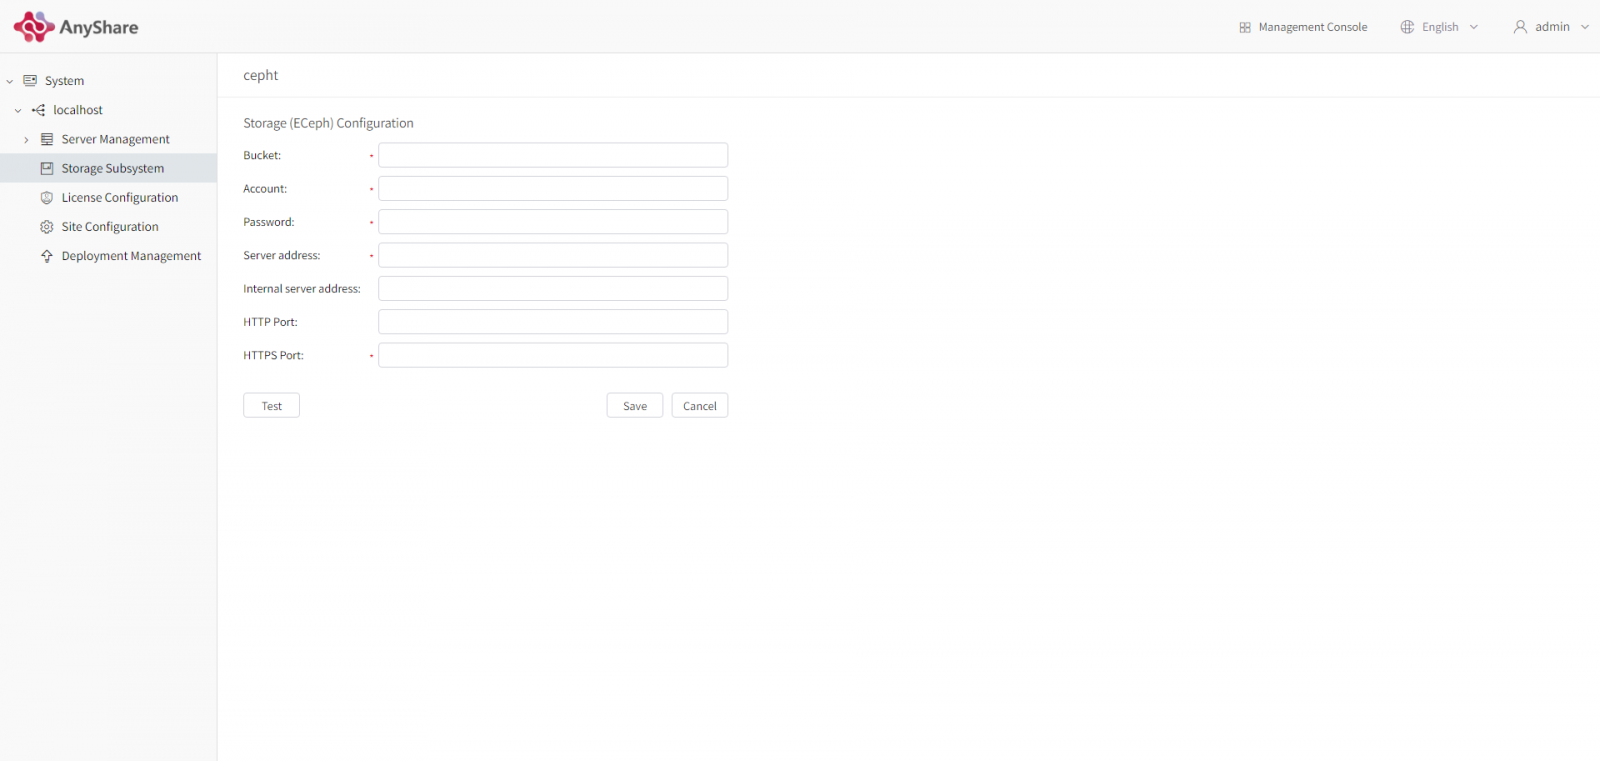
- ECeph Storage
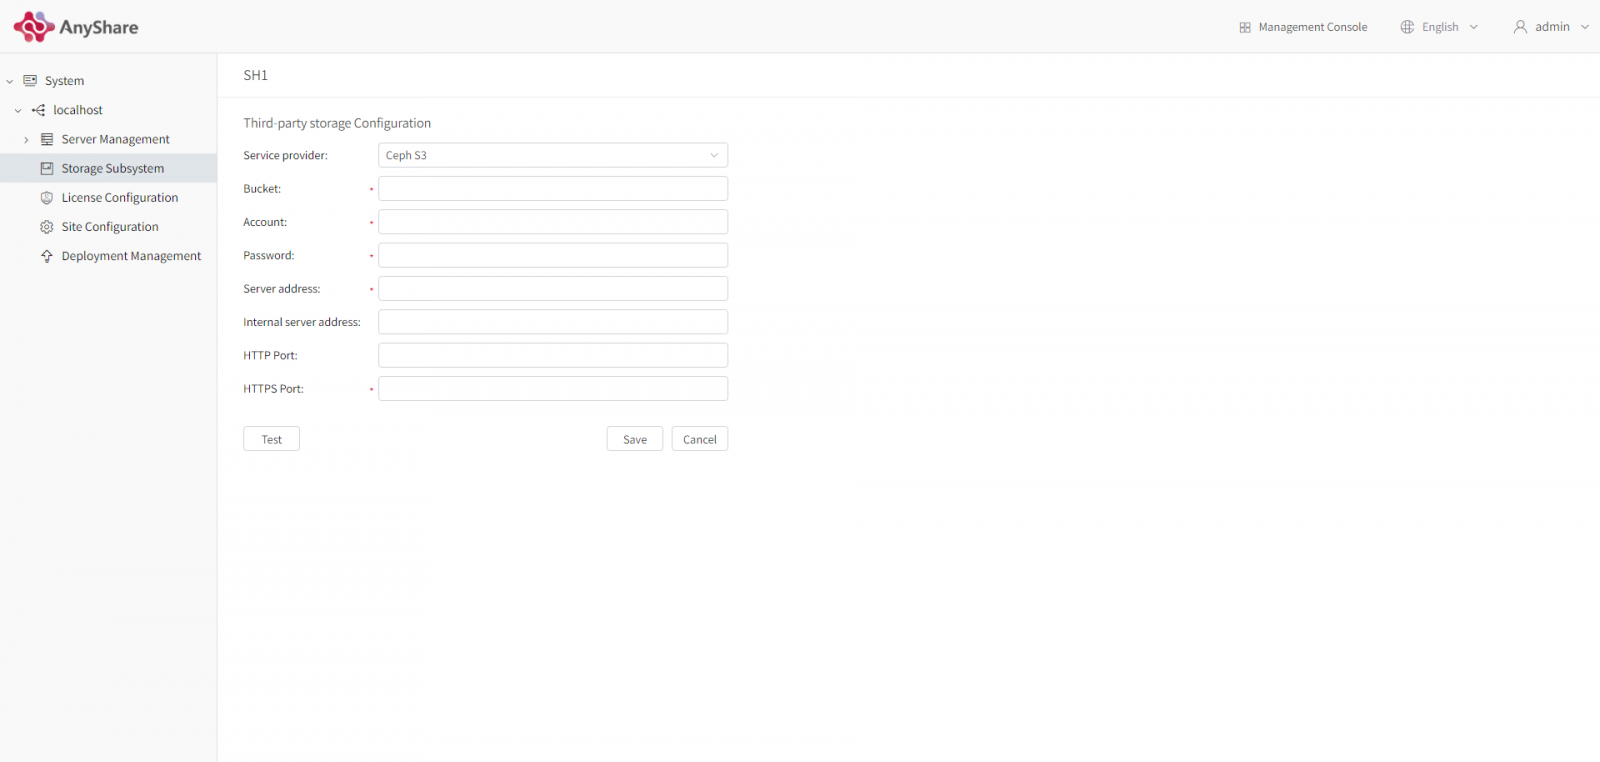
Bucket: the name of the bucket added in the storage management console
Account: the name of the tenant to which the bucket belongs
Password: the S3 key of the bukect
Server address: the object store service address
Internal Server Address: Not required. If you need to use the object storage Intranet address in the Intranet, you can fill the object storage Intranet address here
http Port: 10001
https Port: 10002
After filling, click on [Test]. If there is a tip, “Connection Successful.” on display, the configuration items filled are correct and available. Then click on [Save] and the tip “Save Successful” will appear. Finally, the storage configuration of Eceph is completed.
- ESwift Storage
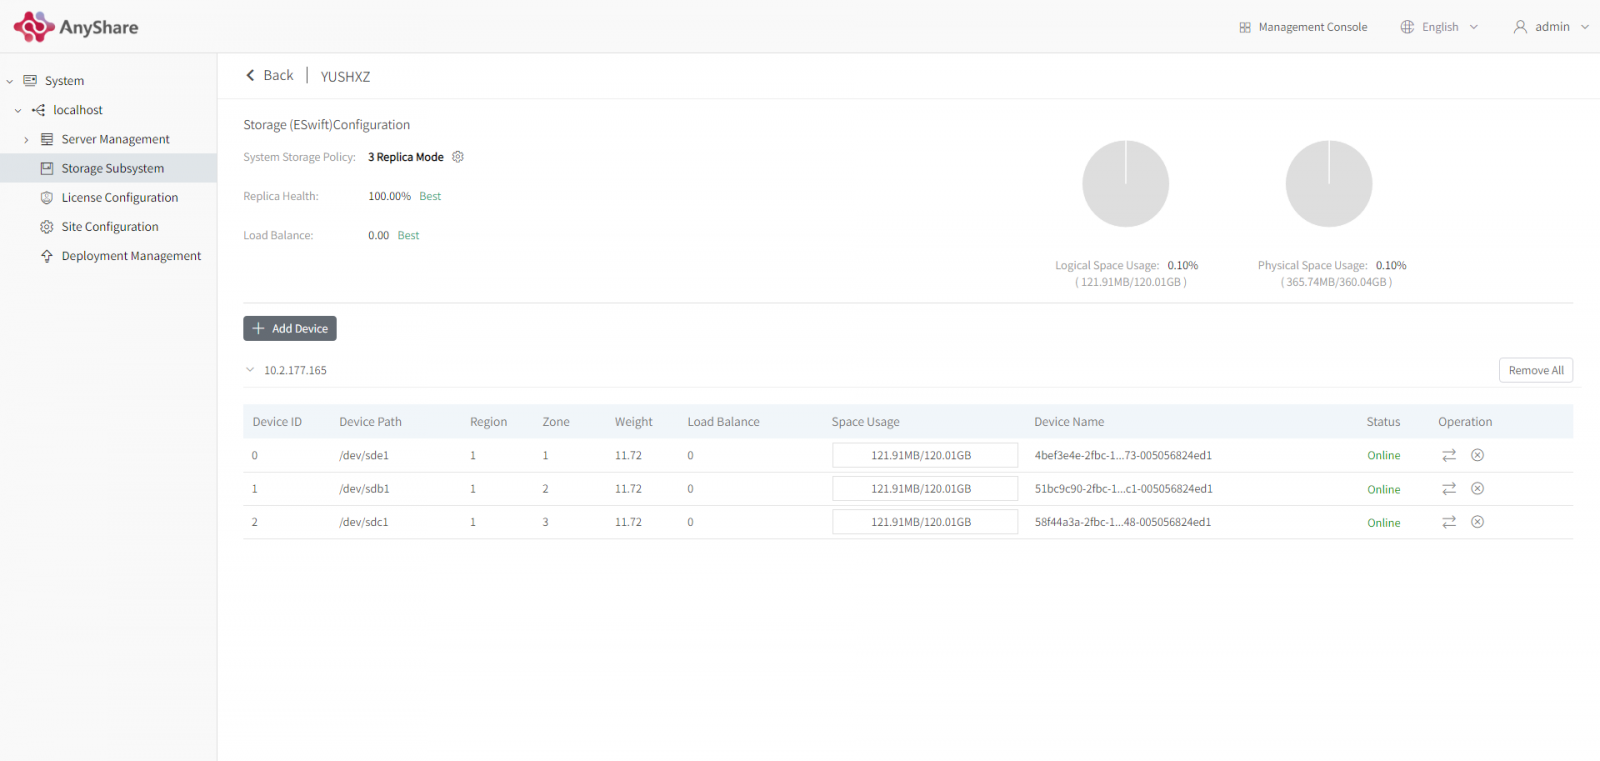
1. Storage Pool Initialization
Select a storage strategy: Copy 1/ Copy 3→ [Do Initialization]. The data security of Copy 3 is higher than that of Copy 1 but selecting Copy 3 will reduce the logical free space in the pool. It should be noted that only a higher-level copy mode is allowed to be changed after initialization, and cannot be rolled back to a lower level copy mode.
After the initialization, the tip “Initialization Successful” means completion. The current page will show you the current system's storage policy, the copy health state, the load balance status, the physical space utilization rate, and the logical space utilization rate. When the load balance status is poor, you can click on [Overload Balance] to overload balance.
2. Storage Pool Management
Add Devices: Click on [Add Devices] and select the idle devices you want to add in the pop-up box.
Replace Devices: The original device will be replaced and the new idle device selected to be replaced will be formatted after it is added to storage.
Remove Devices: Removing the disk will trigger data migration in the storage pool and the system will perform load balance again.
Remove all: It supports the bulk removal of all devices.
Note: The replacement or removal of equipment is risky. Think before you leap.
- Third-Party Storage
After selecting service vendors, you need to fill the Bucket, the account, the password, the server address, and other information items to add the third-party object storage. The above input items should be the configuration information provided by the third-party storage.
II Services of Managing Storage
Edit Object Storage: Click on [Edit] in the top right-hand corner of an object storage information card, and you can edit object storage names and home sites.
Enable/Disable Object Storage: Click on [Status] in the object storage information card to enable/disable object storage. If a site is disabled, the object storage services affiliated to this site will not be available; the default storage cannot be disabled.
Set the storage mode: Click on [Set] behind “Storage mode” in the object storage information card to edit the basic information of object storage.
Set the default storage: Check the checkbox “Set Default” at the bottom left of the object storage information card to set the object storage as the default storage. The data of users, departments, and document libraries that are not assigned to a specified home store will be saved to this storage.
Note: You can modify the unique default storage which cannot be the storage whose affiliated sites are subsites.