


Updated at: 2022-12-09 03:49:50
I Dependent Package Installation
1. Create the package folder, mkdir package, where the dependent and client packages are uploaded;
2. Enter the folder of the package to extract the dependent package;
Note: The name of the dependent package here is only for reference.
tar zxf AnyShareDeps-el7.x86_64-20200606-103351-x86_64-15.tar.gz

3. Enter the folder extracted and run python install_deps.py;

4. The picture below shows a successful installation;

5. Restart the system by following the prompts.
II Instal AnyShare
1. Extract server-installer from the client package of AnyShare;
Note: The package name here is only for reference.
tar zxf AnyShare-Server-7.0.0-20200617-el7.x86_64-464.tar.gz server-installer

2. Instal the server package;
python server-installer/anyshare_install.py --package AnyShare-Server-7.0.0-20200617-el7.x86_64-464.tar.gz

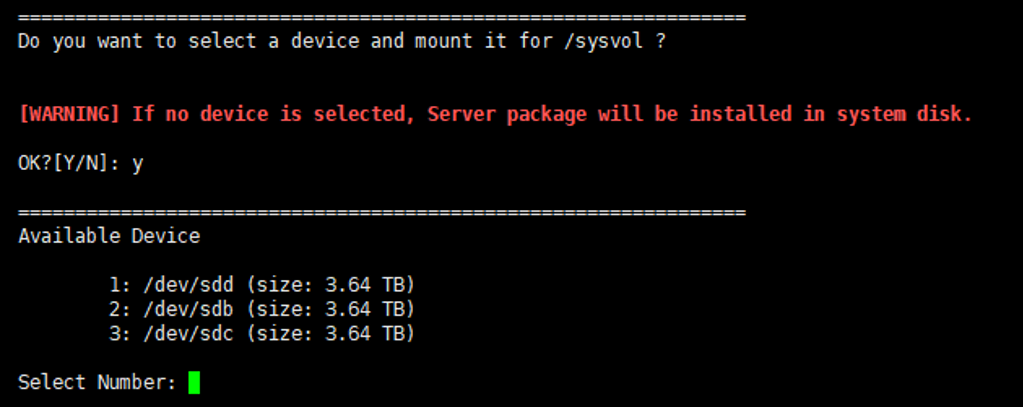
2.1 Prompts below will appear on your screen. Input Y and select the disk mounted by directory /sysvol;
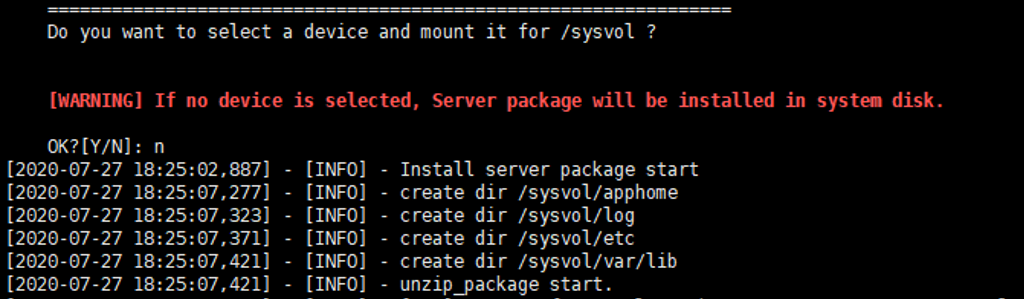
2.2 Input N to mount directory /sysvol to the system disk;
3. Delete the package by inputting rm -rf *.
III Deployment Initialization
1. Choose your product model;
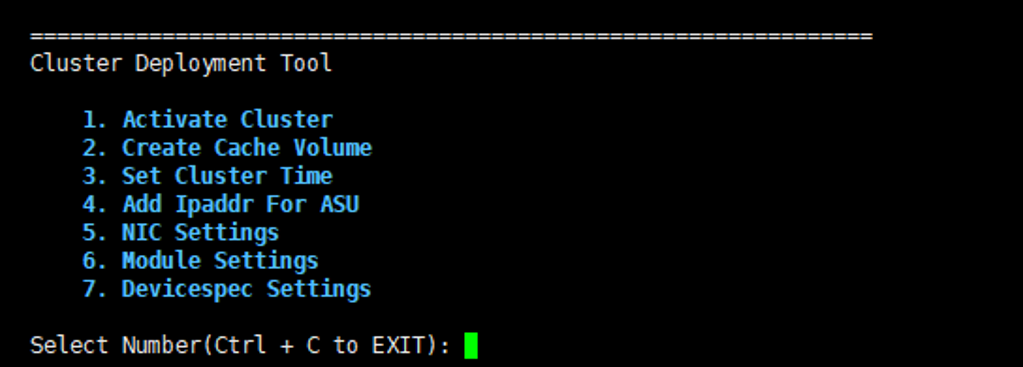
1.1 Log in via deploy_tools.py;

1.2 Pick 7 to set the product in line with the model you chose;
2. Initialize and activate AnyShare;
Note: In this step, you only need to operate in one server within the cluster and enter the operating system via deploy_tools.py.
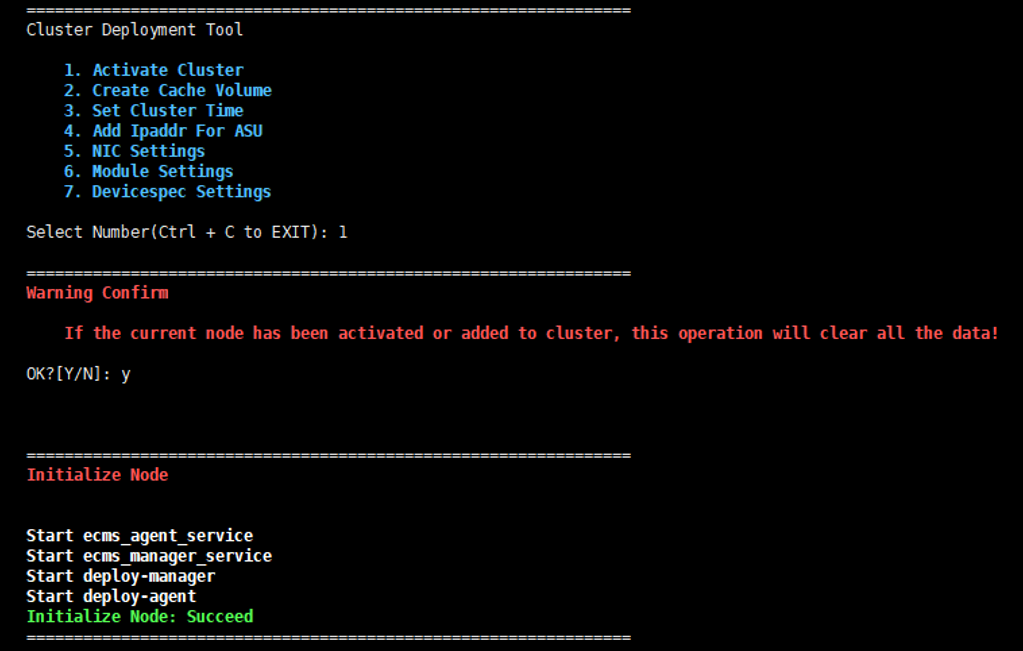
2.1 Pick 1 to activate the cluster; input y to confirm the activating status;
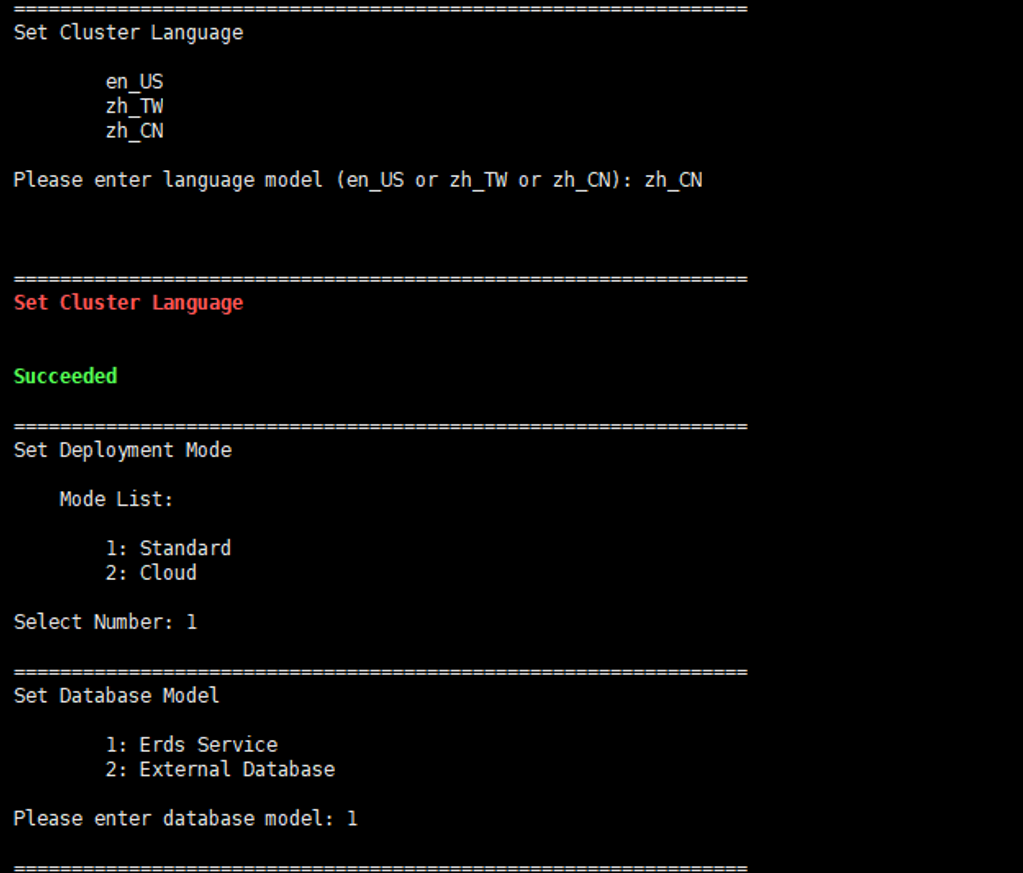
2.2 Select the language: zh_CN(on-demand);
2.3 Pick 1 to apply the standard mode to the cluster;
2.4 Pick 1 to choose the internal database;
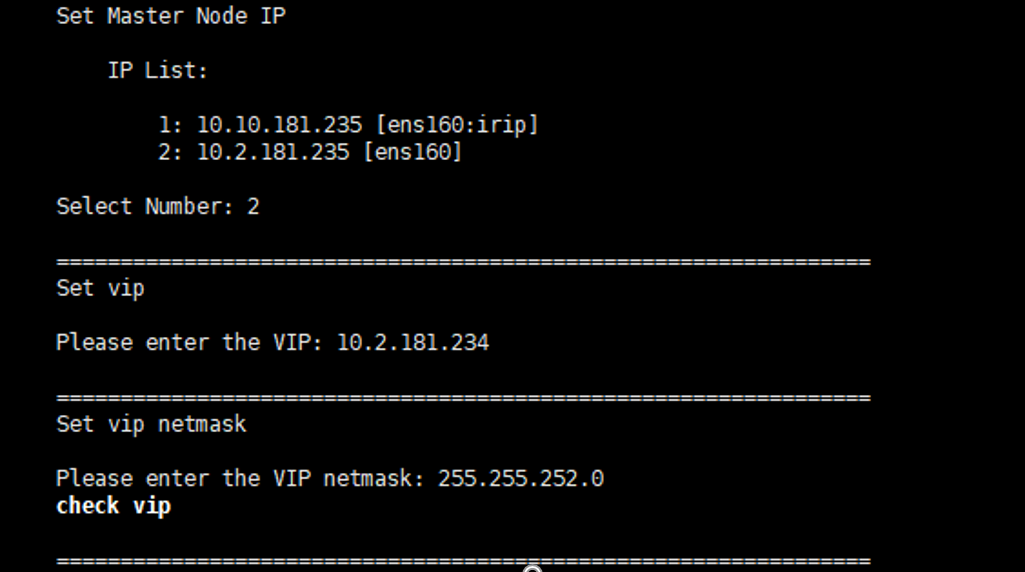
2.5 The network tag should be chosen as Node IP;
2.6 Set the vip and input the subnet mask;
Note: The ip should be unused and the same as the network segment node ip.
2.7 Pick y to make sure vip, vip mask, and that the node ip you chose is the cluster ip of AnyShare


1. Create the package folder, mkdir package, where the dependent and client packages are uploaded;
2. Enter the folder of the package to extract the dependent package;
Note: The name of the dependent package here is only for reference.
tar zxf AnyShareDeps-el7.x86_64-20200606-103351-x86_64-15.tar.gz
3. Enter the folder extracted and run python install_deps.py;
4. The picture below shows a successful installation;
5. Restart the system by following the prompts.
II Instal AnyShare
1. Extract server-installer from the client package of AnyShare;
Note: The package name here is only for reference.
tar zxf AnyShare-Server-7.0.0-20200617-el7.x86_64-464.tar.gz server-installer
2. Instal the server package;
python server-installer/anyshare_install.py --package AnyShare-Server-7.0.0-20200617-el7.x86_64-464.tar.gz
2.1 Prompts below will appear on your screen. Input Y and select the disk mounted by directory /sysvol;
2.2 Input N to mount directory /sysvol to the system disk;
3. Delete the package by inputting rm -rf *.
III Deployment Initialization
1. Choose your product model;
1.1 Log in via deploy_tools.py;
1.2 Pick 7 to set the product in line with the model you chose;
2. Initialize and activate AnyShare;
Note: In this step, you only need to operate in one server within the cluster and enter the operating system via deploy_tools.py.
2.1 Pick 1 to activate the cluster; input y to confirm the activating status;
2.2 Select the language: zh_CN(on-demand);
2.3 Pick 1 to apply the standard mode to the cluster;
2.4 Pick 1 to choose the internal database;
2.5 The network tag should be chosen as Node IP;
2.6 Set the vip and input the subnet mask;
Note: The ip should be unused and the same as the network segment node ip.
2.7 Pick y to make sure vip, vip mask, and that the node ip you chose is the cluster ip of AnyShare
< Previous:
Next: >