AnyShare Family 7 AI Lab leverages on-premises AI models to deliver Automatic Speech Recognition capabilities, offering two core functions to transform speech into editable text data for intelligent workflows and content creation.
› Key Features
• File to Text: Supports audio/video transcription, AI summarization, multi-format export, and subtitle burning. Ideal for automated video subtitling, script restoration, transcription of meetings/trainings/interviews, and personal knowledge organization.
• Live Recording: Enables live speech-to-text conversion, AI summarization, and multi-format export. Suitable for real-time scenarios such as interviews, meetings, negotiations, training sessions, lecture notes, and cross-language communication.
• Text to Speech: Converts text to audio with customizable voice characteristics, tone, volume, speed, and language. Designed for generating voiceovers, announcements, and broadcast content.
› Version Requirement
AI Lab features require AnyShare 7.0.6.4 or later.
› System Requirement
Apple Silicon Exclusive
› This capability requires:
- Chip: M1/M2/M3/M4 Macs
- OS: Version 14.x or higher
Access the AI Lab
› Access Path
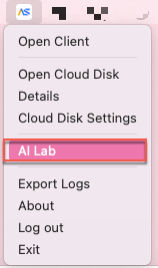
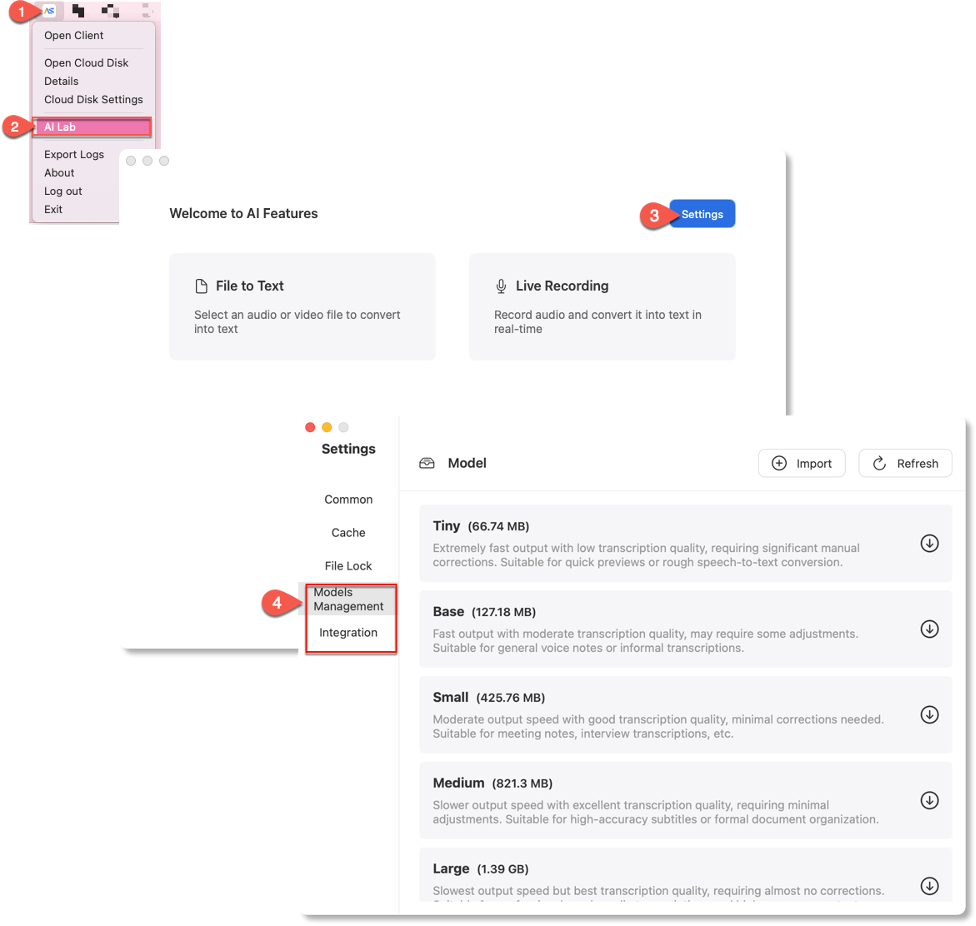
Click "AI Lab" in the system tray menu to launch the interface.
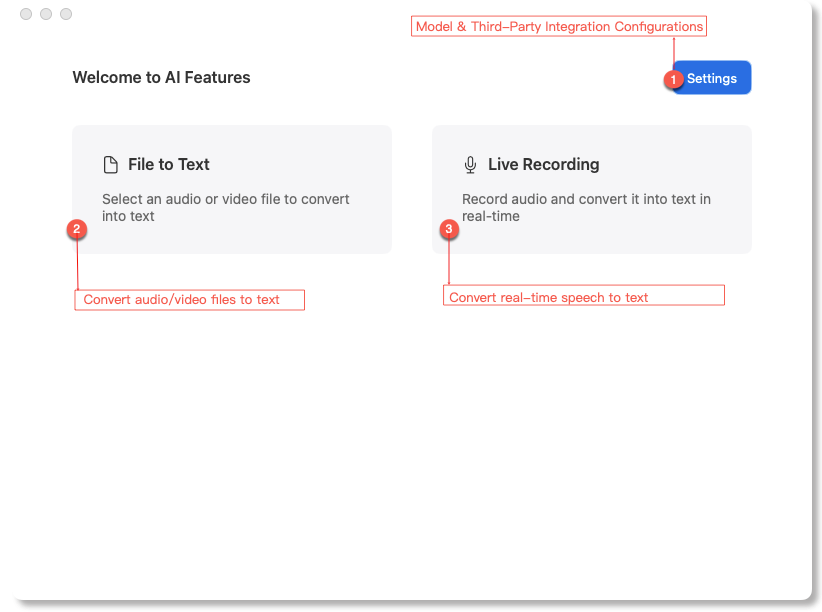
› Initial Setup
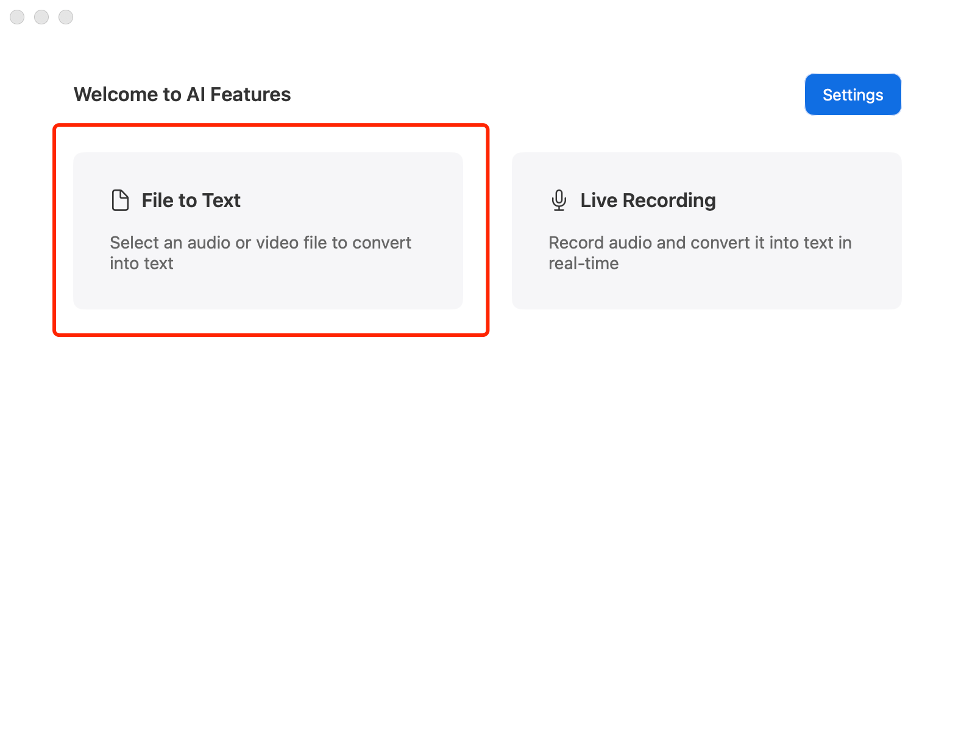
Click Settings to configure the prerequisite dependencies (including AI models and third-party integrations) before using any features.
After completing setups:
-
- Use File to Text to upload files for editable transcripts and AI-generated summaries.
- Enable Live Recording for real-time speech-to-text conversion.
Configure feature dependencies
› Configuration path
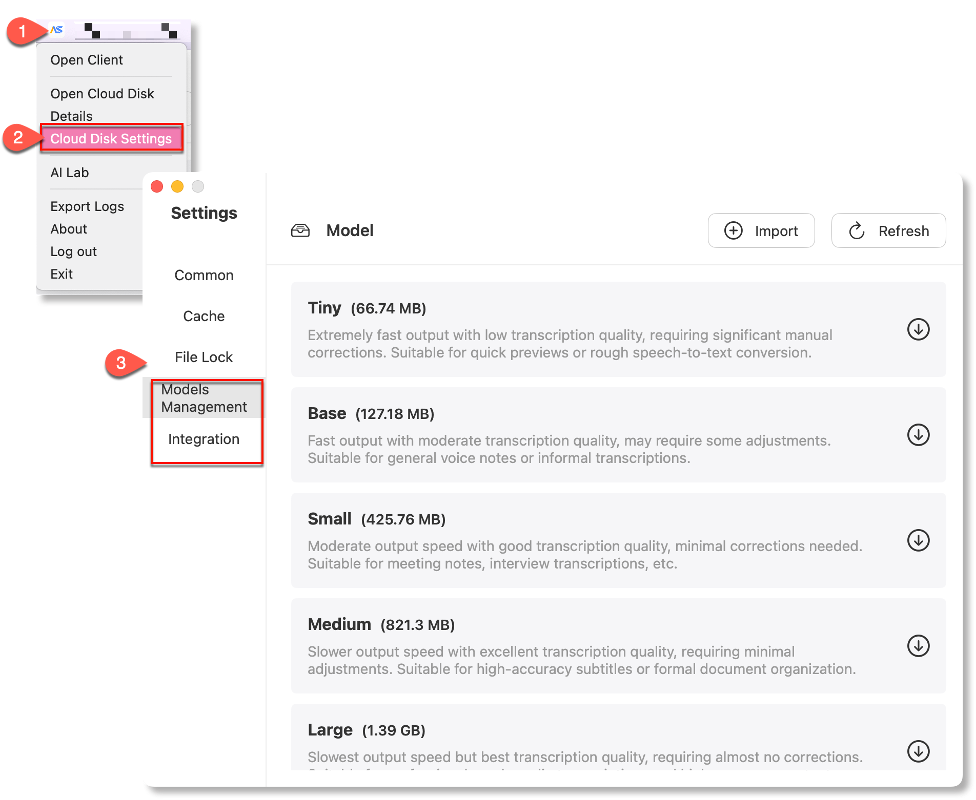
Path 1: Click Cloud Disk Settings in the system tray menu, then switch to either Models Management or Integration.
Path 2: Select AI Lab from the system tray, then click the Settings icon (top-right corner).
› Configure AI models
» Model Options
Available Sizes:
-
-
- Tiny (66.74 MB)
- Base (127.18 MB)
- Small (425.76 MB)
- Medium (821.3 MB)
- Large (1.39 GB)
-
Performance Trade-off: Larger models deliver higher accuracy but slower processing speeds.
» Model Deployment
Models are bundled with the AnyShare client installation package. For users in restricted network environments, you can contact your system administrator to obtain the model package and download locally for offline installation.
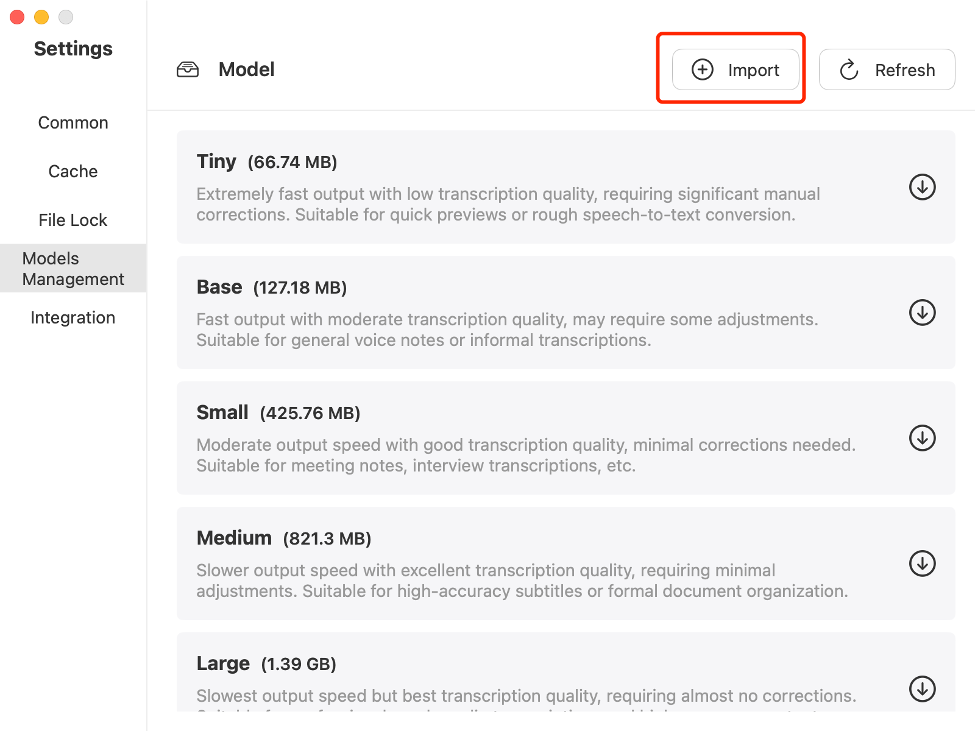
» Model Import Guide
Downloaded the model package locally first, then open the Models Management interface, click Import and select the required package in the pop-up dialog and confirm Import.
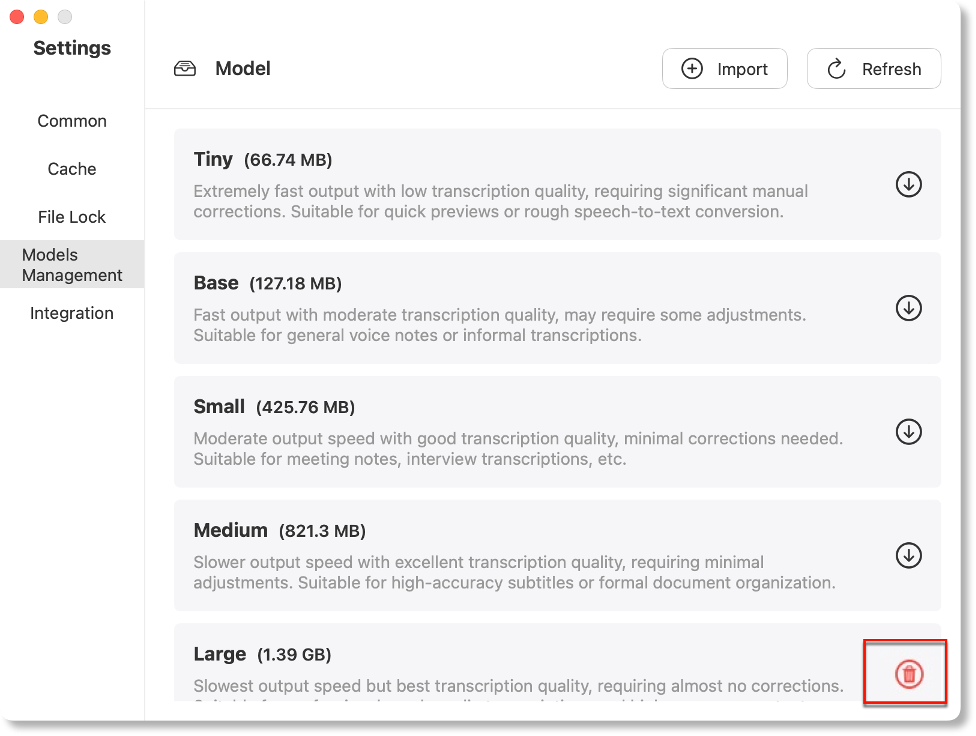
Imported models are labeled with“![]() ”for immediate use, and you can remove unwanted models by clicking the“
”for immediate use, and you can remove unwanted models by clicking the“![]() ”button.
”button.
Note: AnyShare automatically marks available models with an identifier; click the cleanup button to manage storage.
› The third-party integration
Third-party Integration enables secondary summarization of transcribed text to extract key content, currently supporting OpenAI-compatible providers (e.g., ChatGPT, DeepSeek, SiliconFlow, Alibaba Cloud Model Studio).
Note: Internet connection is required for this functionality.
Configuration Steps:
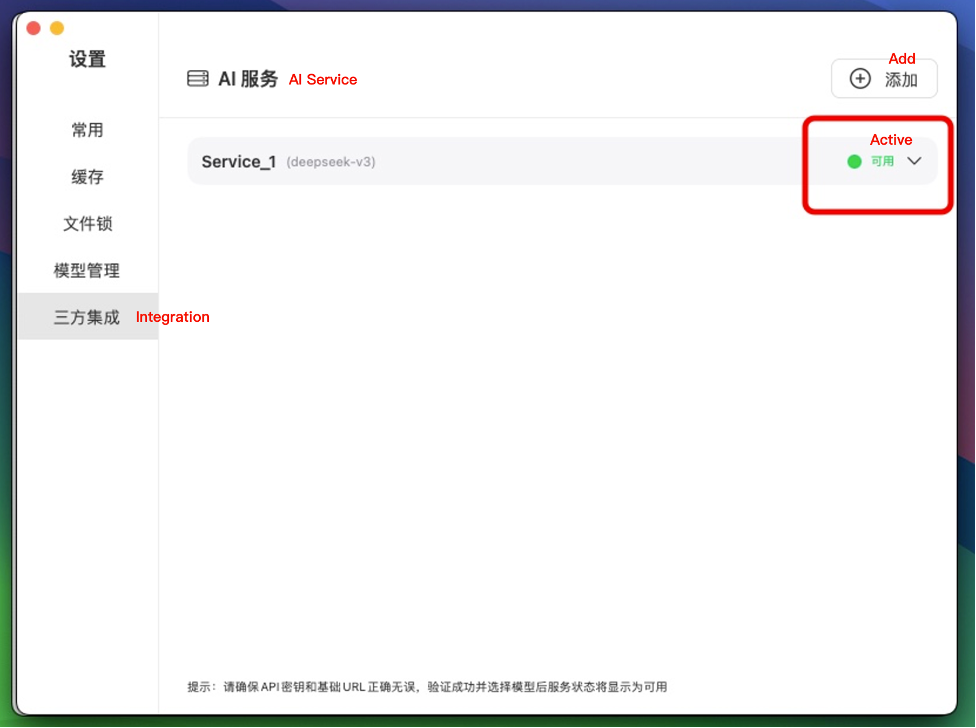
Access the dependency configuration interface and switch to the Third-party "Integration" tab, then click [Add] to configure and enable new services.
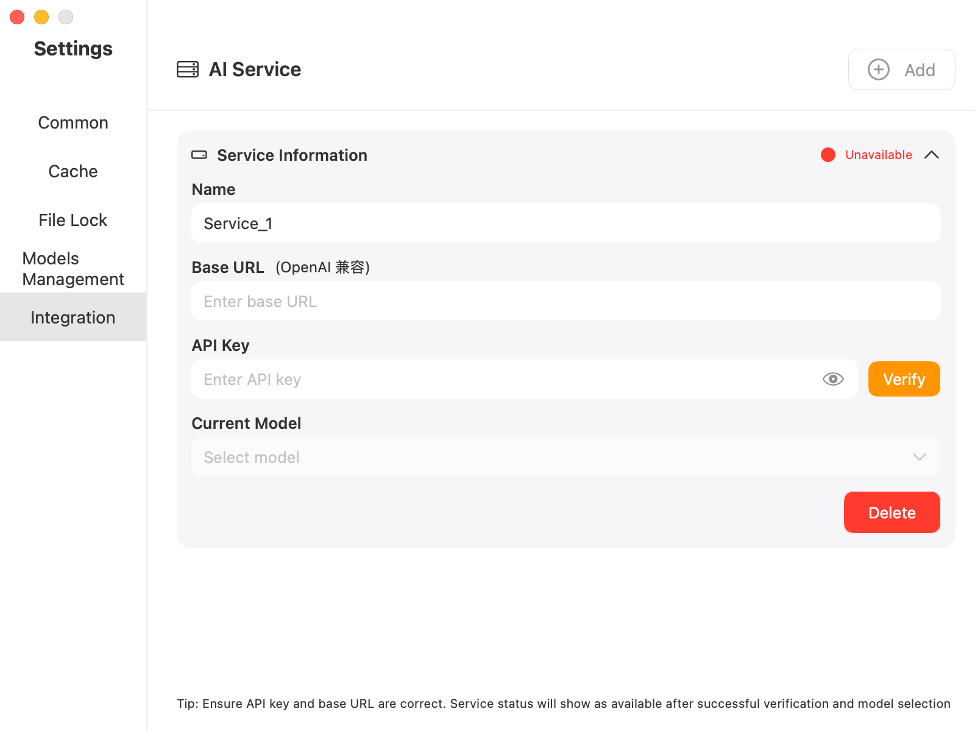
You can customize the service Name, then enter the Base URL and API Key obtained from your service provider (platform-specific credential retrieval methods vary). Upon successful validation, select your preferred AI model to activate the service immediately after model confirmation.
Note: The chosen model must explicitly support text summarization capabilities.
Figure-Service Active Status:
File to text
Step1. Select files for transcription
Click "File to Text" to open the file selection dialog, where you can choose audio/video files for transcription. By default, files are selected from AnyShare, but other storage locations are also supported.
Supported Transcription Formats:
-
-
- Audio: WAV, MP3, OGG, FLAC, AAC, M4A, WMA
- Video: MP4 (audio track extraction only)
-
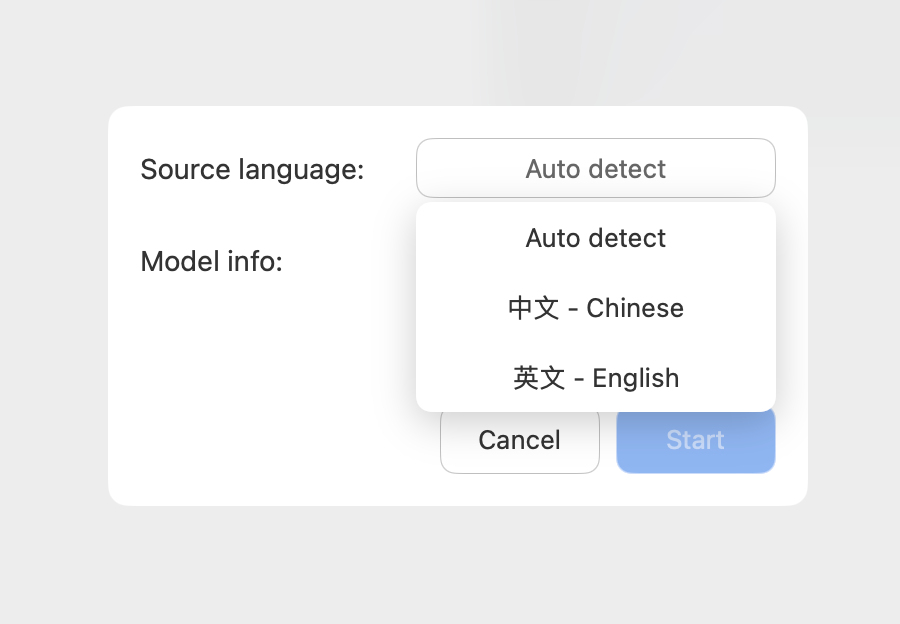
Step2. Configure model and source language
Select the desired model and source language, then click [Start] to execute transcription.
Step3. Edit transcripts
Transcription accuracy varies by AI model and may require manual refinement post-processing. The transcribed text can be further refined through manual editing.
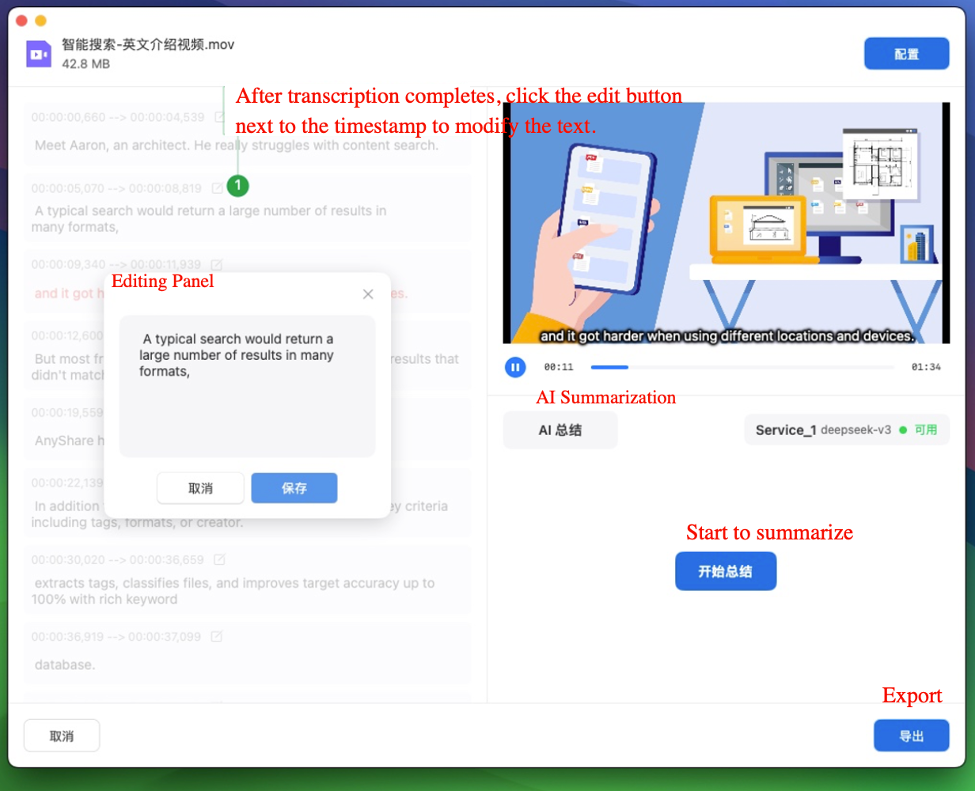
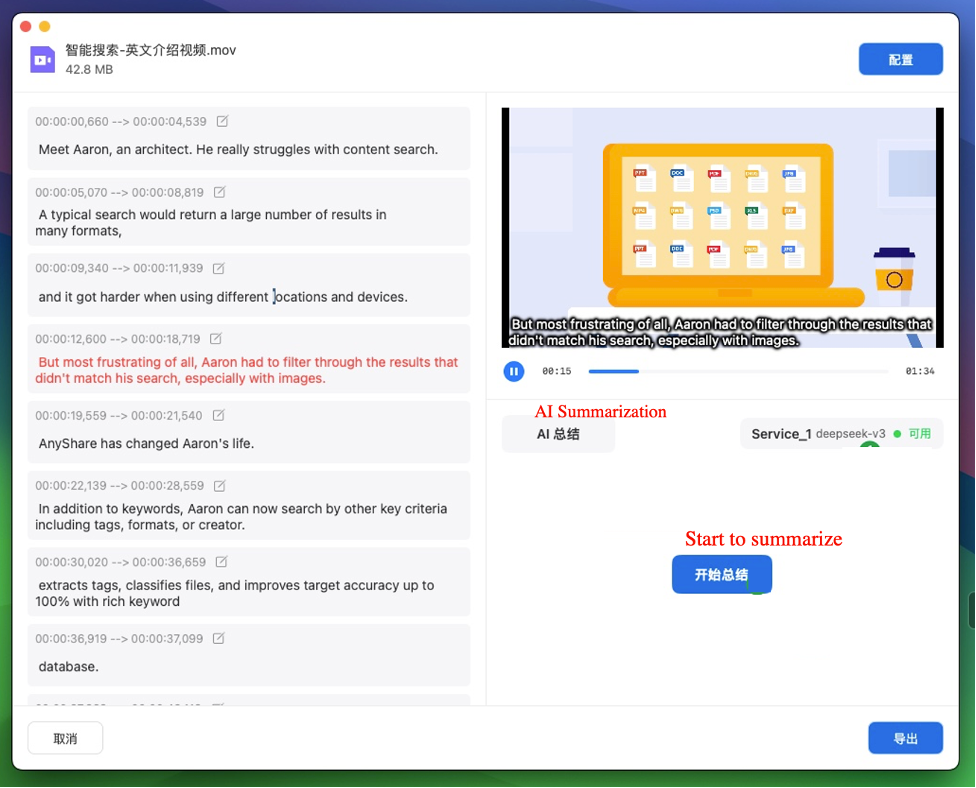
Step4. AI-powered transcription summarization
When third-party services are active, AnyShare enables AI-driven summarization of transcribed content upon completion, facilitating rapid extraction of core information.
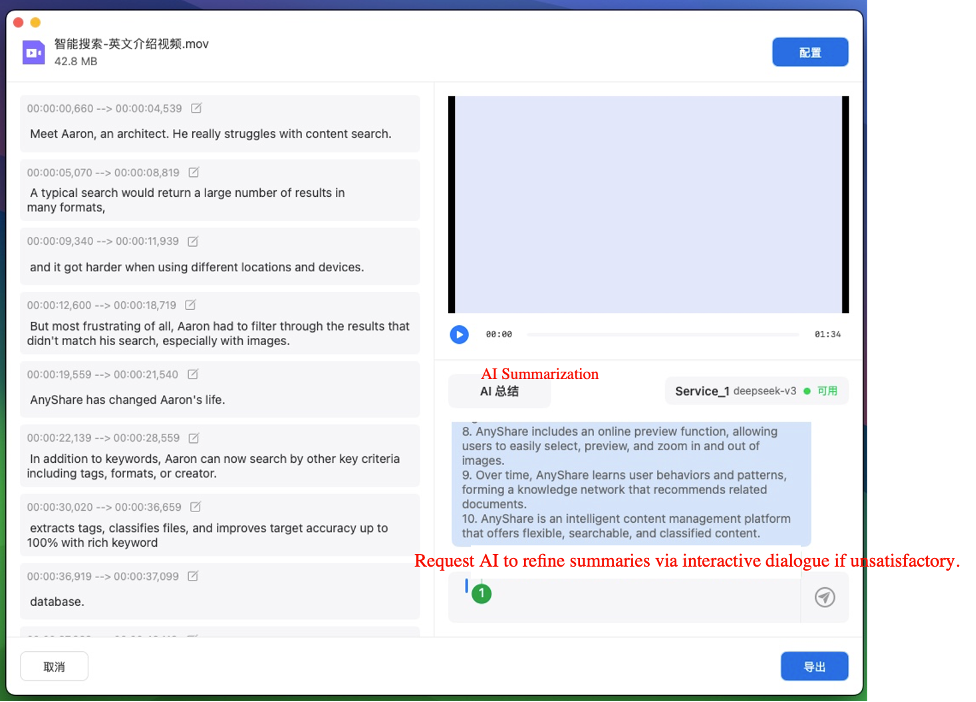
If unsatisfied with the summary, enter conversation mode to submit requests and regenerate the summary accordingly.
Step5. Export transcripts
Upon completing all tasks, click [Export] to save the transcript in multiple formats including:
-
-
- TXT (plain text)
- SRT (video subtitles)
- LRC (lyrics/timed text)
- VTT (WebVTT captions)
- …
-
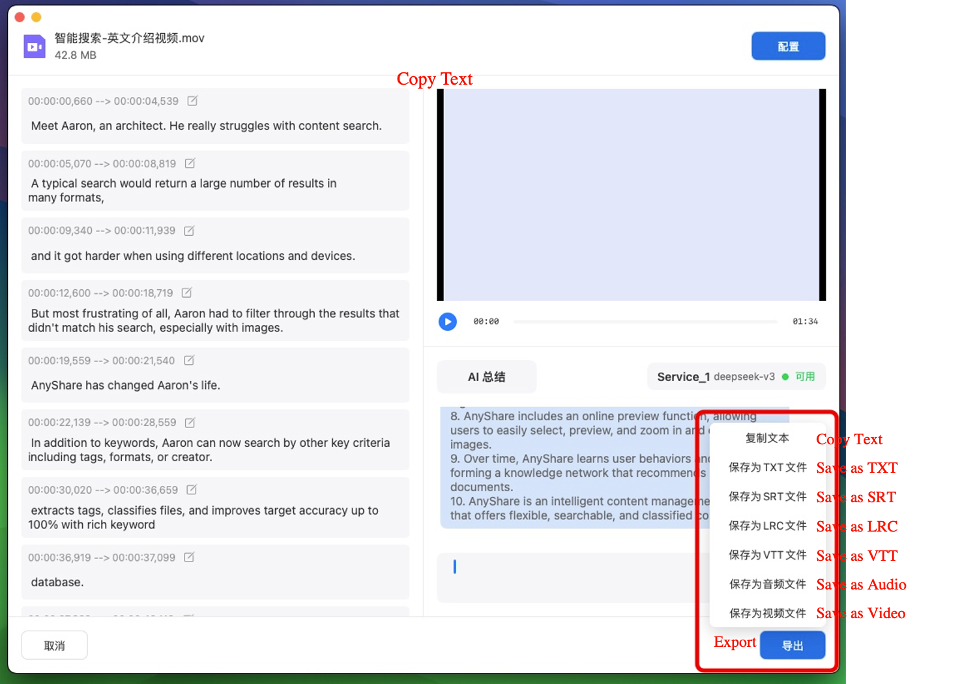
When exporting as video, pay attention to the "Subtitle Method" selection. Choosing "Burn into Video" will permanently embed the subtitles into the video frames.
Real-Time Audio Transcription
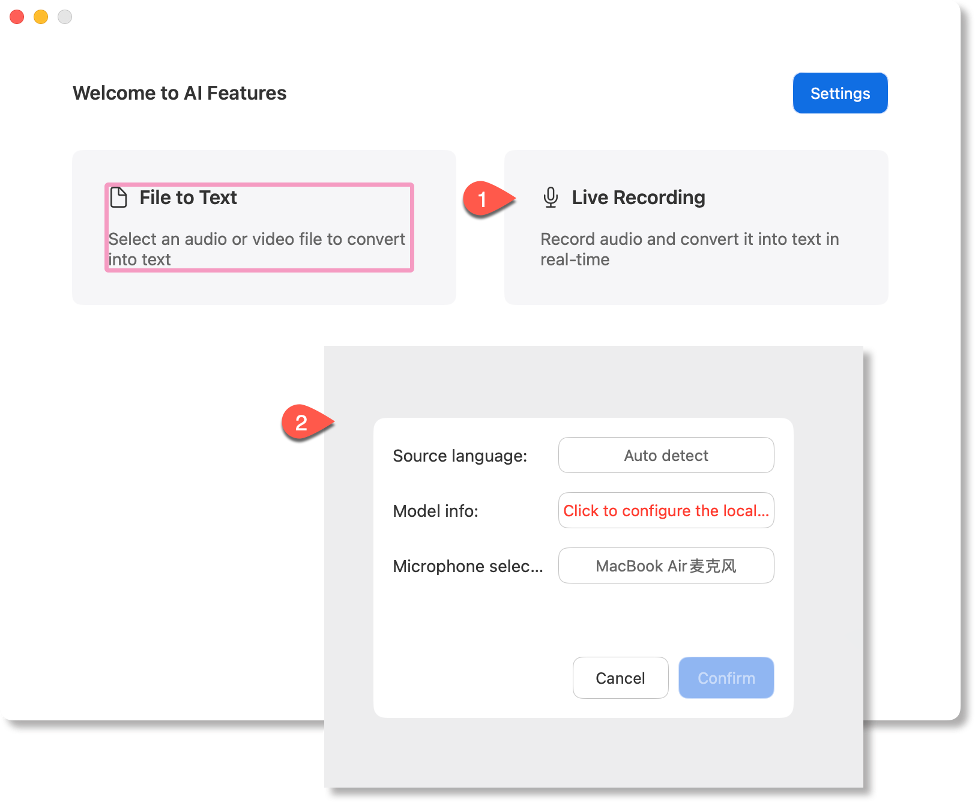
Step1. Configure model and source language
Click [Live Recording], select your preferred model, source language (auto-detection available), and microphone to begin.
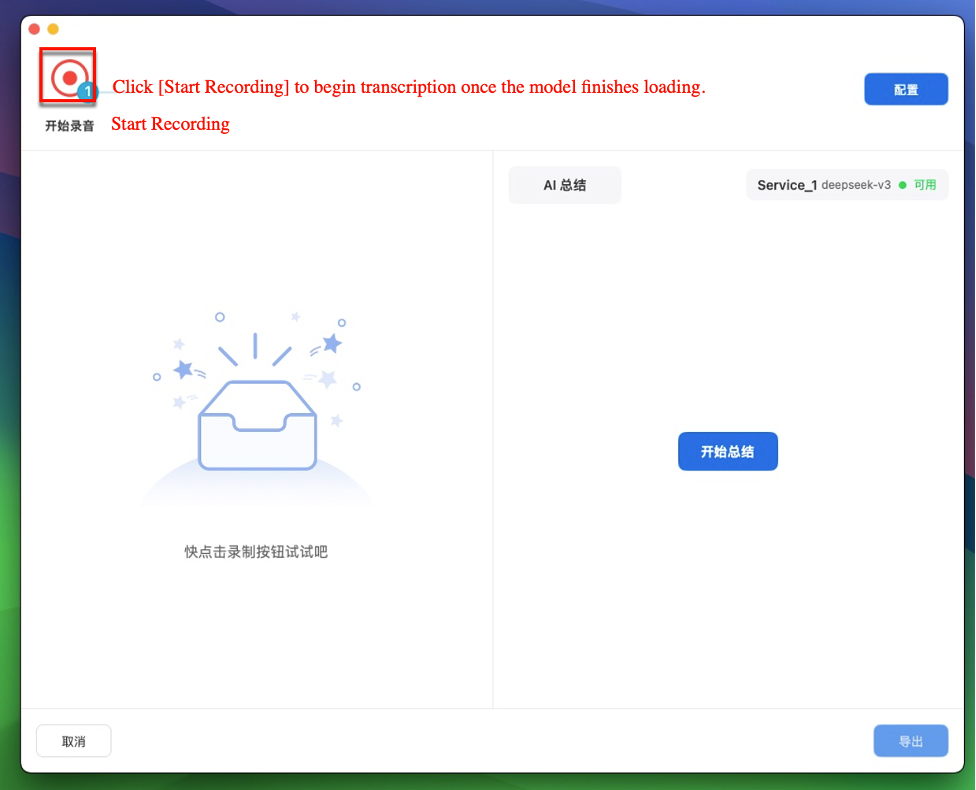
Step2. Start Recording for Real-Time Transcription
Once the model loads, click the [Start Recording] icon to initiate live transcription.
Step3. Edit Transcript
Transcription accuracy varies by AI model and may require manual refinement post-processing. The transcribed text can be further refined through manual editing.
Note: The operation is consistent with the File to Text For detailed steps, refer to Section AI Lab > File to text > Edit transcripts.
Step4. AI-powered transcription summarization
When third-party services are available, AI summarization can be applied post-transcription to quickly extract key content. If dissatisfied with the summary, enter conversation mode to request revisions and regenerate the summary.
Note: The operation is consistent with the File to Text For detailed steps, refer to Section AI Lab > File to text > AI-Powered Transcription Summarization.
Step5. Export transcripts
Upon completion, click [Export] to save transcripts in multiple formats:
-
-
- TXT (plain text)
- SRT (video subtitles)
- LRC (lyrics/timed text)
- VTT (WebVTT captions)
- …
-
Text to Speech
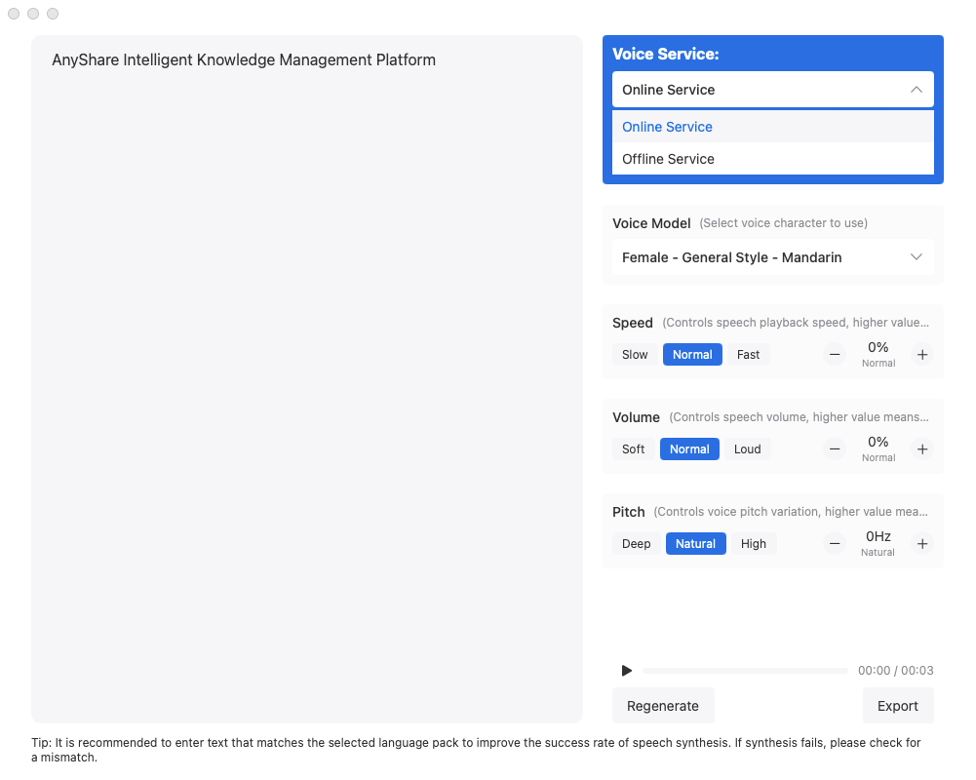
Click “Text to Speech” to access the feature page. The left panel is for text input, and the right panel is for speech conversion settings.
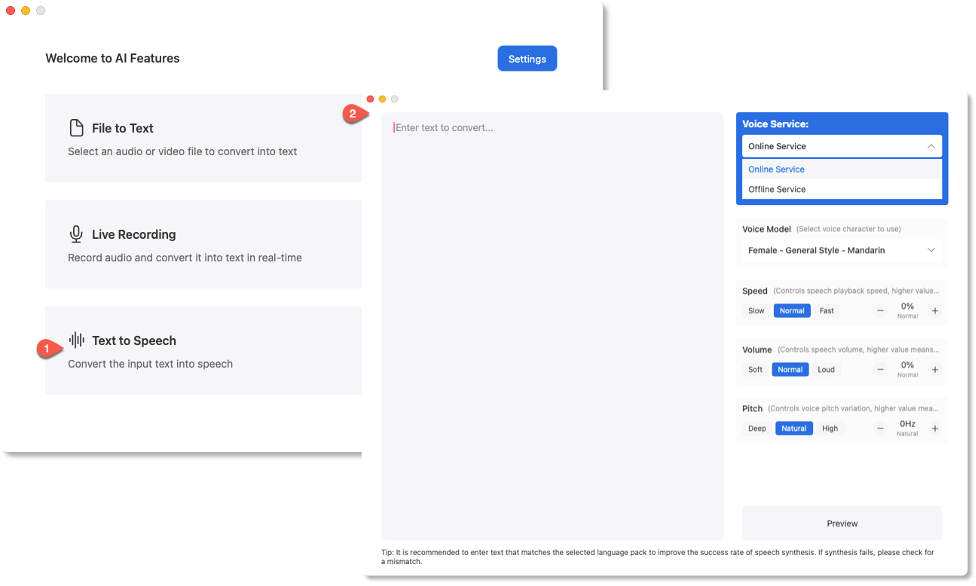
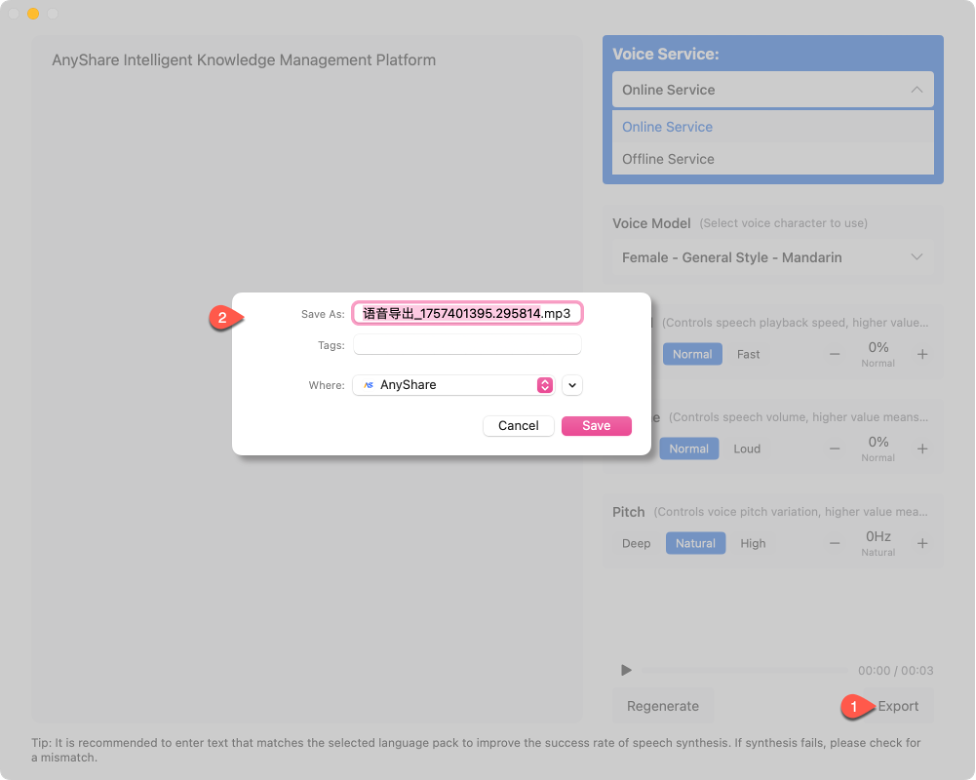
Step1 Select Speech Service
Choose between online and offline services based on network environment and functional needs:
• Online Service: Requires internet access. Supports tone, volume, speed adjustment, and multiple languages (e.g., Mandarin, English, Japanese, Korean, Vietnamese).
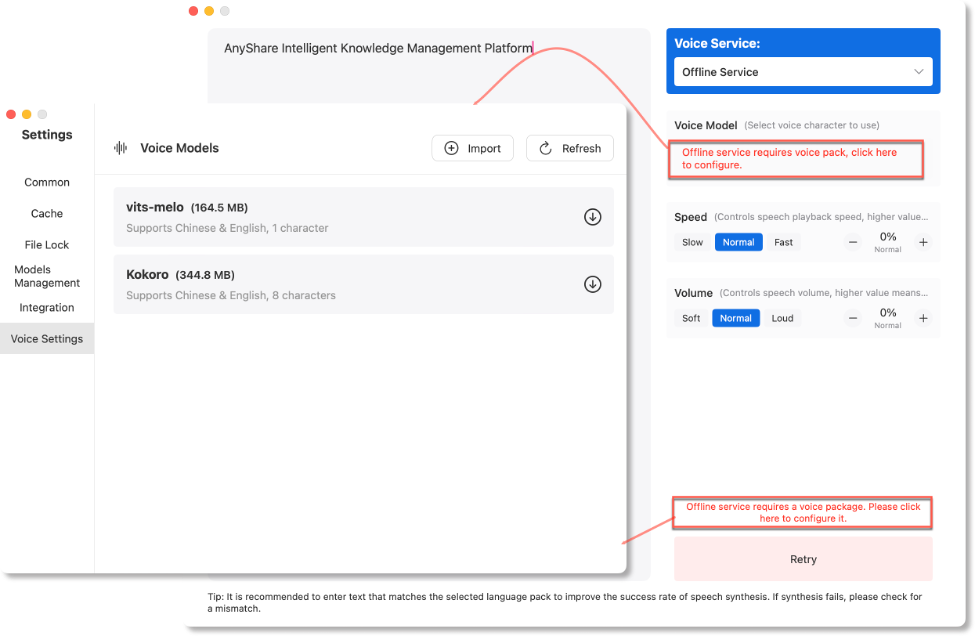
• Offline Service: Requires local model configuration. Supports speed, volume adjustment, and select languages (e.g., Mandarin, English).
Note: Online services require no configuration. For issues, contact technical support. Offline services require downloading and importing local models (see Section 6.2.2 for configuration).
Step2. Debug and Convert Speech
Enter text in the left panel, adjust parameters (tone, speed, volume, language), and click [Preview] to generate the audio.
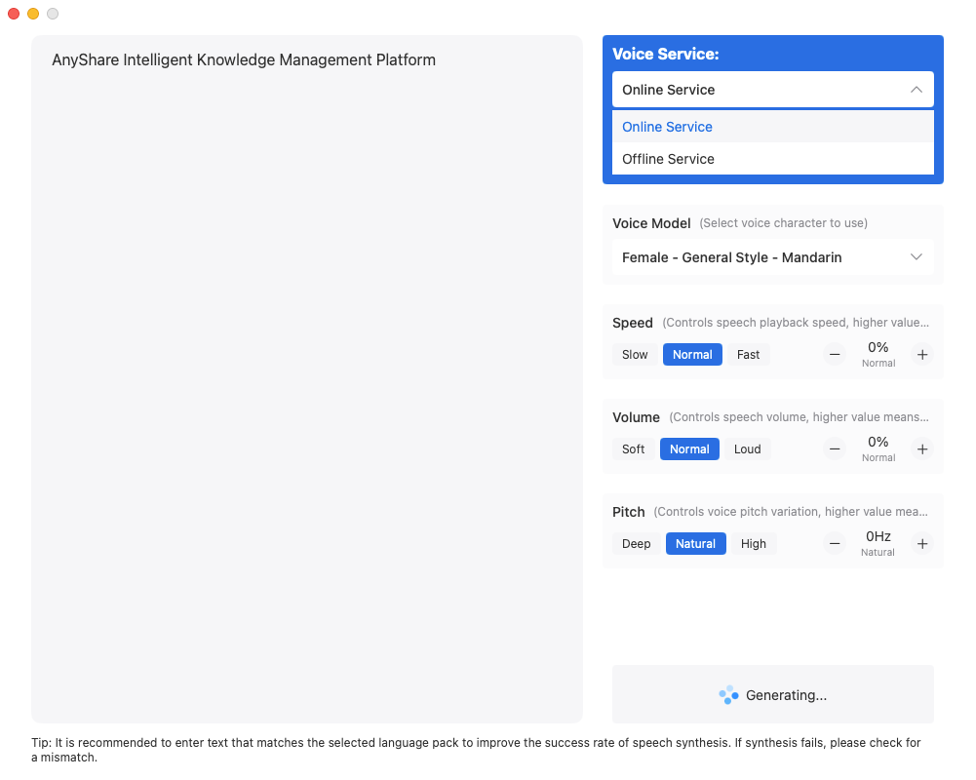
If unsatisfied, adjust parameters and click [Regenerate].
Step3. Export Audio File
Click [Export], set the file name and storage path, then click [Save] to complete.