


In this section, Admin can learn about the operations related to user management, including user roles settings, user group management, message notification message and user statistics.
Set roles to users
On the [Organizations] > [User Management] > [Organizations] page, Admin can select one user and click on [Set Role].
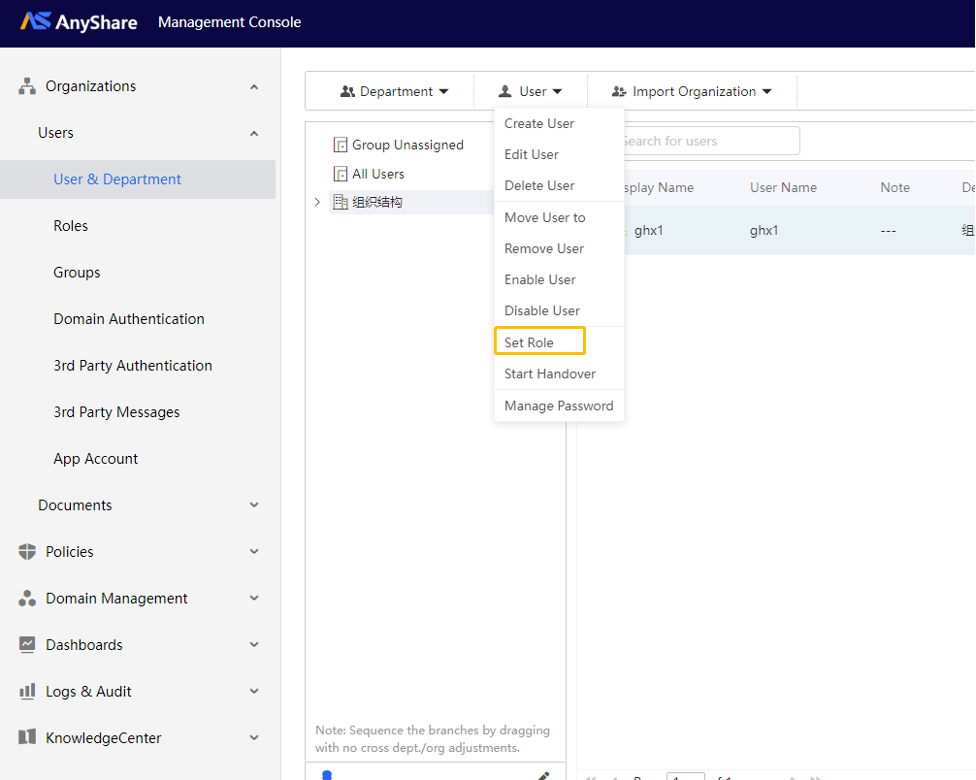
In the new window, Admin can set the selected user as one certain role. Admin can also designate a certain role to any user on [Roles] page, by selecting a rule and clicking [+Add] to add users.

Manage Groups
› What are Groups?
Admin can create Groups in Management Console so that Admin can configure the settings in the unit of Group besides users, department, and organization. Group can contain multiple users, departments, and organizations. An organization, department or user can belong to multiple user groups. User groups cannot contain other user groups.
› When to use Groups?
Users can configure permissions with Groups when sharing. Admin can configure Groups according to the user role: in the sharing scenario of the school, the teacher is expected to share content with all students, while most students are not required to share with teachers. However, the monitor may share files with teachers. In this case, Admin can set all monitors as one Group. Thus, all the teachers can configure permissions directly with them.
› How to use Groups?
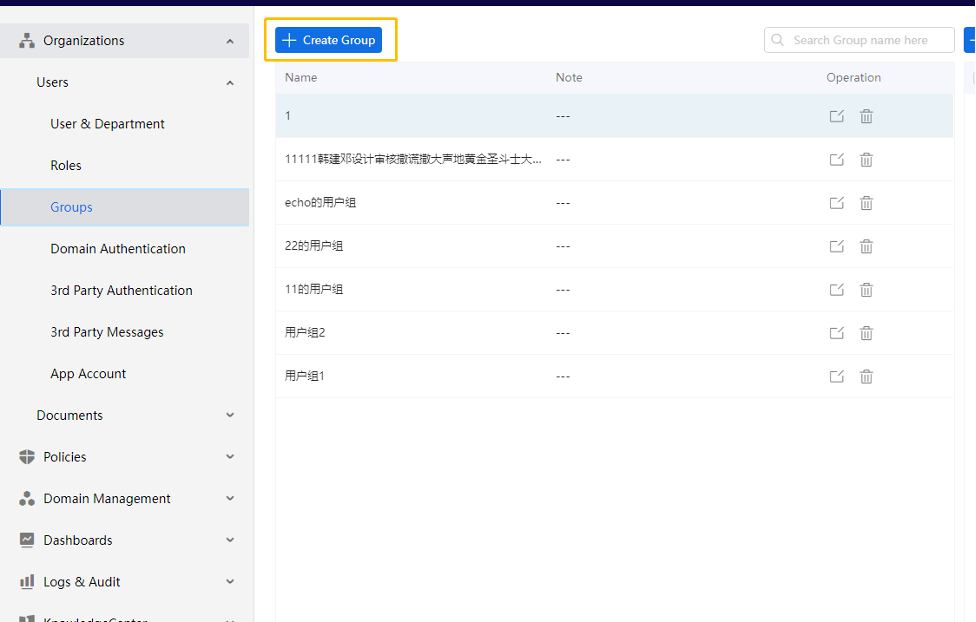
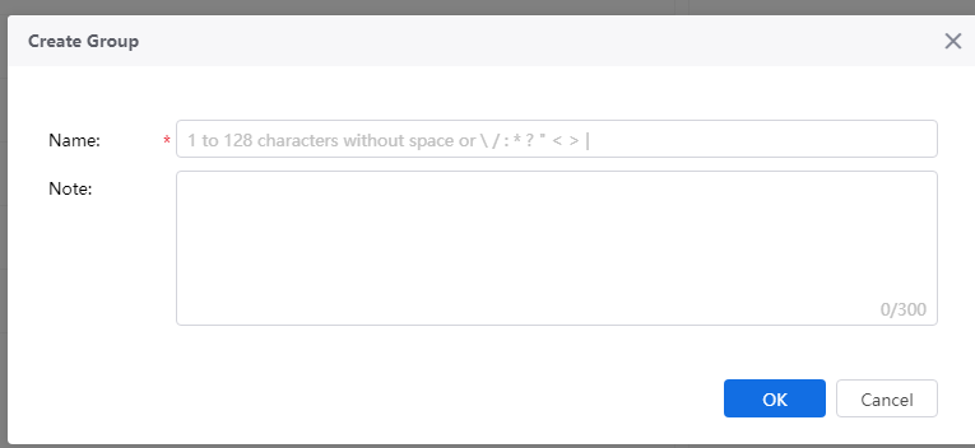
1. Create Group
On [Organizations] > [Users] > [Groups] page, click on [+Create Group] and enter the name of Group.
2. Add Group Member
Click on [Add Member] on the right side of the page, and then you can select the users or departments that you want to add.
Transfer Users’ Work
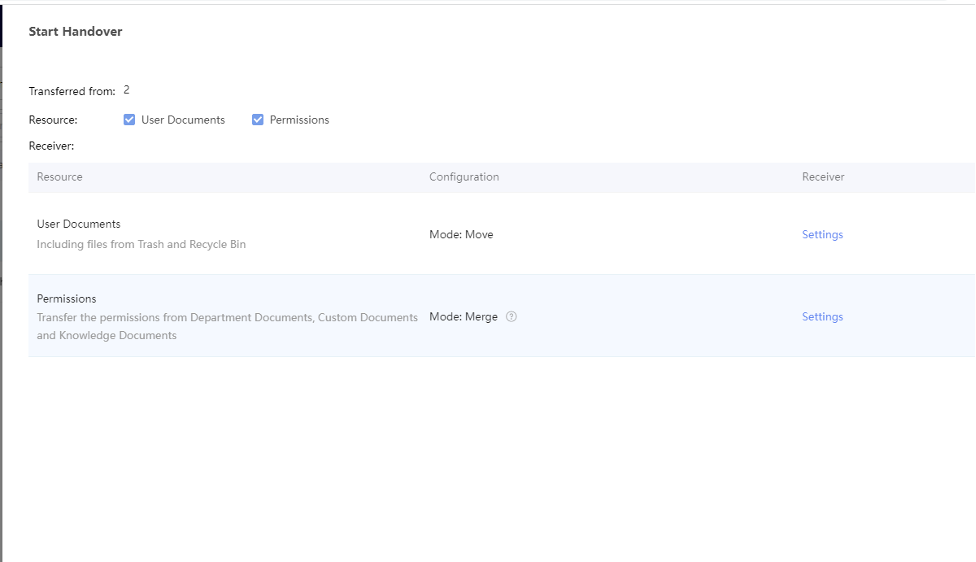
If any user leaves the current organization, what should Admin do to transfer his/her documents?
Admin should select the user and select [Start Handover] from [User] of the top menu bar.
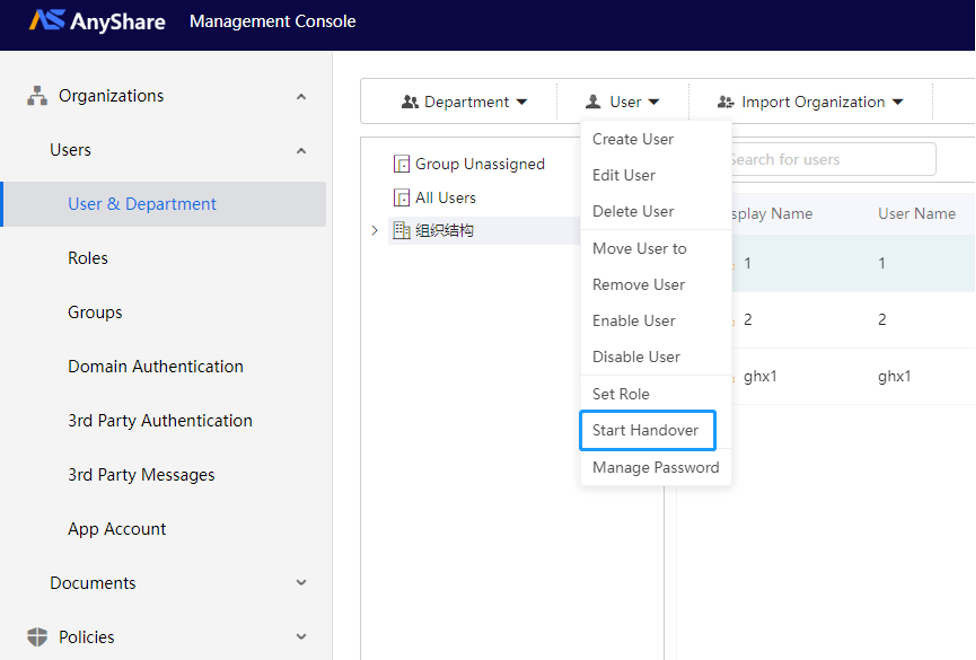
Then, Admin enters the Handover page to select the resource and receiver for the work transfer. On the new page, Admin can transfer the User Documents and Permissions of the certain user to other user’s Documents.
App Account Management
Application accounts serve as dedicated credentials for business systems to integrate with AnyShare via Open APIs, enabling core functionalities including data storage, permission configuration, and user access control. These accounts are categorized into:
-
- External Application Accounts: Third-party system integrations (e.g., WeCom, Ding Talk)
- Internal Application Accounts: AnyShare-native service accounts (e.g., "KnowledgeCenter", "Document Relay")
Administrators can create and manage external application accounts through the management console. Click [+Create] to access the creation page, specify the account name and password to create a new account.
Note: AnyShare will automatically generates an Account ID upon successful creation.
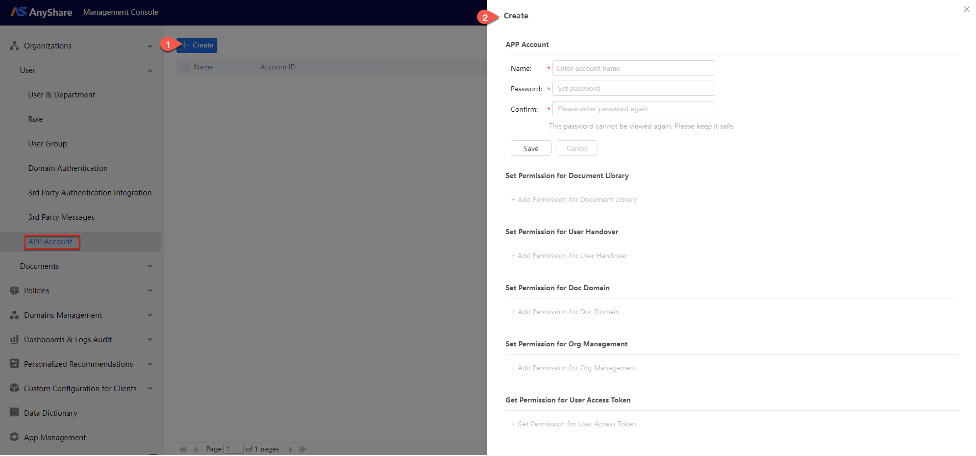
Upon successful creation, administrators may configure application account permissions including documents access, user handover rights, document domain controls, organizational management privileges, and access token authorization, with additional granular permissions configurable by documents type.
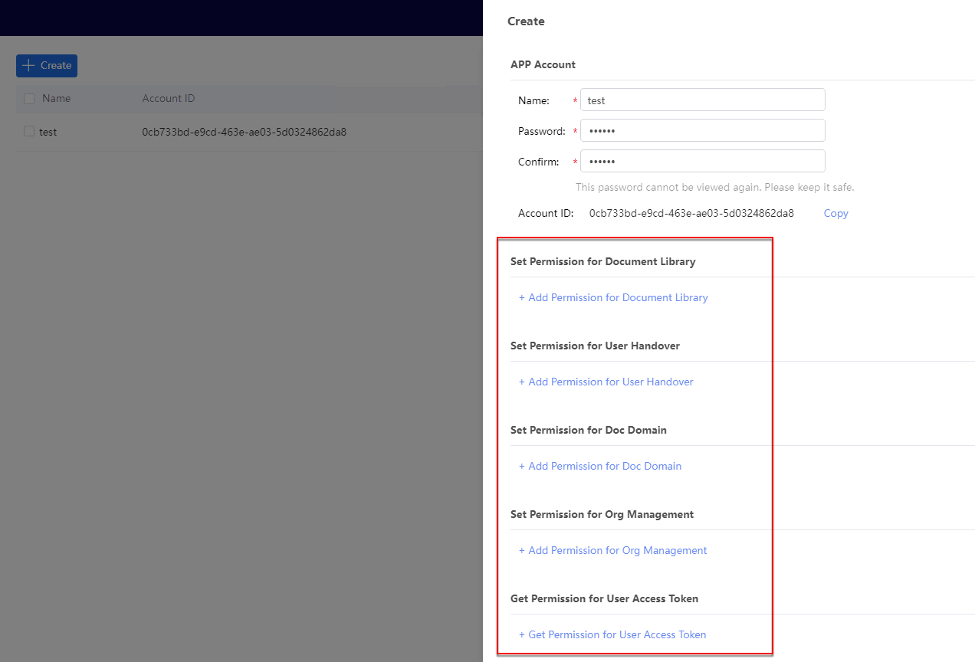
Permission Configuration Guidelines:
-
- Set Permission for Documents: When enabled, administrators must select the corresponding document library type to set the required access levels.
- Set Permission for User Handover: When enabled, authorized accounts may process user handovers within the organization.
- Set Permission for Doc Domain: Requires clicking [Save] to activate after enabling.
- Set Permission for Organization Management: Mandates explicit permission settings for users, departments, and user groups.
- Get Permission for User Access Token: Confirm with [Save] to enable.