


Add/Import Users, Departments, Organizations
You can create multiple organizations for business groups, which are independent of each other.
Enter [Organizations] > [Users & Organizations] page, you can create, edit, as well as delete organizations.
After the organization is created, you may create departments. Still, on this tab, select the organization you'd like to create, then click [Department] and click [Create Department].
The created organizations or departments can be edited or deleted. Changing the site and email address and moving departments and users to other departments or organizations are also supported.
Create Users
Users are the AnyShare accounts that Admin manages. Admin can create users and make configurations for them via the following steps:
1. Enter [Organizations] > [Users & Organizations] page.
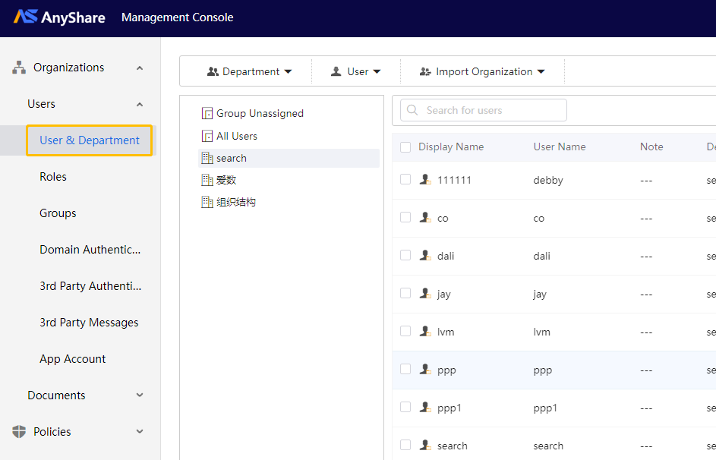
2. Select the organization where you'd like to create users.
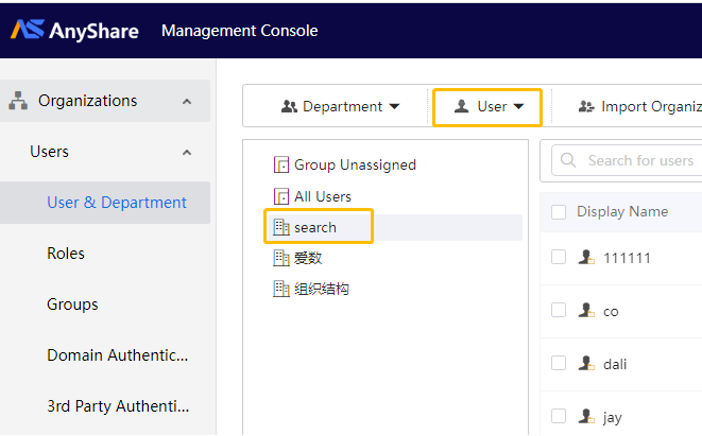
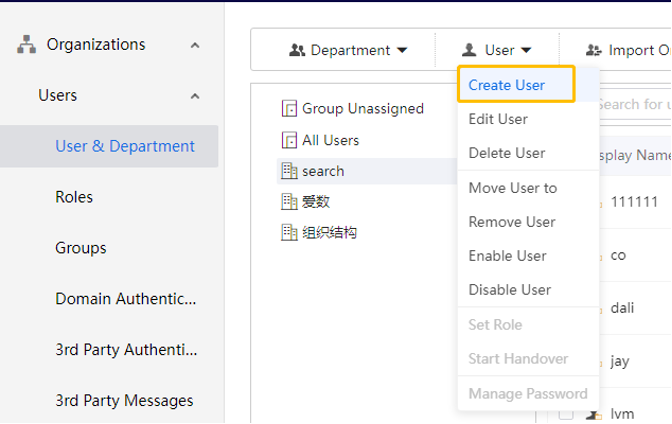
3. Click [User] and choose [Create User].
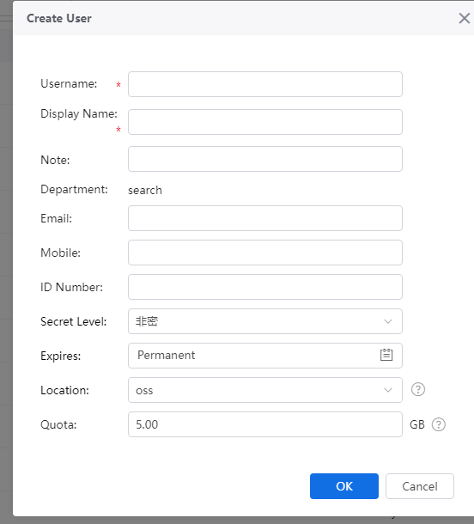
Step4. Type the basic attributes of the user into the pop-up window.
Admin can edit, delete, remove and move the created users. Setting roles for them is also supported.
Admin can import organization for AnyShare users via domain controller or ODL files.
Import Domain User
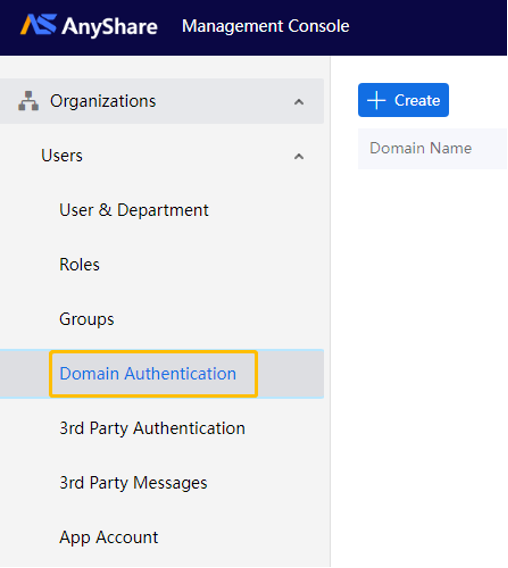
1. Enter [Organizations] > [User] > [Domain Authentication] page to add a domain controller first.
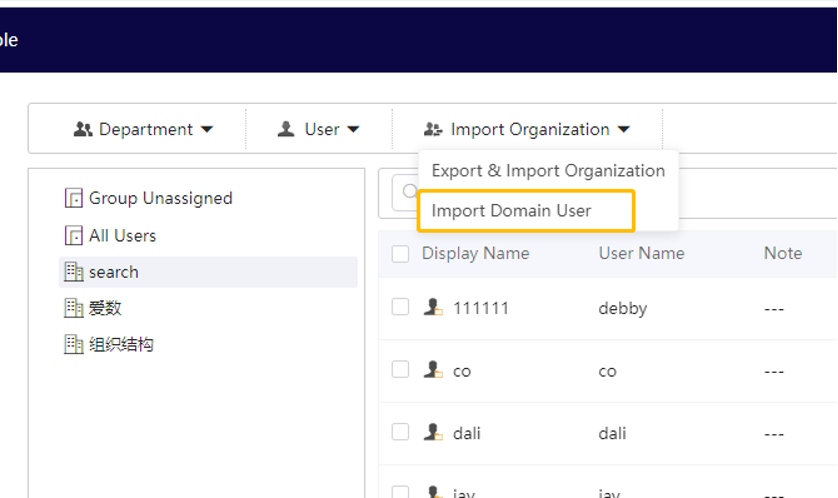
2. After the domain controller is enabled, go to [Organizations] > [User] > [User & Department] page and click [Import Organization].
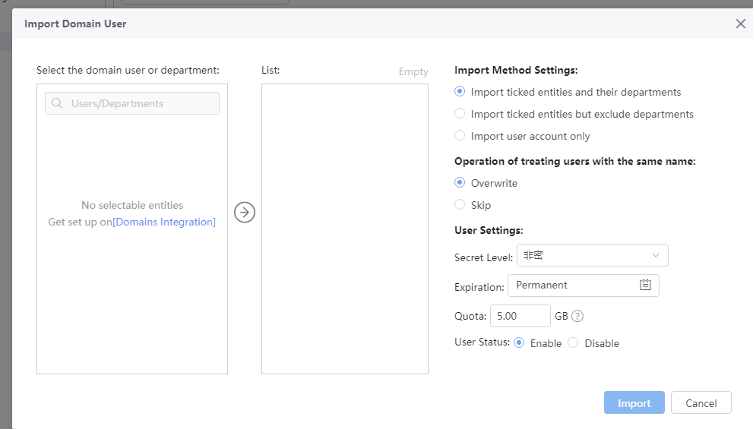
3. Make configurations in the pop-up window and click [Import].
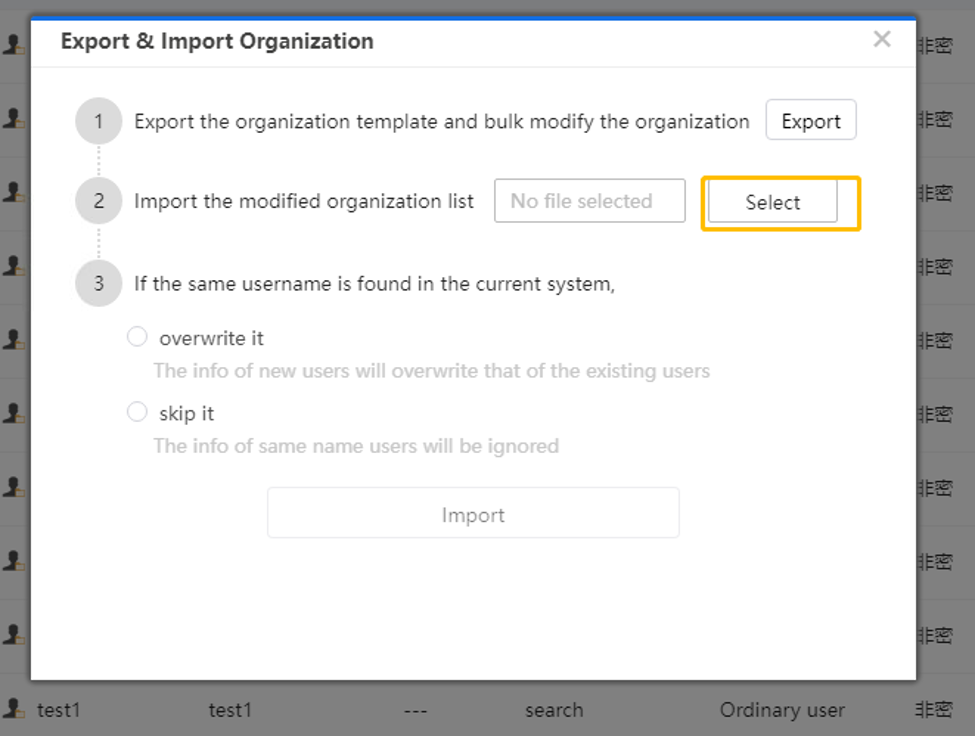
Export and Import Organization
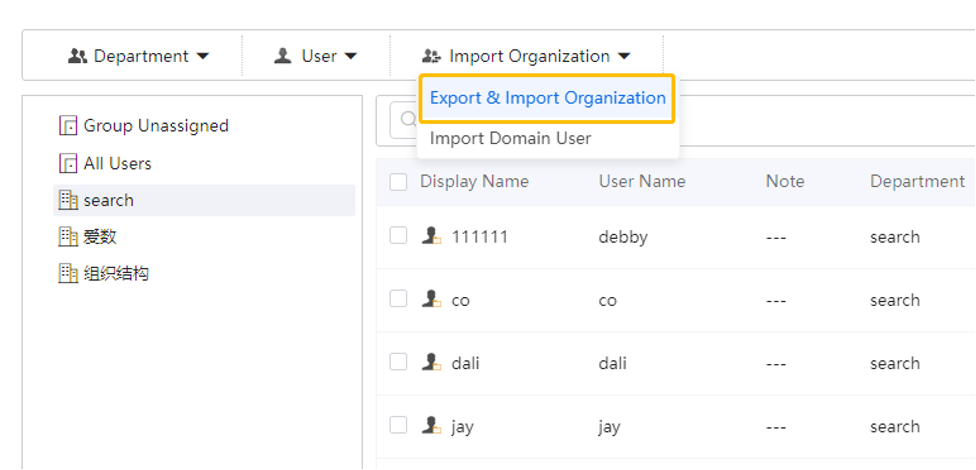
1. Click [Organizations] > [User] > [User & Department] > [Import Organization] > [Export] and Import Organization.
Then you will export the default Excel of AnyShare. You can fill in the user information in the form and save it.
2. Click [Select] from Export and Import Organization window, select the excel file you saved in step 1.
When importing users, you can choose to overwrite or skip the users with the same name.
Create Documents
To facilitate users to categorize and collaborate on documents according to different scenarios, AnyShare Family 7 reclassifies document libraries into User Documents, Department Documents, Custom Documents, and Knowledge Documents which are suitable for personal mobile office work, inter-departmental document collaboration and other document storage scenarios, respectively.
The following steps will show how to add, edit, delete Department Documents.
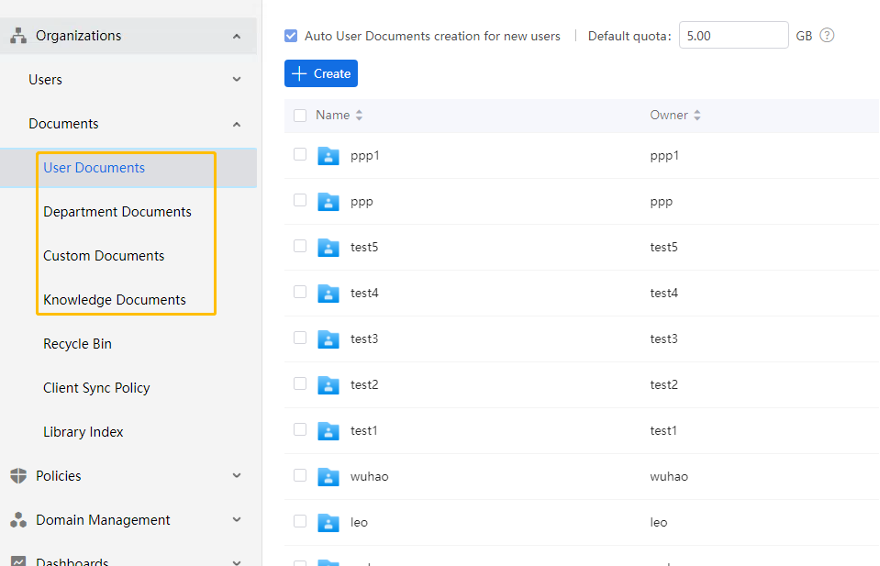
User Documents
User Documents is designed for the personal space for office work, which is used for synchronous protection of the user’s office documents, allowing for mobile office work, desktop document backup, etc. Other users have no permission to view the content by default.
Note: User Documents are managed by Super Admin, System Admin or Organization Admin can manage User Documents within their jurisdiction.
For example, on the [Organizations] > [Documents] > [User Documents] page, Admin clicks the [+ Create] button, on the pop-up page, select the location and fill in the quota, then click the [OK] button below to create successfully.
Figure-Create User Documents
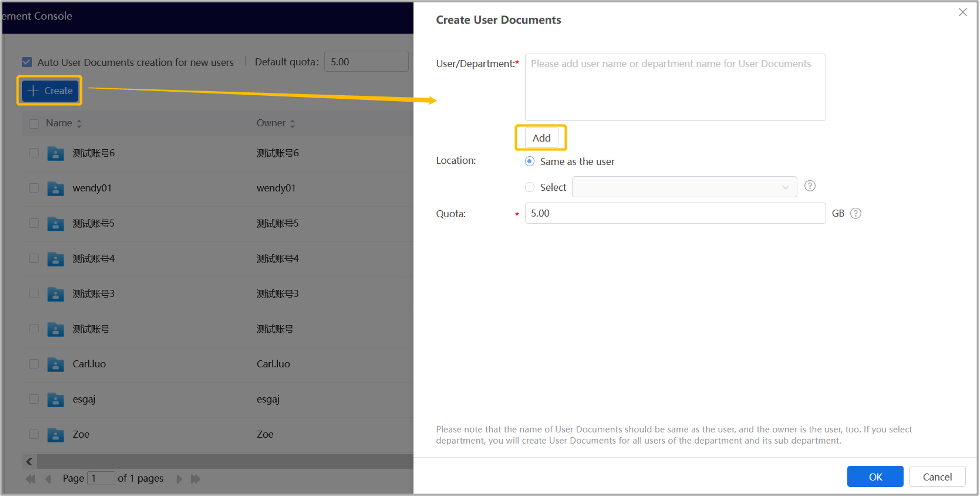
In addition, if the admin checks “Auto User Documents creation for new users”, then when a new employee is added to the enterprise or organizational unit, a user document will be created for him/her automatically, reducing the workload of enterprise IT administrators.
Figure-Auto User Document creation for new users

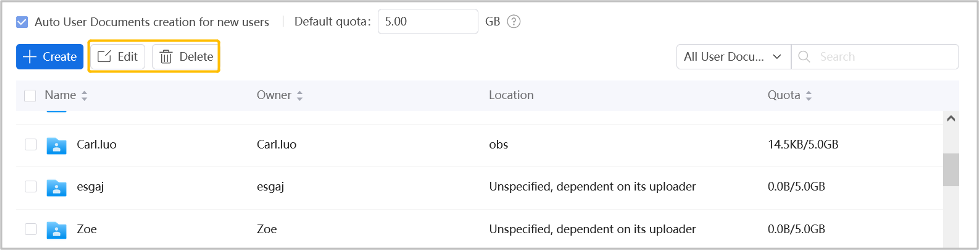
For User Documents that have been created, Admin can modify the quota. If a user has left the organization, Admin can delete their User Documents.
Figure-Edit and Delete the User Document
Department Documents
The document space belonging to the department only, which is used for departmental document management and collaboration based on the organization structure.
Note: Department Documents are managed by Super Admin, System Admin or Organization Admin can manage Department Documents within their jurisdiction.
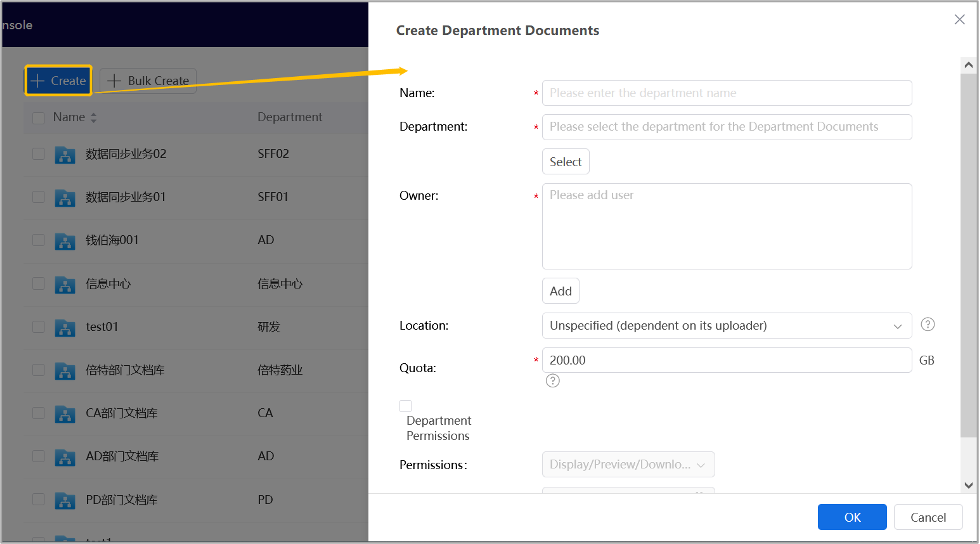
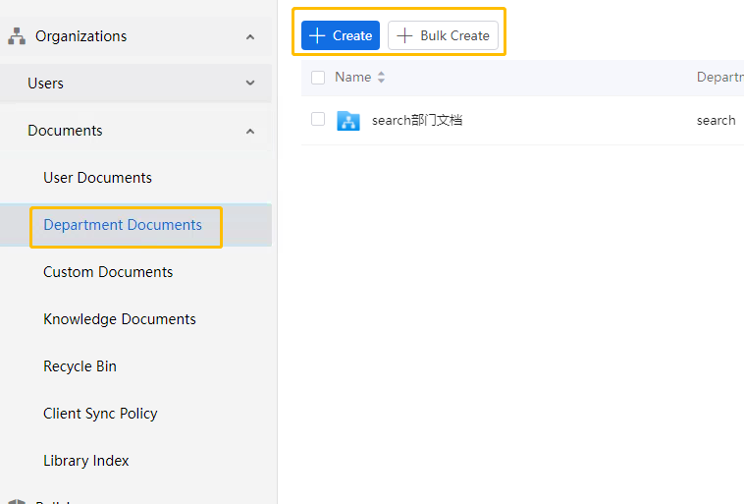
From [Organizations] > [Documents] > [Department Documents], administrators can click [+ Create] to:
1. Name the resource and assign departments
2. Designate an owner and storage location
3. Set quota limits and permissions
Department permissions define the access rights for the assigned departments, with the default setting granting permanent view, preview, and download privileges. Administrators may customize these permissions by adjusting the access levels (e.g., edit or share capabilities) and modifying the validity period as needed.
Once all configurations are complete, the administrator finalizes the process by clicking the [OK] button to save and apply the settings.
Figure 1-8 Create Department Documents
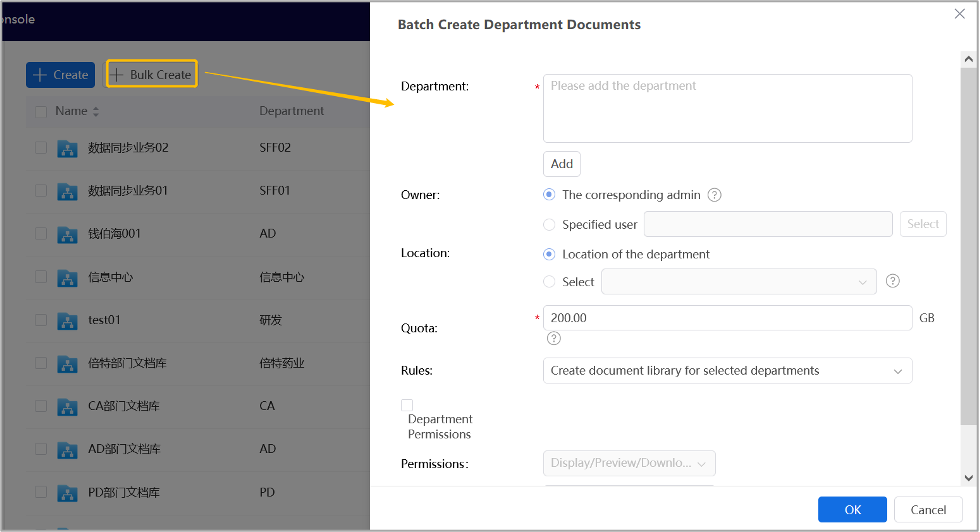
Admin can create Department Documents in bulk. Batch modification and batch deletion are supported for created Department Documents.
Figure 1-9 Bulk Create
› Create Department Documents
Click [+Create] or [+Bulk Create], and fill in the fields in the window, including Name, Department, Owner, Location, Quota, then click [OK] to finish.
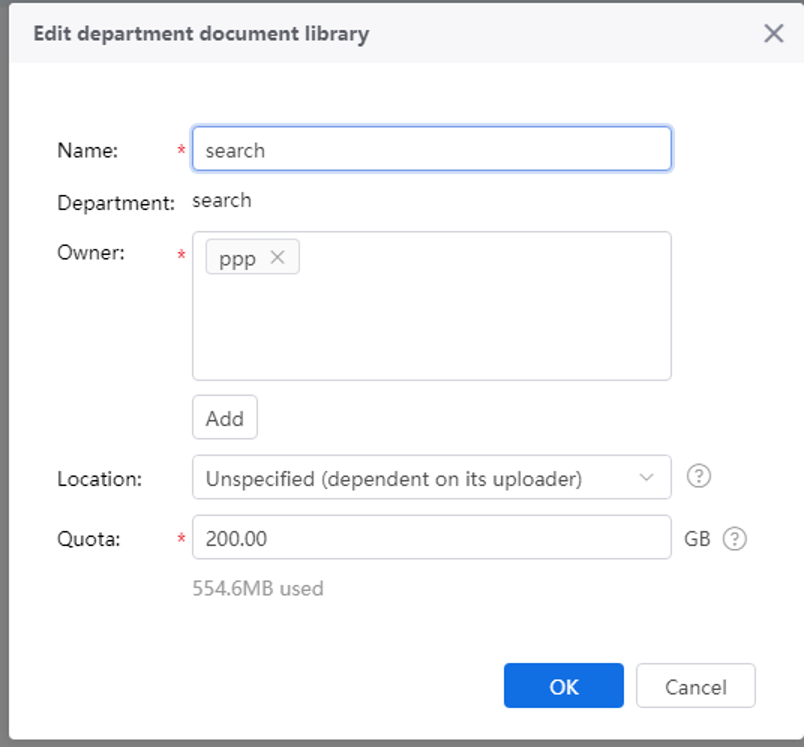
› Edit & Delete Department Documents
Select the Department Documents you want to edit or delete.
-
- To edit it, you can change its name, owner, location, and quota.
- To delete it, you will be required to enter a login password to confirm the operation.
Custom Documents
To meet document management needs beyond the preset types. Enterprises can add Custom Documents types based on the situation and create Custom Documents accordingly.
Note: Custom Documents are managed by Super Admin or System Admin, and Organization Admin can manage Custom Documents created by themselves.
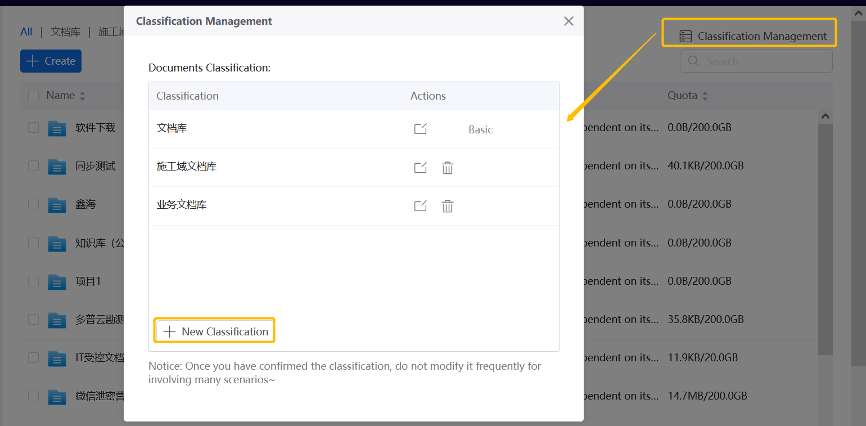
› Classification management for Custom Documents
Admin can add classifications to the Custom Documents in Management Console so that when creating a new custom document, the appropriate classification can be selected and managed. Click the [Classification Management] button in the upper right corner, and click the [+New Classification] to create a new one.
Figure-Create New Classification
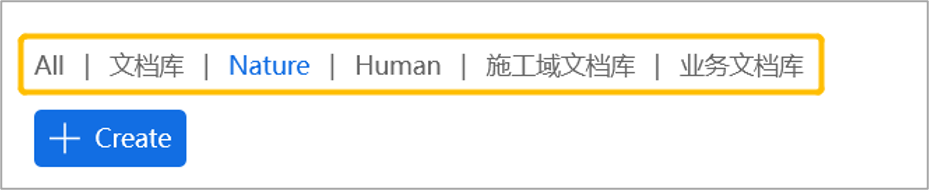
The added document classification is displayed as follows.
Figure 1-11 Document Classification
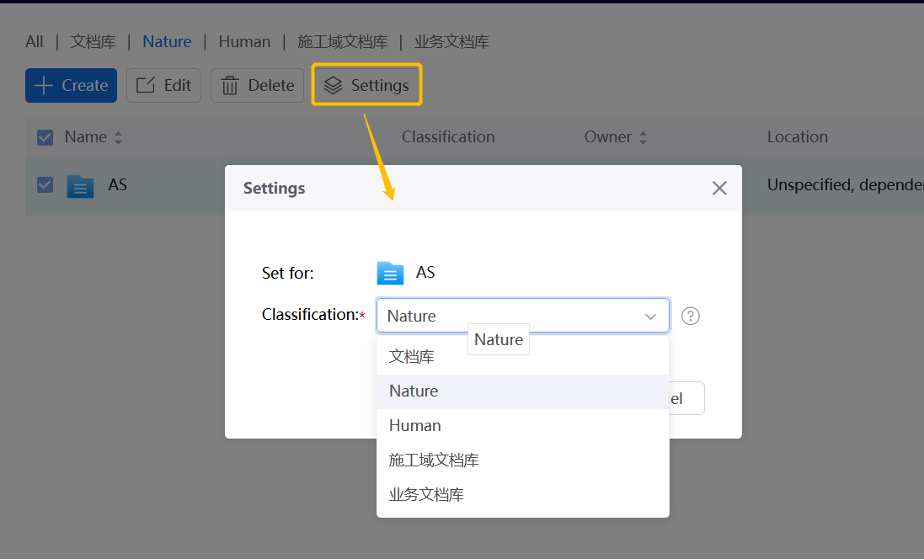
To modify the classification for Custom Documents, Admin should select Custom Documents, click the [Settings] button, in the pop-up box select other document classification, and then click the following [OK] button.
Figure-Modify the Classification
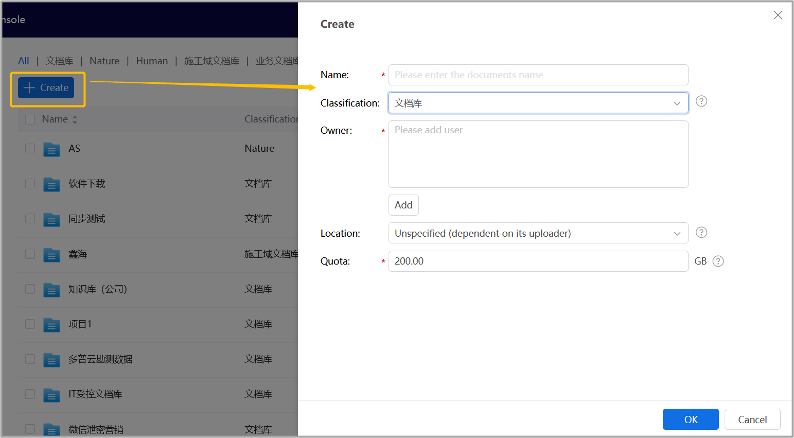
› Create New Custom Documents
Admin enters the [Organizations] > [Documents] > [Custom Documents], clicks the right [+ Create] button, in the pop-up page fills in the name, sets the owner, selects the location, fills in the quota, and then clicks the [OK] button below to create successfully.
Figure-Create Custom Documents
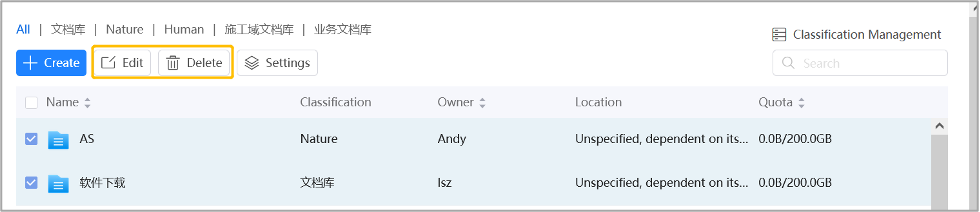
For the created Custom Documents, the admin can re-edit each content in it, and can also delete the Custom Documents.
Figure-Edit and Delete the Custom Documents
Knowledge Documents- Simplified Knowledge Sharing
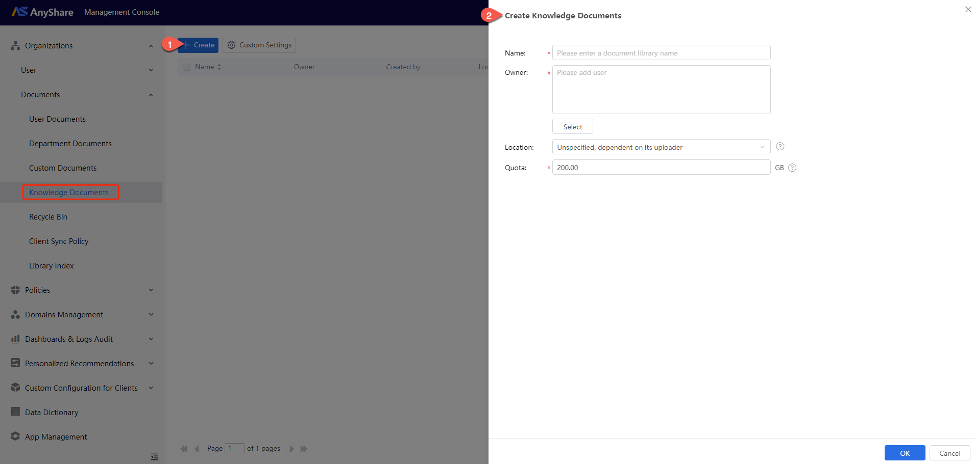
Administrators can create a Knowledge Documents by navigating to [Organizations] > [Documents] > [Knowledge Documents], then clicking [+ Create] to configure knowledge documents name, owner (for management), storage location (optional) and quota allocation in the pop-up window.
Figure-Create a new Knowledge Documents
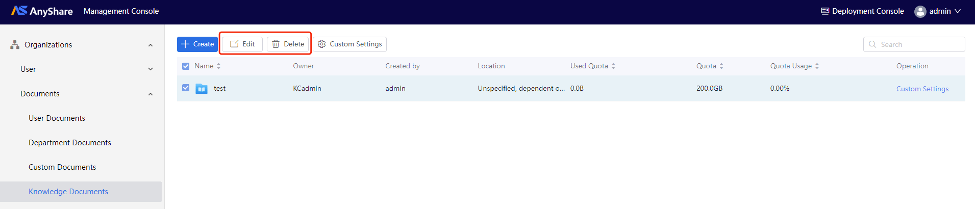
For existing Knowledge Documents, administrators can modify the documents name, owner assignment, storage location, and quota allocation, or permanently delete the knowledge documents if required.
Figure-Edit/Delete Knowledge Documents
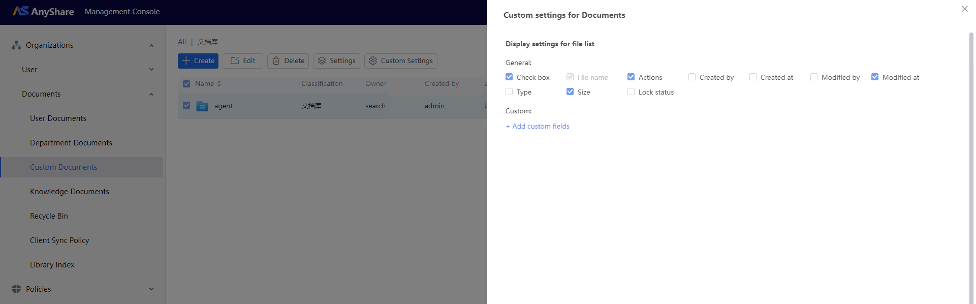
Custom settings for Documents
In order to meet the personalized display of the file lists in Documents for different organizations and users, Admin can click on [Custom Settings] on the User Documents/Department Documents /Custom Documents /Knowledge Documents page to enter the configuration page.
Figure-Custom Settings
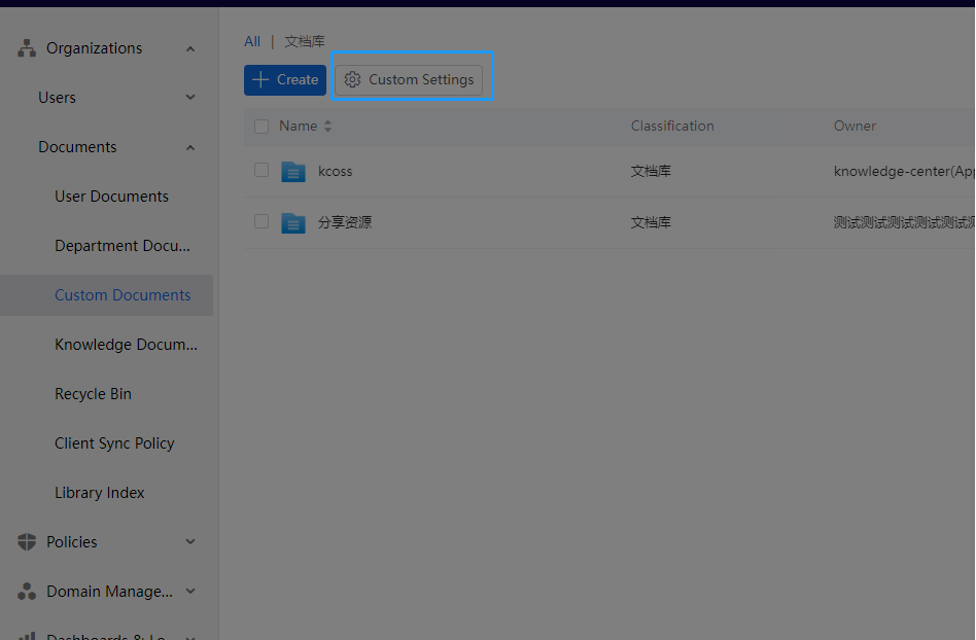
Admin can configure the display settings for end user-oriented document lists on the corresponding page. If you select the corresponding document library and then click [Custom Settings], you can personalize the selected document library. If a specific Documents is not selected and you click on [Custom Settings], it means that the entire document library type is uniformly personalized.
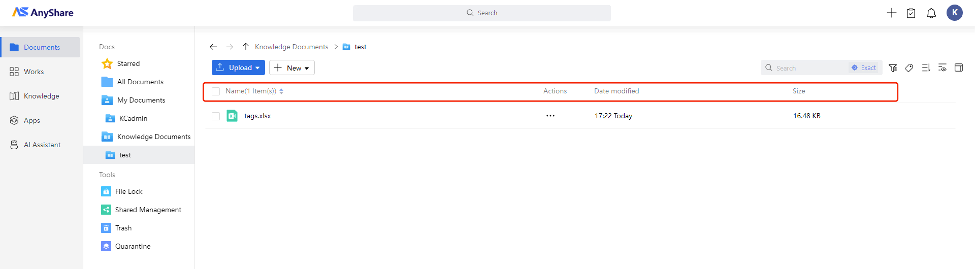
Under the policy control, the file list displayed on the user’s page will remain consistent with the configuration in the previous step.
Set System Recycle Bin
Admin can set the User Documents policy so that the data of User Documents will be cleared periodically.
On [Policies] > [Document Policy] > [Document Settings] page, you can set the retention time for the deleted data from User Documents Trash, as well as the auto cleanup policy.
Recycle Bin in Management Console allows Admin to view and set the [Trash] of each user, including size and recycle policy. Admin can also restore the files that have been deleted by mistake in the [Trash] of any user.
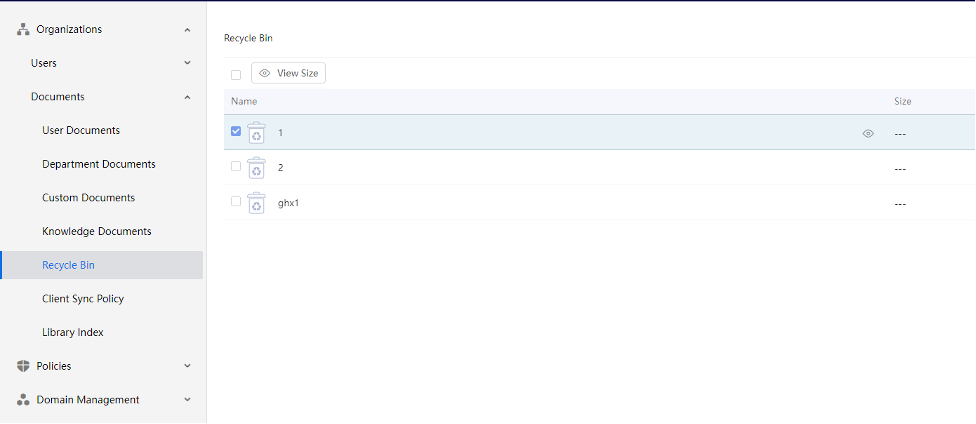
› View the size of Trash for a certain Documents
Select one document library on the [Recycle Bin] page, and click [View Size]. You can see the size, file, and folder count in it.
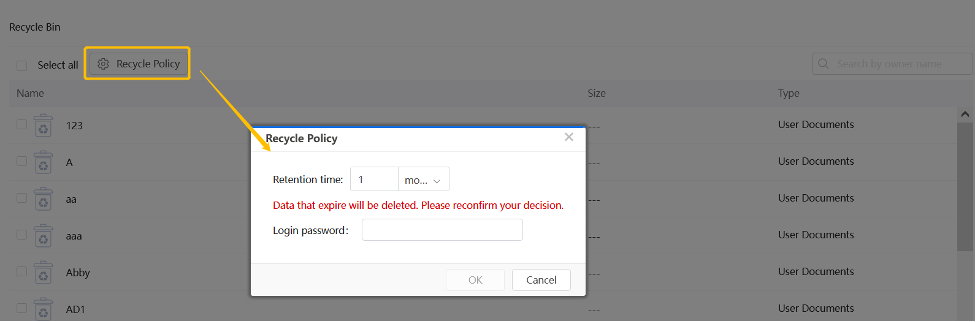
› Configure Recycle Policy
Click on [Recycle Policy] and then you will be able to set the retention time for each [Trash]. Data that expire will be deleted permanently. For further concerns, you will be asked to enter the password.

› Recycle Bin Policy
In AnyShare, files deleted in Trash will be relayed to the Recycle Bin in Management Console where the Admin can restore these files to avoid maloperations.
Figure-Restore files in Recycle Bin

Also, the Recycle Policy can be set to clear files exceeding the retention time, avoiding deleted files’ taking up too much space.
Figure-Set Recycle Policy
Note: If the user has already set the retention time as [Permanent] in Trash, then the [Recycle Bin Policy] will be blocked in Management Console and the data will not be cleared automatically.