


In the digital transformation era, data security remains paramount for enterprises to operate smoothly. AnyShare provides comprehensive protection through features like illegal content control, antivirus services, watermark policies, version history, trash management, remote data wipe, and device disablement.
Illegal Content Control
With vast amounts of content generated daily in Documents, security is critical. AnyShare safeguards against inappropriate content (e.g., violence, pornography) that could disrupt organizational operations by automatically scanning and quarantining problematic files.
Illegal content control in AnyShare includes the control for illegal content and sensitive words. By analyzing the content, content that has been involved in political issues, pornography, and infringement will be isolated and controlled in Quarantine, which will further prevent data loss.
› Configuration
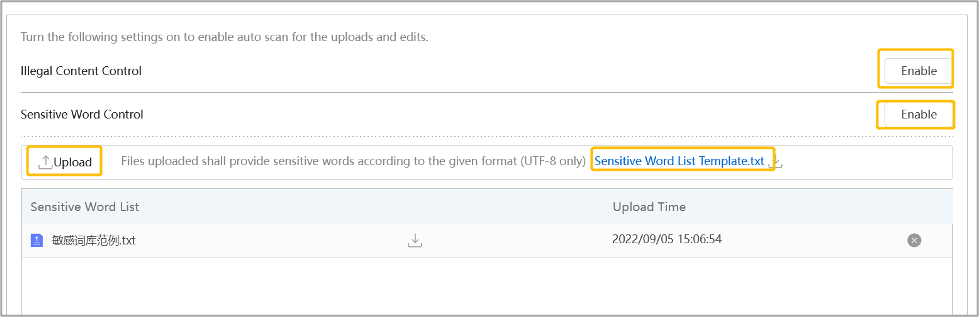
This requires the Administrator to enable [Illegal Content Control] and [Sensitive Words Control]. After this, the Administrator should upload the sensitive words library (.txt file).
The following is an example. Users can download this .txt file, add some sensitive words based on their business needs and then upload this file again.
Figure-Upload sensitive word list
› How Illegal Content Control Works?
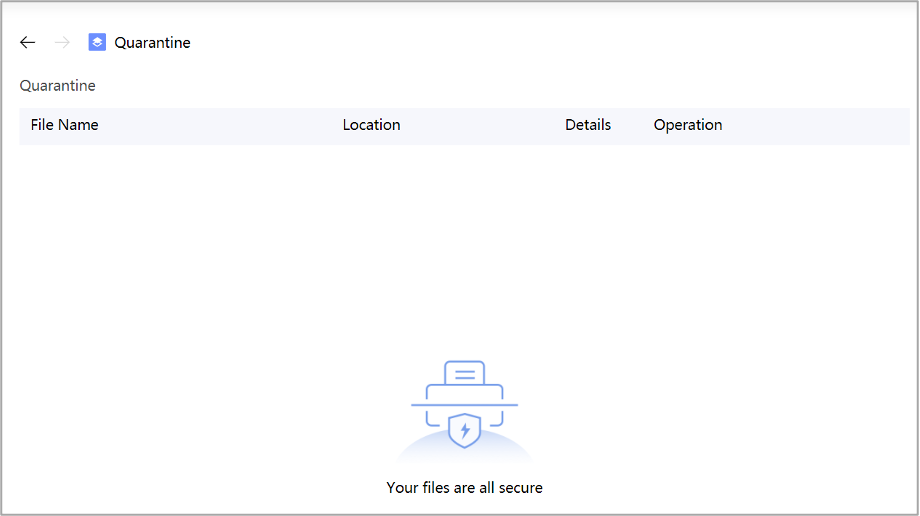
When enabled, AnyShare automatically scans all newly uploaded or edited files. If a file contains sensitive words, it will be temporarily quarantined while simultaneously notifying both the uploader and Administrator.
Note: Only the uploader and the Administrator have permission to view this file in Quarantine.
Figure-Quarantine
› Manage Quarantined Files
Quarantined files can only be managed by either the file owner or system administrators. Users who disagree with the quarantine decision may file a complaint with supporting reasons or choose to delete the file entirely.
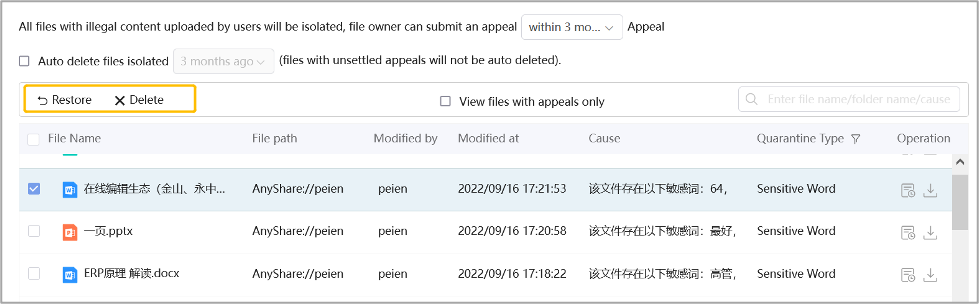
Here’s what the Administrator in Management Console can do: View all the quarantined files; set the time range when the uploader can file a complaint; set automatic deletion of the quarantined files within a certain period. After that, users may choose to restore or delete the files and can only delete quarantined files uploaded by themselves.
Figure-Quarantine in the Management Console
Real-time Antivirus
An increasing number of organizations have realized the necessity of antivirus due to the frequent virus attacks. The purpose of the document antivirus is to discover and quarantine the infected files uploaded to AnyShare by users, preventing them from spreading.
› AnyShare Real-time antivirus mechanism
AnyShare provides antivirus services, which are in the combination with the third-party antivirus service, detecting viruses after uploading to ensure document safety. It supports functions such as real-time antivirus of uploaded files, full scan, and custom document library antivirus. For the antivirus of uploaded files, a trigger mechanism is adopted to create a task and notify the server to kill the virus in real-time. For the full scan, the Administrator can create an antivirus task manually and manage the scan task.
Figure-Enable real-time antivirus service

› How to trigger the antivirus service?
To use the real-time antivirus service, first, the Administrator should deploy this service on Deployment Console, configure the virus database, and enable the service on Management Console. Next, all the files uploaded on AnyShare by users will be scanned automatically. Once the file with viruses is discovered, it will be saved in Quarantine temporarily, and a notification will be sent to the user. The users can check all the quarantined files in Quarantine, including files carrying viruses and sensitive words.
Figure-Quarantine
› How to deal with the files in quarantine?
If files containing viruses are in quarantine, please refer to the approaches above in Illegal Content Control.
Watermark Policy
Watermarks have always been widely used. The watermarks used to be added to books for anti-counterfeiting. With the advancement of the information era, watermarks have been frequently used in working, especially in governments, confidential institutions, financial organs, securities and banks to safeguard files, prevent stealing and trace their origins.
› Introduction to watermark policy
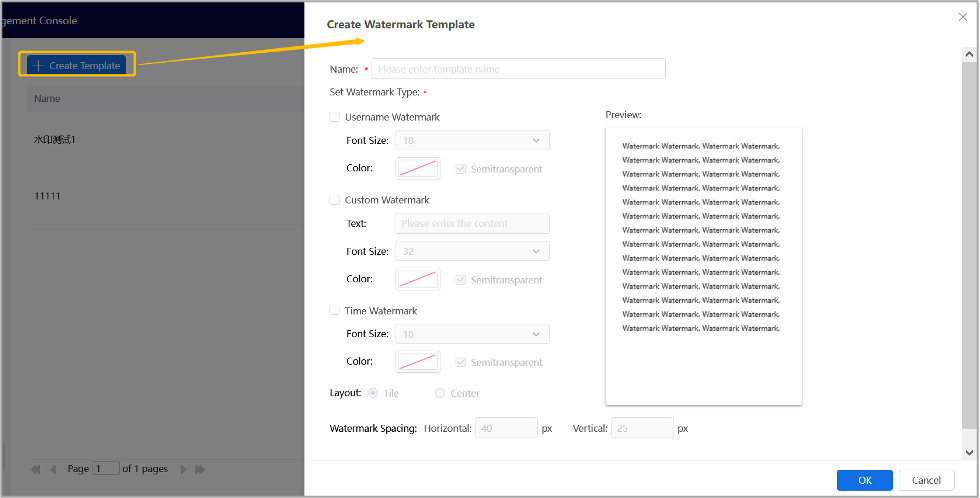
Watermarks can be divided into three types: user name watermark, time watermark, and custom watermark. The user name and time watermark refer to adding the user name and time of actions to the file when users preview or download files, which can be used to trace the person responsible for the disclosure and thus ensure the security of internal files; custom watermark means that the Administrator can customize the watermark content to declare personal/company copyright and avoid stealing or tampering with files for external use.
Figure-Watermark template
› How to configure the watermark for Documents?
To add a watermark to the file when sharing, the Administrator needs to configure the preview/download policy on Management Console. Watermarks can be added to User Documents, Department Documents, or documents accessed by the specified users or anyone (Master Document or Sub Document) in Custom Documents.
Figure-Configure preview/download policy
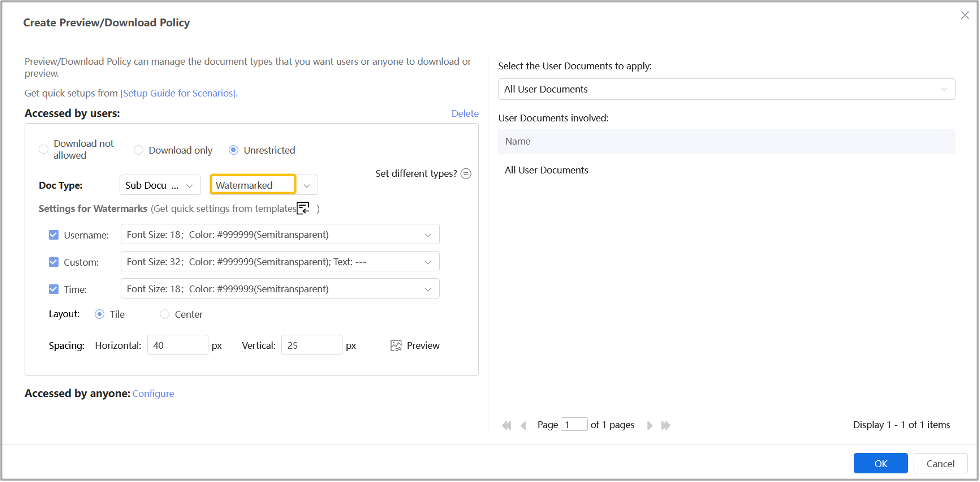
After adding the watermark, whether users open this file on AnyShare or via SharedLink, they can only view the file with watermarks. When downloading, users with permission to edit can download the original file without the watermark, otherwise, only the file with the watermark that has been transferred to the pdf format can be downloaded.
Version History
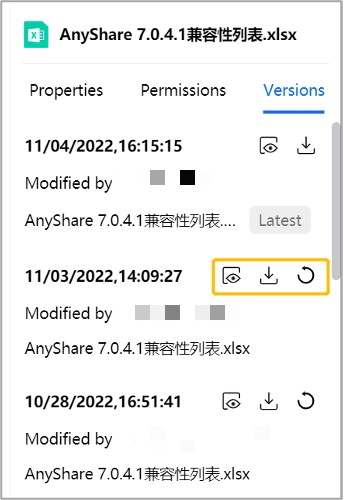
We often need to edit or modify files frequently in our work and sometimes it is unavoidable that the files are tampered with, modified or deleted by accident. What do to next? Find the version history of the related files. In AnyShare, users can view and restore any version history and compare different versions (an Office plug-in needs to be installed) so that users can easily find out who has made modifications and when.
Figure-Version Management
Trash
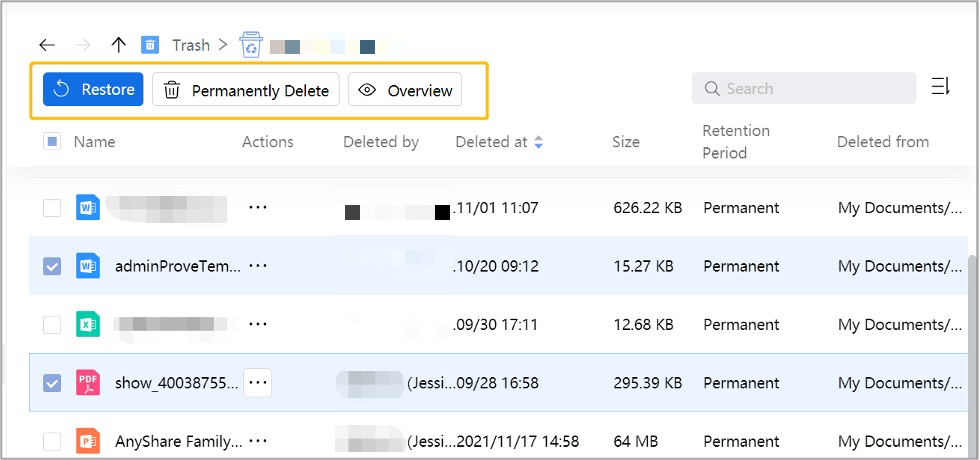
AnyShare automatically moves accidentally deleted files to Trash, where users can restore them individually or in bulk.
Figure-Restore deleted files
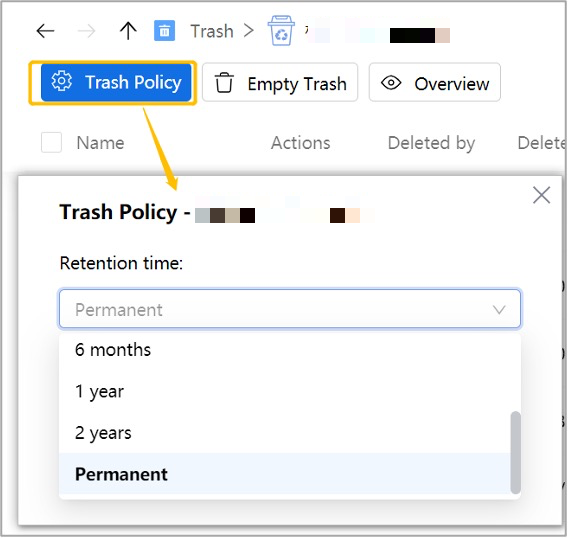
At the same time, the retention time of the files in Trash can be set. When the time is up, files will be deleted from Trash and thus the cloud disk storage will be saved.
Figure-Set trash policy
Recycle Policy
AnyShare provides Trash in the Client to help users find files deleted by accident. But how to restore files deleted in Trash?
In AnyShare, files deleted in Trash will be relayed to the Recycle Bin in Management Console where the Administrator can restore these files to avoid maloperations.
Figure-Restore files in Recycle Bin

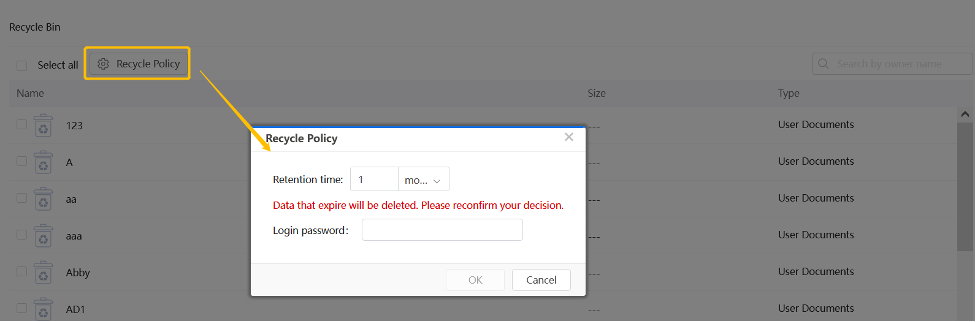
Also, the Recycle Policy can be set to clear files exceeding the retention time, avoiding deleted files’ taking up too much space.
Figure-Set Recycle Policy
Note: If the user has already set the retention time as [Permanent] in Trash, then the [Recycle Policy] will be blocked in Management Console and the data will not be cleared automatically.