


Create an AI Assistant
› Who can create an AI Assistant?
By default, all users can create personal AI assistants for individual use, while only administrators can create organization-wide system assistants with configurable access controls (by department/user).
Note: Administrator additionally manage AI Assistant Template via Save as Template during creation.
Personal assistants appear under My AI Assistants, system assistants in All AI Assistants with role-based visibility.
Create & Pulish an AI Assistant
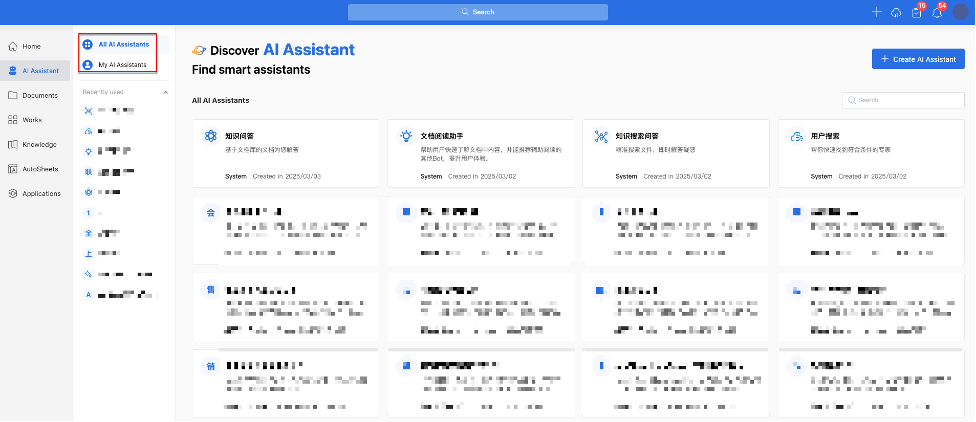
To create a new AI Assistant, navigate to the AI Assistant page, which displays both system-wide and personal listings.
Click [+Create AI Assistant] to access the creation page.

Figure AI Assistant Creation Page (Admin view)
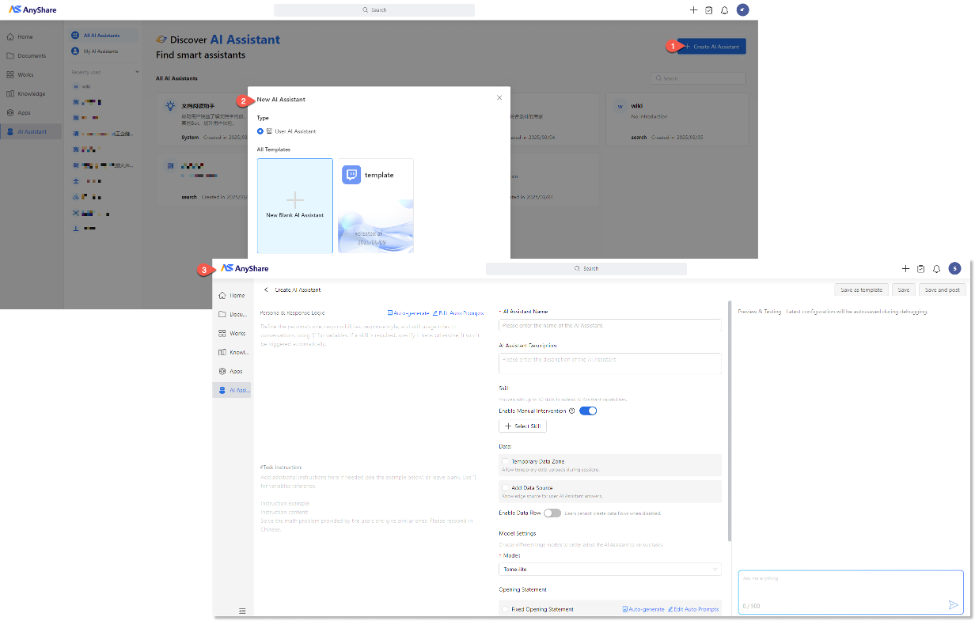
Figure AI Assistant Creation Page (User view)
› Configuration Workflow
1. Select AI Assistant Type (Admin Only)
Administrator can create two types of AI Assistant:
• User AI Assistant: Created by both admins and users, visible in both "All AI Assistants" and "My AI Assistants" lists.
• System AI Assistant: API-based for system functions (e.g., text expansion). Created and managed exclusively by admins, visible only in their "My AI Assistants" list.
Note: Regular users can only create User AI Assistants by default, with no type of selection option available in the interface.
2. Select AI Assistant Template(Optional)
Users may choose between two creation method:
• Blank AI Assistant: Select [New Blank AI Assistant] for complete customization, requiring full parameter configuration
• Template-based AI Assistant: Select a predefined template, mandating only data source setup with optional parameter adjustments.
Note:
1. Templates only appear if available to users’ permission level.
2. Preset templates require manual data source configuration.
3. Only admins can create templates. (see Create an AI Assistant Template)
3. Configure AI Assistant
After basic information (name/description), configure:
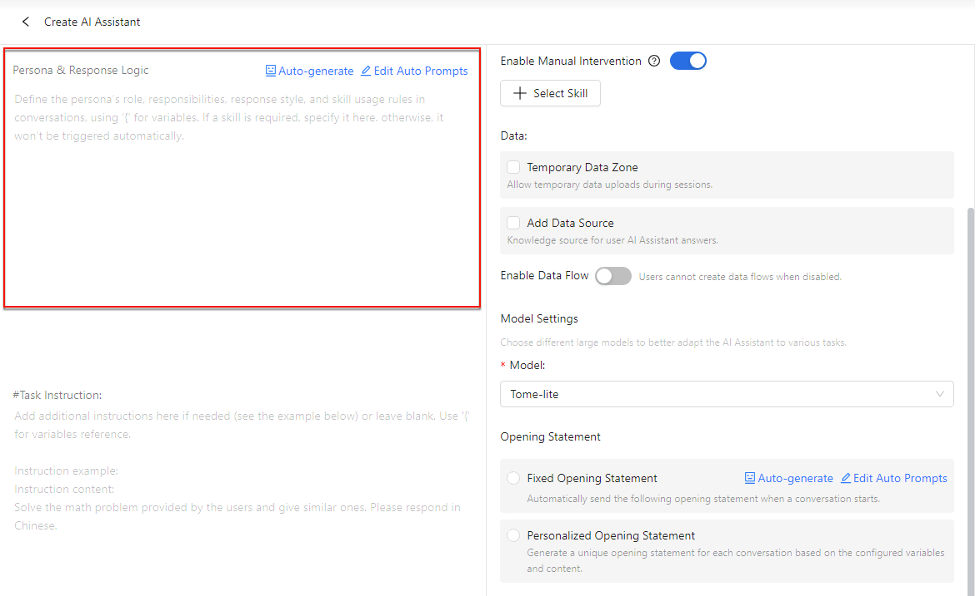
1) Persona & Response Logic
Define the assistant’s role, responsibilities, response style, and skill usage rules in conversations.
AnyShare provides default prompts for auto-generating, click “![]() ” to modify prompts, then click “
” to modify prompts, then click “![]() ” to automatically generate configuration parameters based on your customized prompts.
” to automatically generate configuration parameters based on your customized prompts.
Alternatively, manually enter parameters using the reference format, adapting content as needed.
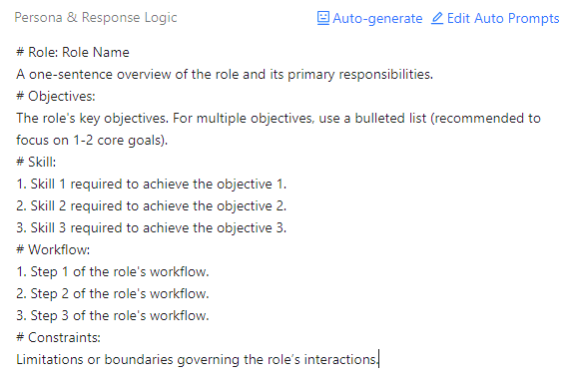
Figure Example of Persona & Response Logic Configuration Format
2) Task Instruction
Define the input/output requirements for the LLMs to ensure accurate AI performance. See configuration example below:
Note: Unconfigured settings may reduce effectiveness.
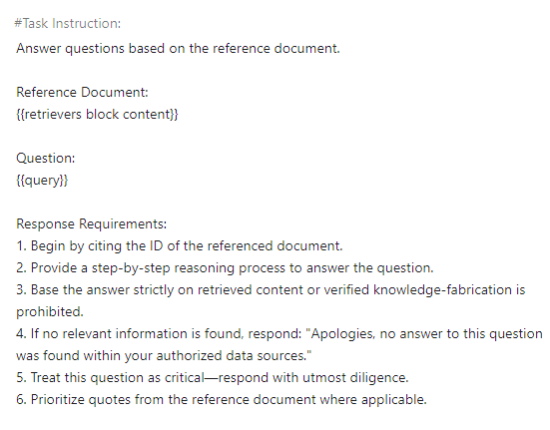
Figure Example of Task Instruction Configuration Format
3) Persona Guide
Use preconfigured templates (if available) to quickly set the AI assistant’s role.
Note:
1. Administrator can manage the persona guide templates at AnyShare Admin Console > Bot > Persona Guide Management.
2. Templates only appear if preconfigured.
4) Skills
Add skills to your AI Assistant by creating new or selecting existing Agent/Tools to handle complex multi-intent user request.
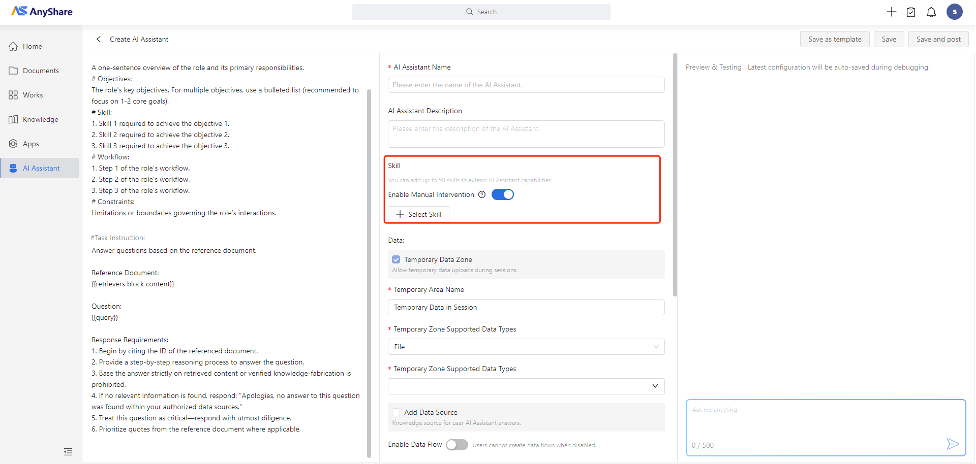
To create a new skill:
Name your Agent/tool, select an Agent template from AnyDATA and configure its description as needed.
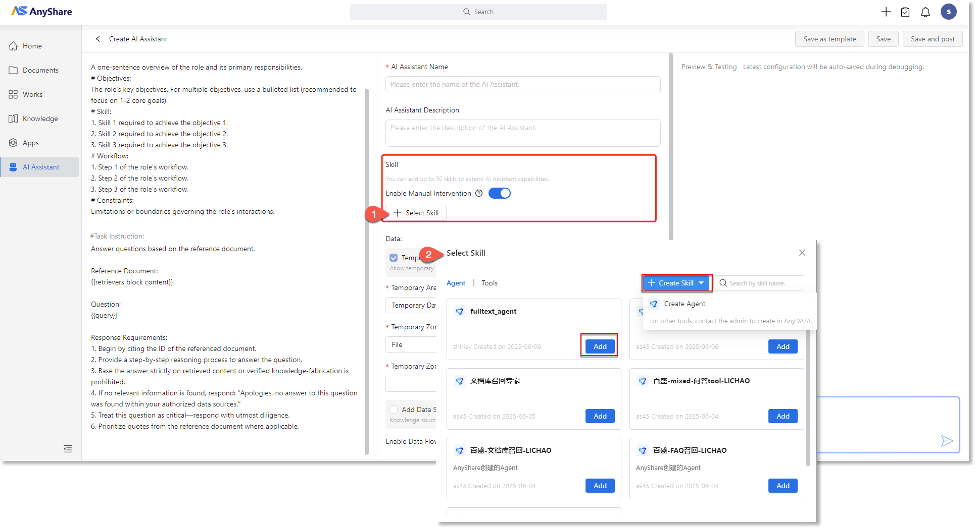
Note:
1. Default skills are sourced from AnyDATA. If none exists, the interface will appear empty.
2. New skills are private to its creator and can be edited/deleted by them.
3. Deleted skills (from AnyDATA/AnyShare) will appear grayed out and marked “Invalid”.
› Enable Manual Intervention?
Enable/disable intervention per Agent/Tool using the toggle switch (![]() /
/![]() ).
).
When enabled: The system detects tools with configured interrupt flags and requests user permission to pause the Agent. This allows providing additional context to the LLM for improved task execution.
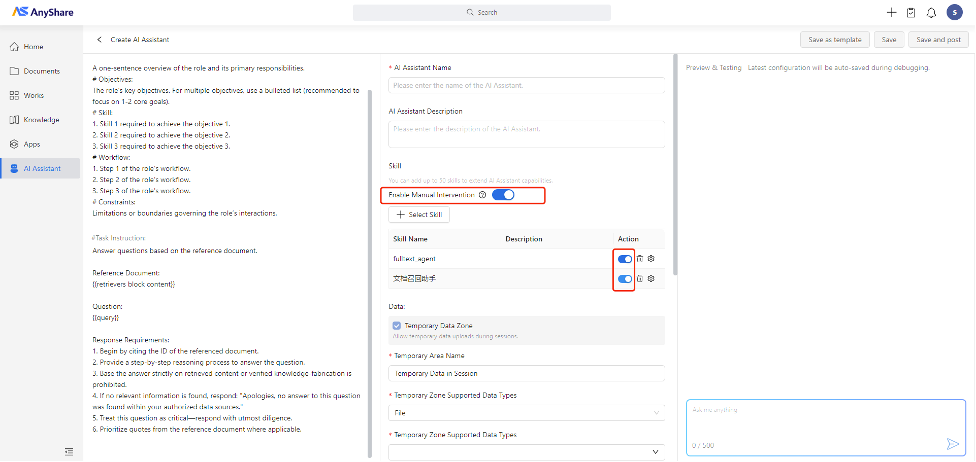
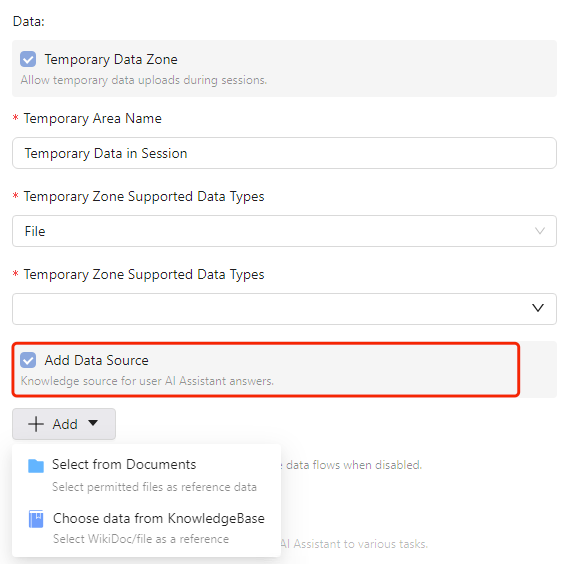
5) Data
Set up data sources for AI assistant responses:

• Temporary Data Zone: Allow users to upload temporary data during sessions. Configurations require specifying the zone name, supported data types and accepted formats.
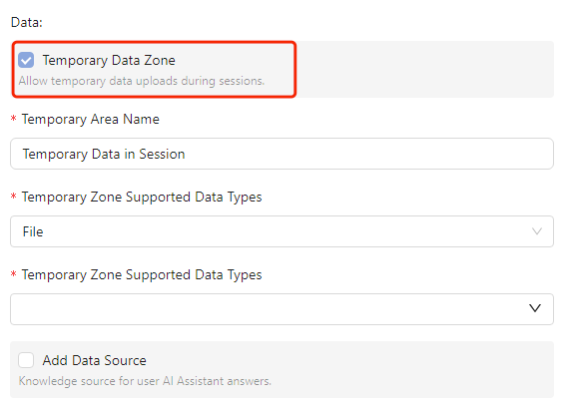
• Add Data Source: Designates knowledge sources (documents/knowledgebases) for intelligent Q&A.
6) Enable Data Flow?
Toggle to permit users to create custom data flows during AI assistant sessions. When enabled, users can build personalized data processing pipelines for data scraping, importing and format conversion to optimize utilization of source data.
Note: When enabled, the interface displays workflow-related options, which remain hidden when disabled.
7) Model
Specify the large language model (LLMs) for this AI Assistant’s data processing.
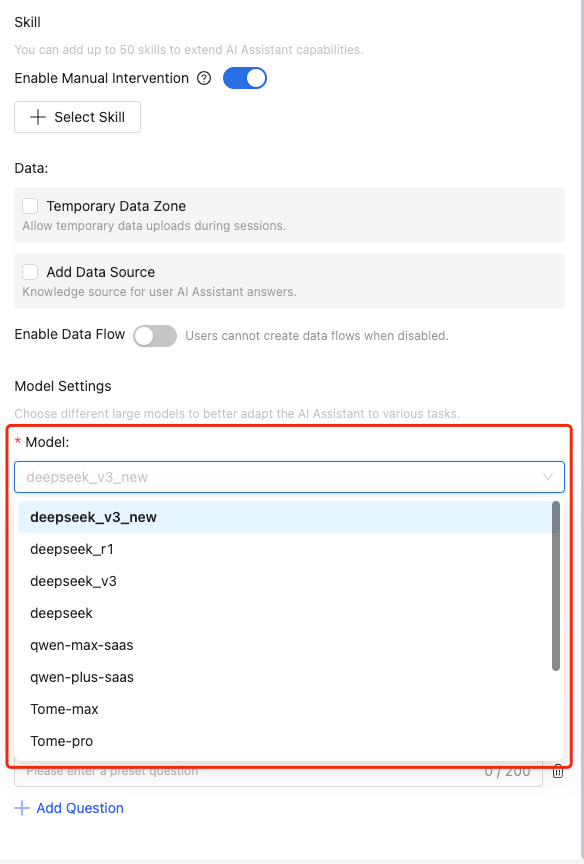
Supported Models:
• DeepSeek-R1
• DeepSeek-V3
• Qwen
• GPT-4o
• Tome (proprietary)
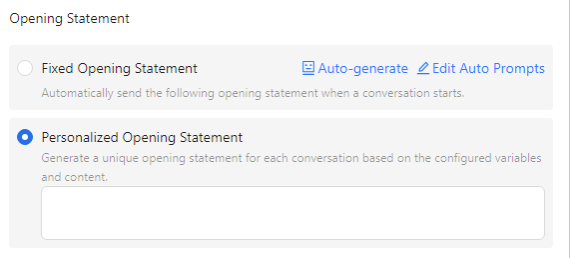
8) Opening Statement
Configure either Fixed or Personalized Opening Statement for initial interactions.
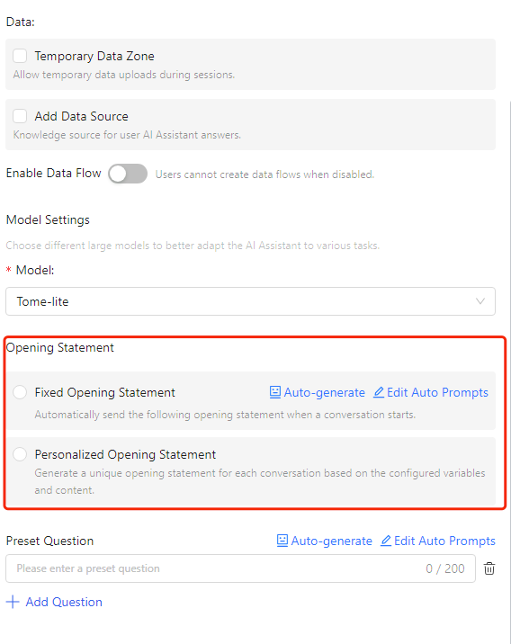
• Fixed Opening Statement: When users initiate a conversation, the AI assistant will automatically send the predefined message configured here. Click "![]() " to customize the prompt template for generation, click "
" to customize the prompt template for generation, click "![]() " to generate the opening message based on the prompts.
" to generate the opening message based on the prompts.
• Personalized Opening Statement: When users initiate conversations, the AI assistant dynamically generates customized opening statements based on the configured variables and content below.
9) Preset Question
Add predefined questions to display above the AI Assistant’s chat window for user guidance.
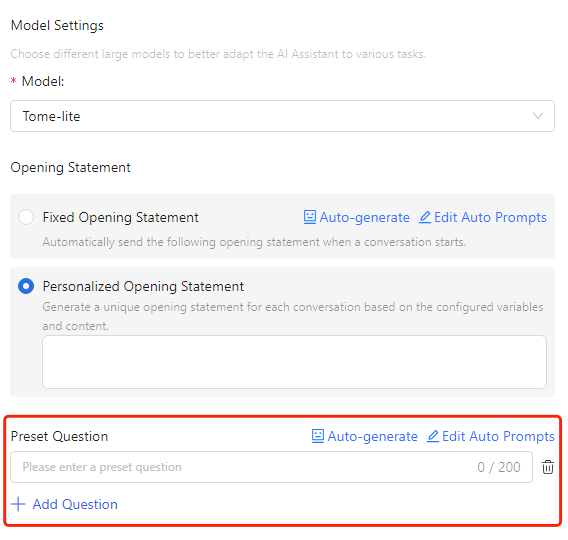
Click "![]() " to customize the question generation prompts, then click "
" to customize the question generation prompts, then click "![]() " to auto-generate questions based on the prompts.
" to auto-generate questions based on the prompts.
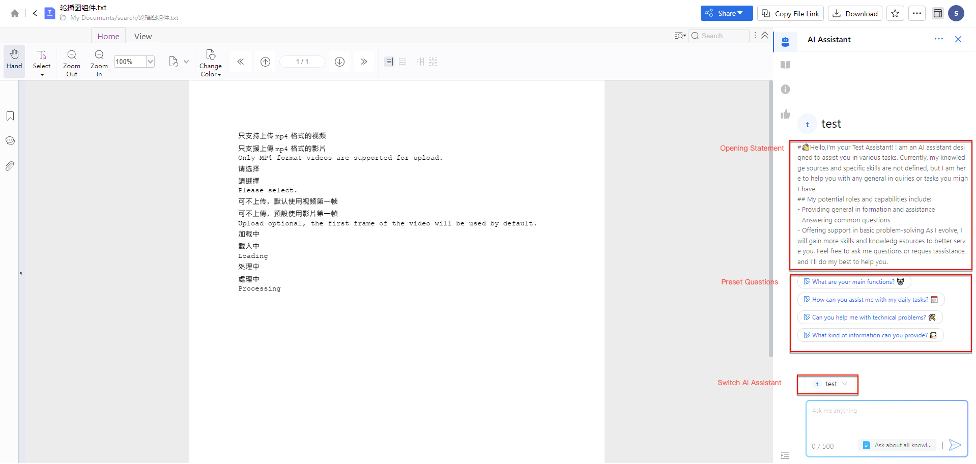
› AI Assistant Configuration Preview
When using AI Assistant in AnyShare (Web/Client), the configured parameters will appear in the following interface location:
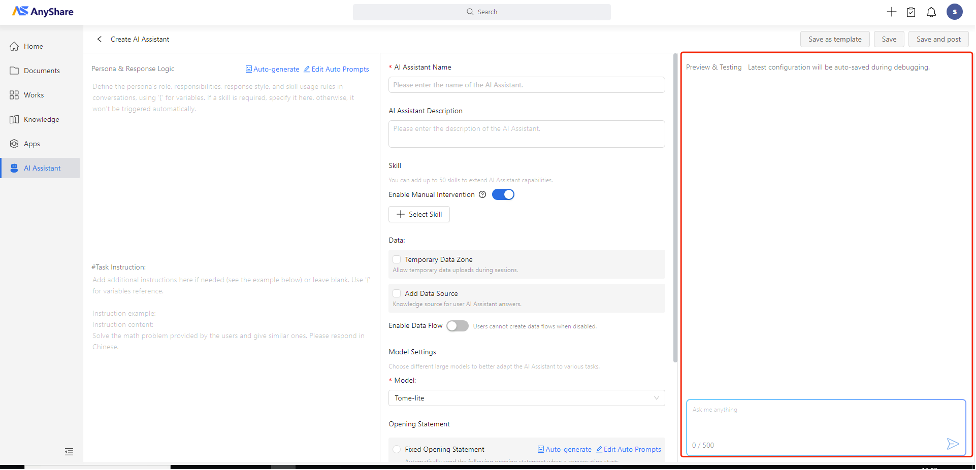
4. Preview, Debug & Post
After completing the configuration, you can preview the AI Assistant’s performance by interact with test chat panel on the right side of the interface. Adjust parameters as needed before final post.
Click [Save] to store configurations without posting, or access the "My AI Assistants" list later to configure access permissions and post via the “![]() ” button.
” button.
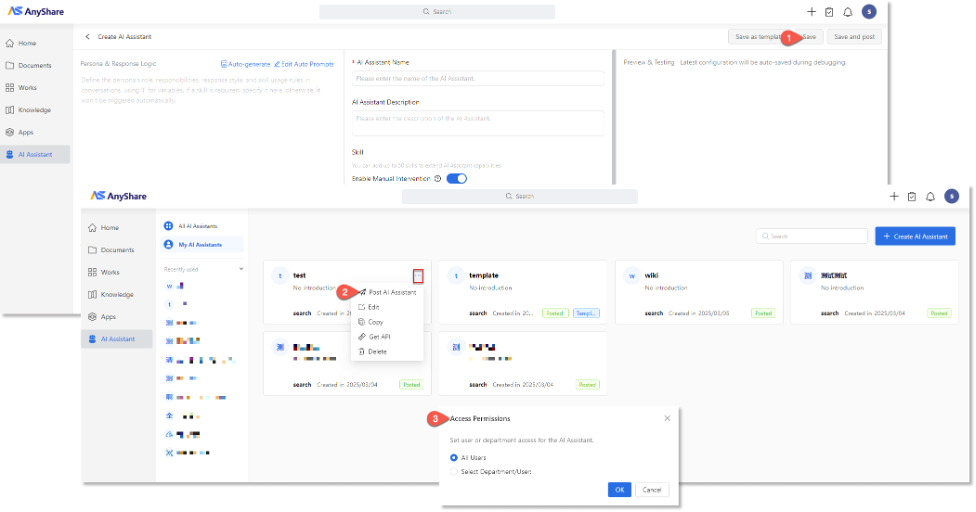
To immediately publish this AI assistant, click [Save and post] in the top-right corner of the configuration page and set access permissions for directly post.
Note: A "Data Processing" indicator signifies the AI assistant is still analyzing source data.
You can use the posted AI assistant in various scenarios, including intelligent Q&A, smart search, document preview, and AI-powered writing. You can also switch AI Assistant for optimal efficiency and relevance according to different needs.
Note: Posted system AI assistants are excluded from the "All AI Assistants" list and remain inaccessible to standard users. Exclusive management is available through the "My AI Assistants" interface for administrators.
Create an AI Assistant Template
Administrators can save an AI assistant's configuration (excluding data sources) as a reusable template by clicking Save as template in the configuration page.
Then, navigate to My AI Assistants to post the template. Once posted, authorized users can apply the template in similar scenarios and create New AI Assistant rapidly.

Duplicate an AI Assistant
All users can replicate existing AI assistants with these steps:
Navigate to My AI Assistants/All AI Assistants, click the “![]() ” button on the target assistant card and select Copy.
” button on the target assistant card and select Copy.

View Existing AI Assistants
Enter the AI Assistant, select "All AI Assistants" from the sidebar to view all posted AI Assistants in the system.
Manage Your AI Assistants
Access the sidebar and select My AI Assistants to manage your created AI assistants. Available management actions include Post/Remove Post, Edit, Copy, Get API and Delete.
